DIY Home Network Rack – the Lack Rack
July 8, 2025 | 898 words | 5min read
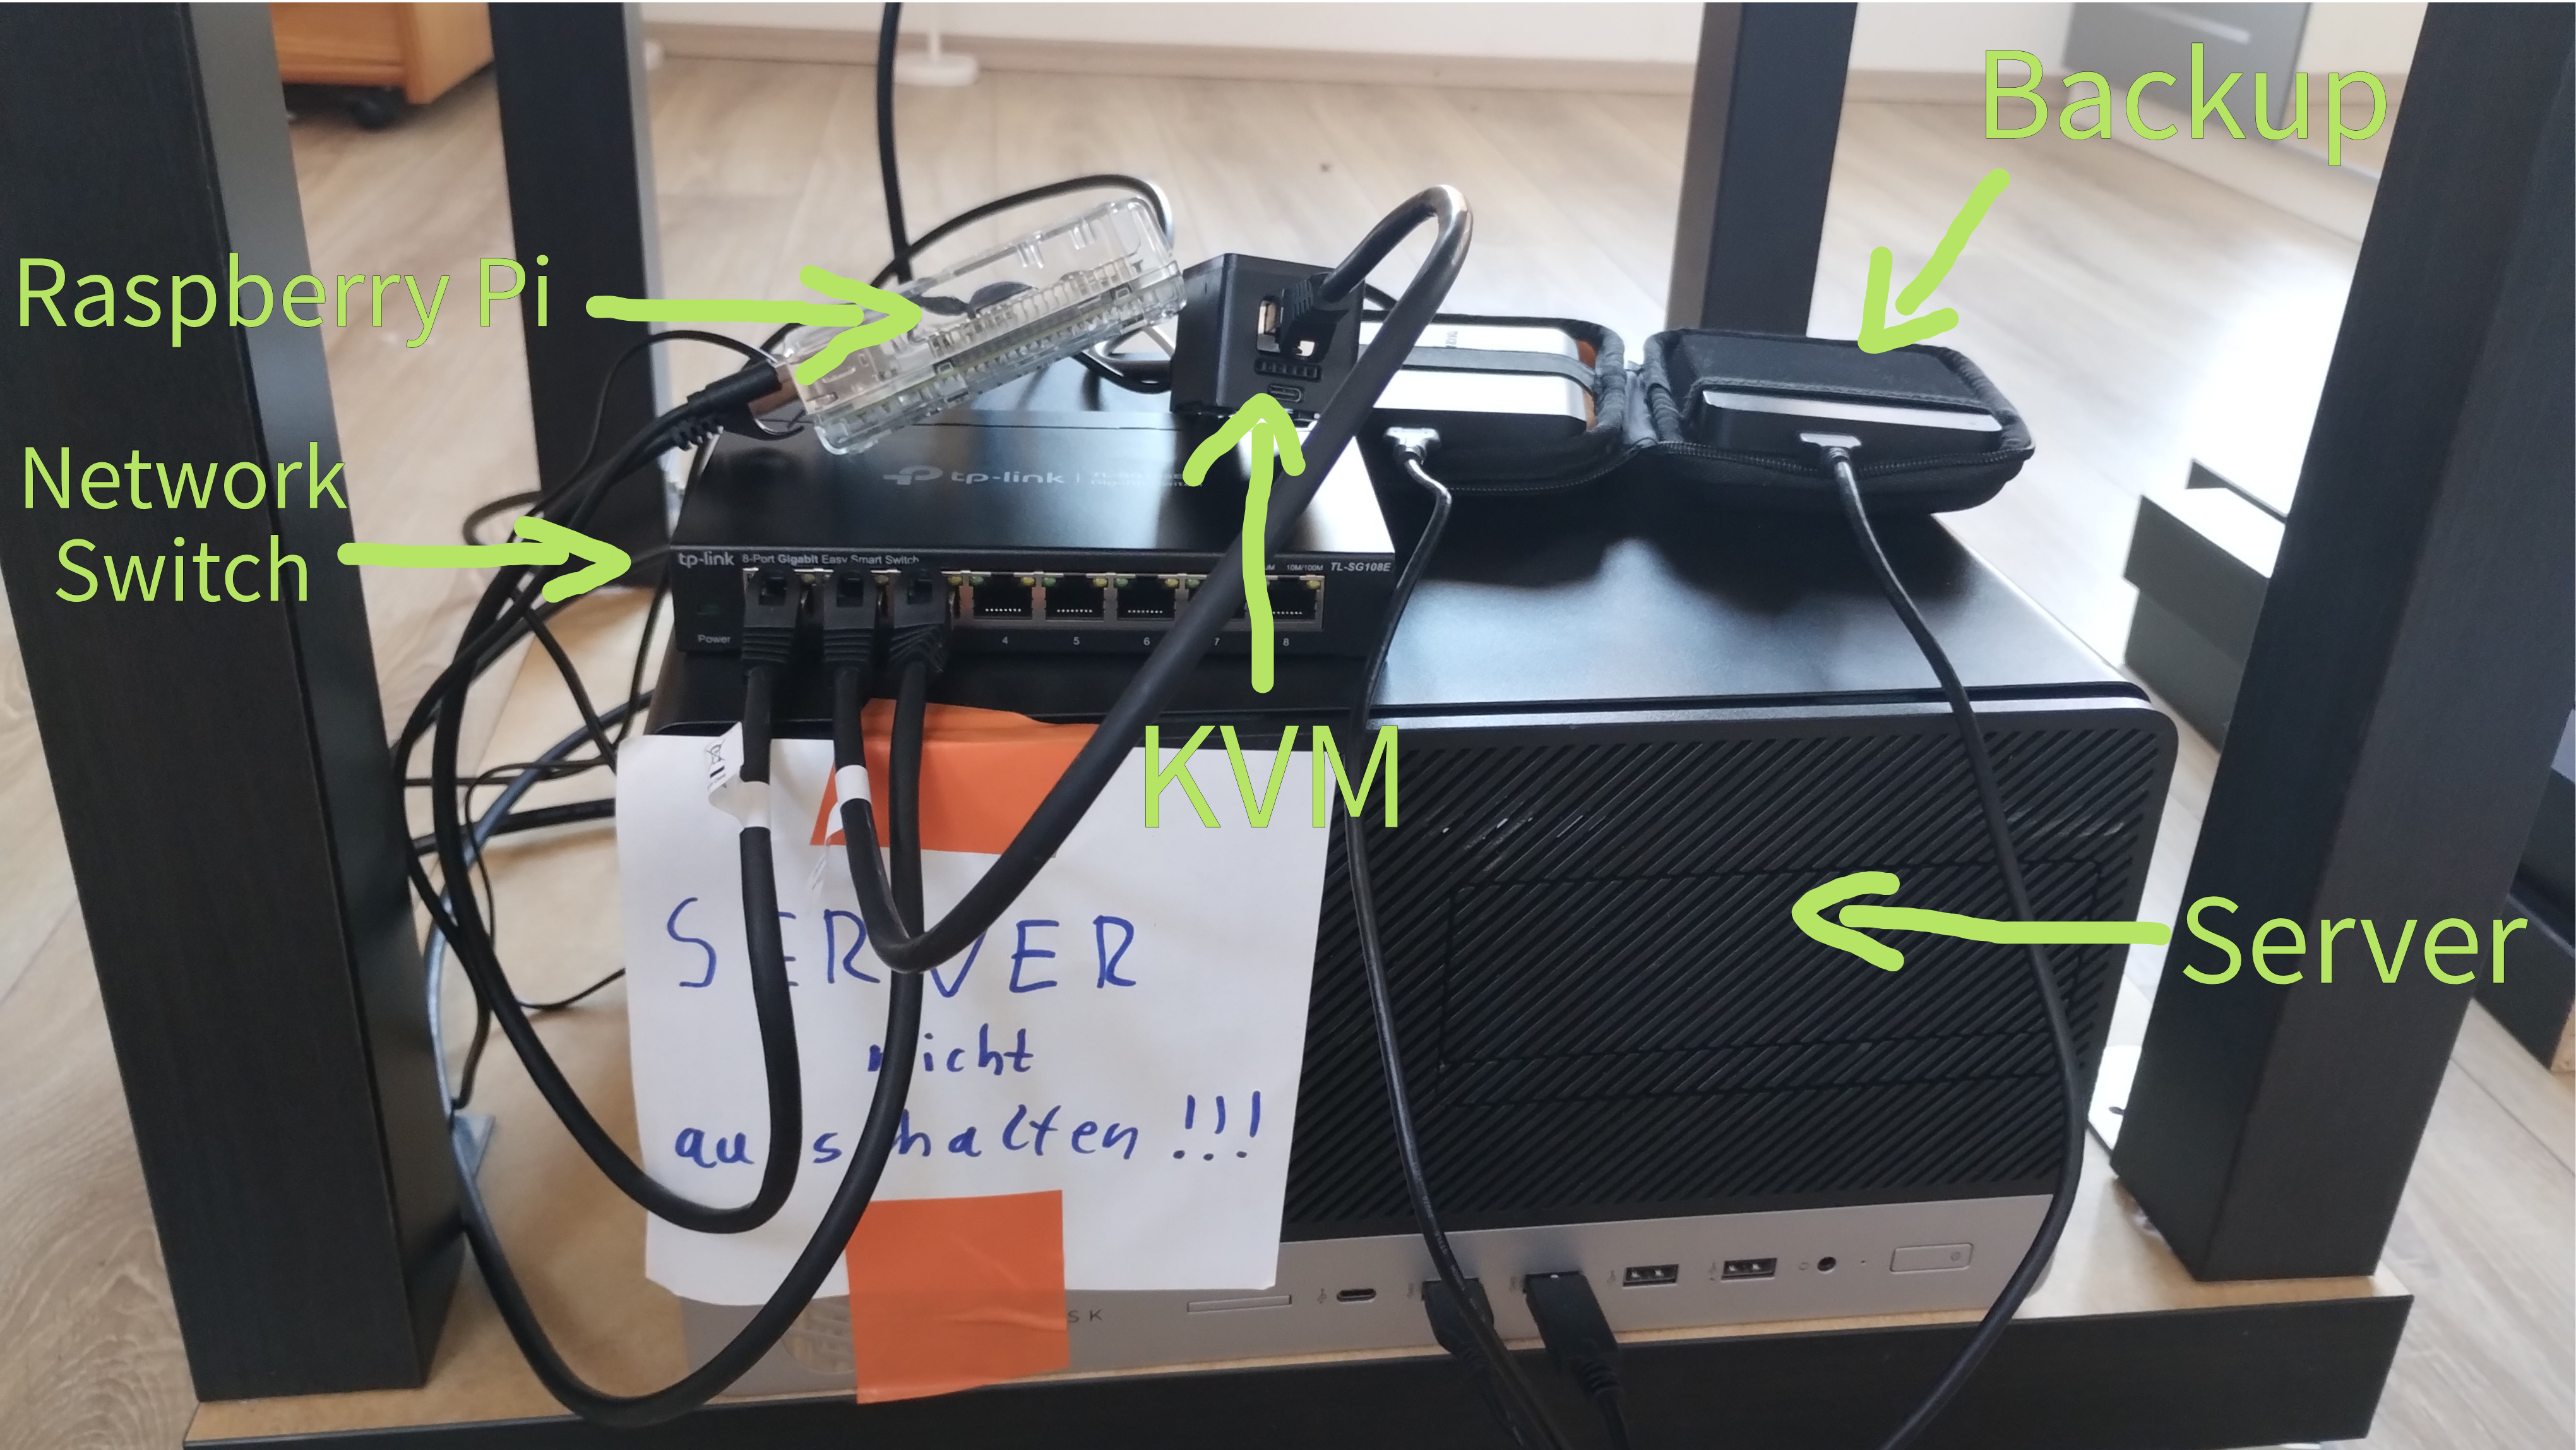
Since my last article on my Homelab, my Homelab has changed quite a bit. Namely, I’ve added a Raspberry Pi that acts both as the entry point to my network via Netbird (similar to Tailscale but better) and as a coordinator between my services. In addition, I added a managed switch and a KVM to be able to debug my server remotely. But this is not what this article is about. Hopefully, I will soon have time to write more about that.

With the increasing size of my homelab, I decided it was no longer acceptable for all my equipment to just lie around loosely connected with each other. Instead, I wanted to tidy things up by having one central place where I could put all my equipment securely mounted, but also easily movable if needed.
Thus, I decided that I needed a network/server rack: basically a closet where one can mount all their equipment. But sadly, I don’t have the time or money for a big, beautiful server rack (there’s a joke in there somewhere). So, something small was needed. I first looked around on Amazon and then AliExpress for something affordable but still big enough to fit my SFF (small form factor) server PC. Most options were either too expensive or not big enough. I found something on AliExpress, but then decided against it because even though I was already paying nearly 80 bucks, this looked too cheap.

This is when I came across the DIY Lack Rack, an invention more than 20 years old and a trusty friend of every networking enthusiast. The more I read about it, the more I realized that building one’s first baby Lack Rack is almost a rite of passage for any homelabbing zealot. I just needed to build one.
So, what is a DIY Lack Rack? Despite how fancy it sounds, it is quite simple: multiple side tables from IKEA called LACK, stacked together. Why these particular tables from IKEA? They have two benefits: first, they are cheap; second, the space between the legs of the table is exactly 19 inches, which is the standard width for most server and networking equipment.
So, what do we need? It depends on your needs. I am building a very basic variant of the Lack Rack, but the beauty of the DIY Lack Rack is that it can be easily expanded. First, you need to figure out how much space you need, which determines the number of tables you’ll need. For my basic case, two are enough. In addition, you will need some screws and angle metal brackets. I also recommend buying a set of wheels so you can more easily move the rack around. And, of course, you need all the equipment you want to put in there, such as switches or plugs. If you have anything that isn’t exactly 19 inches wide but want to place it in the rack, I recommend using double-sided KU Tape (self-adhesive tape) to strap them in place.
Thus, in total, we need:
- 2x IKEA Lack Tables
- 4x Angle Brackets
- 16x Screws
- 4x Caster Wheels
- (Optional) Wood Glue
- (Optional) KU Tape
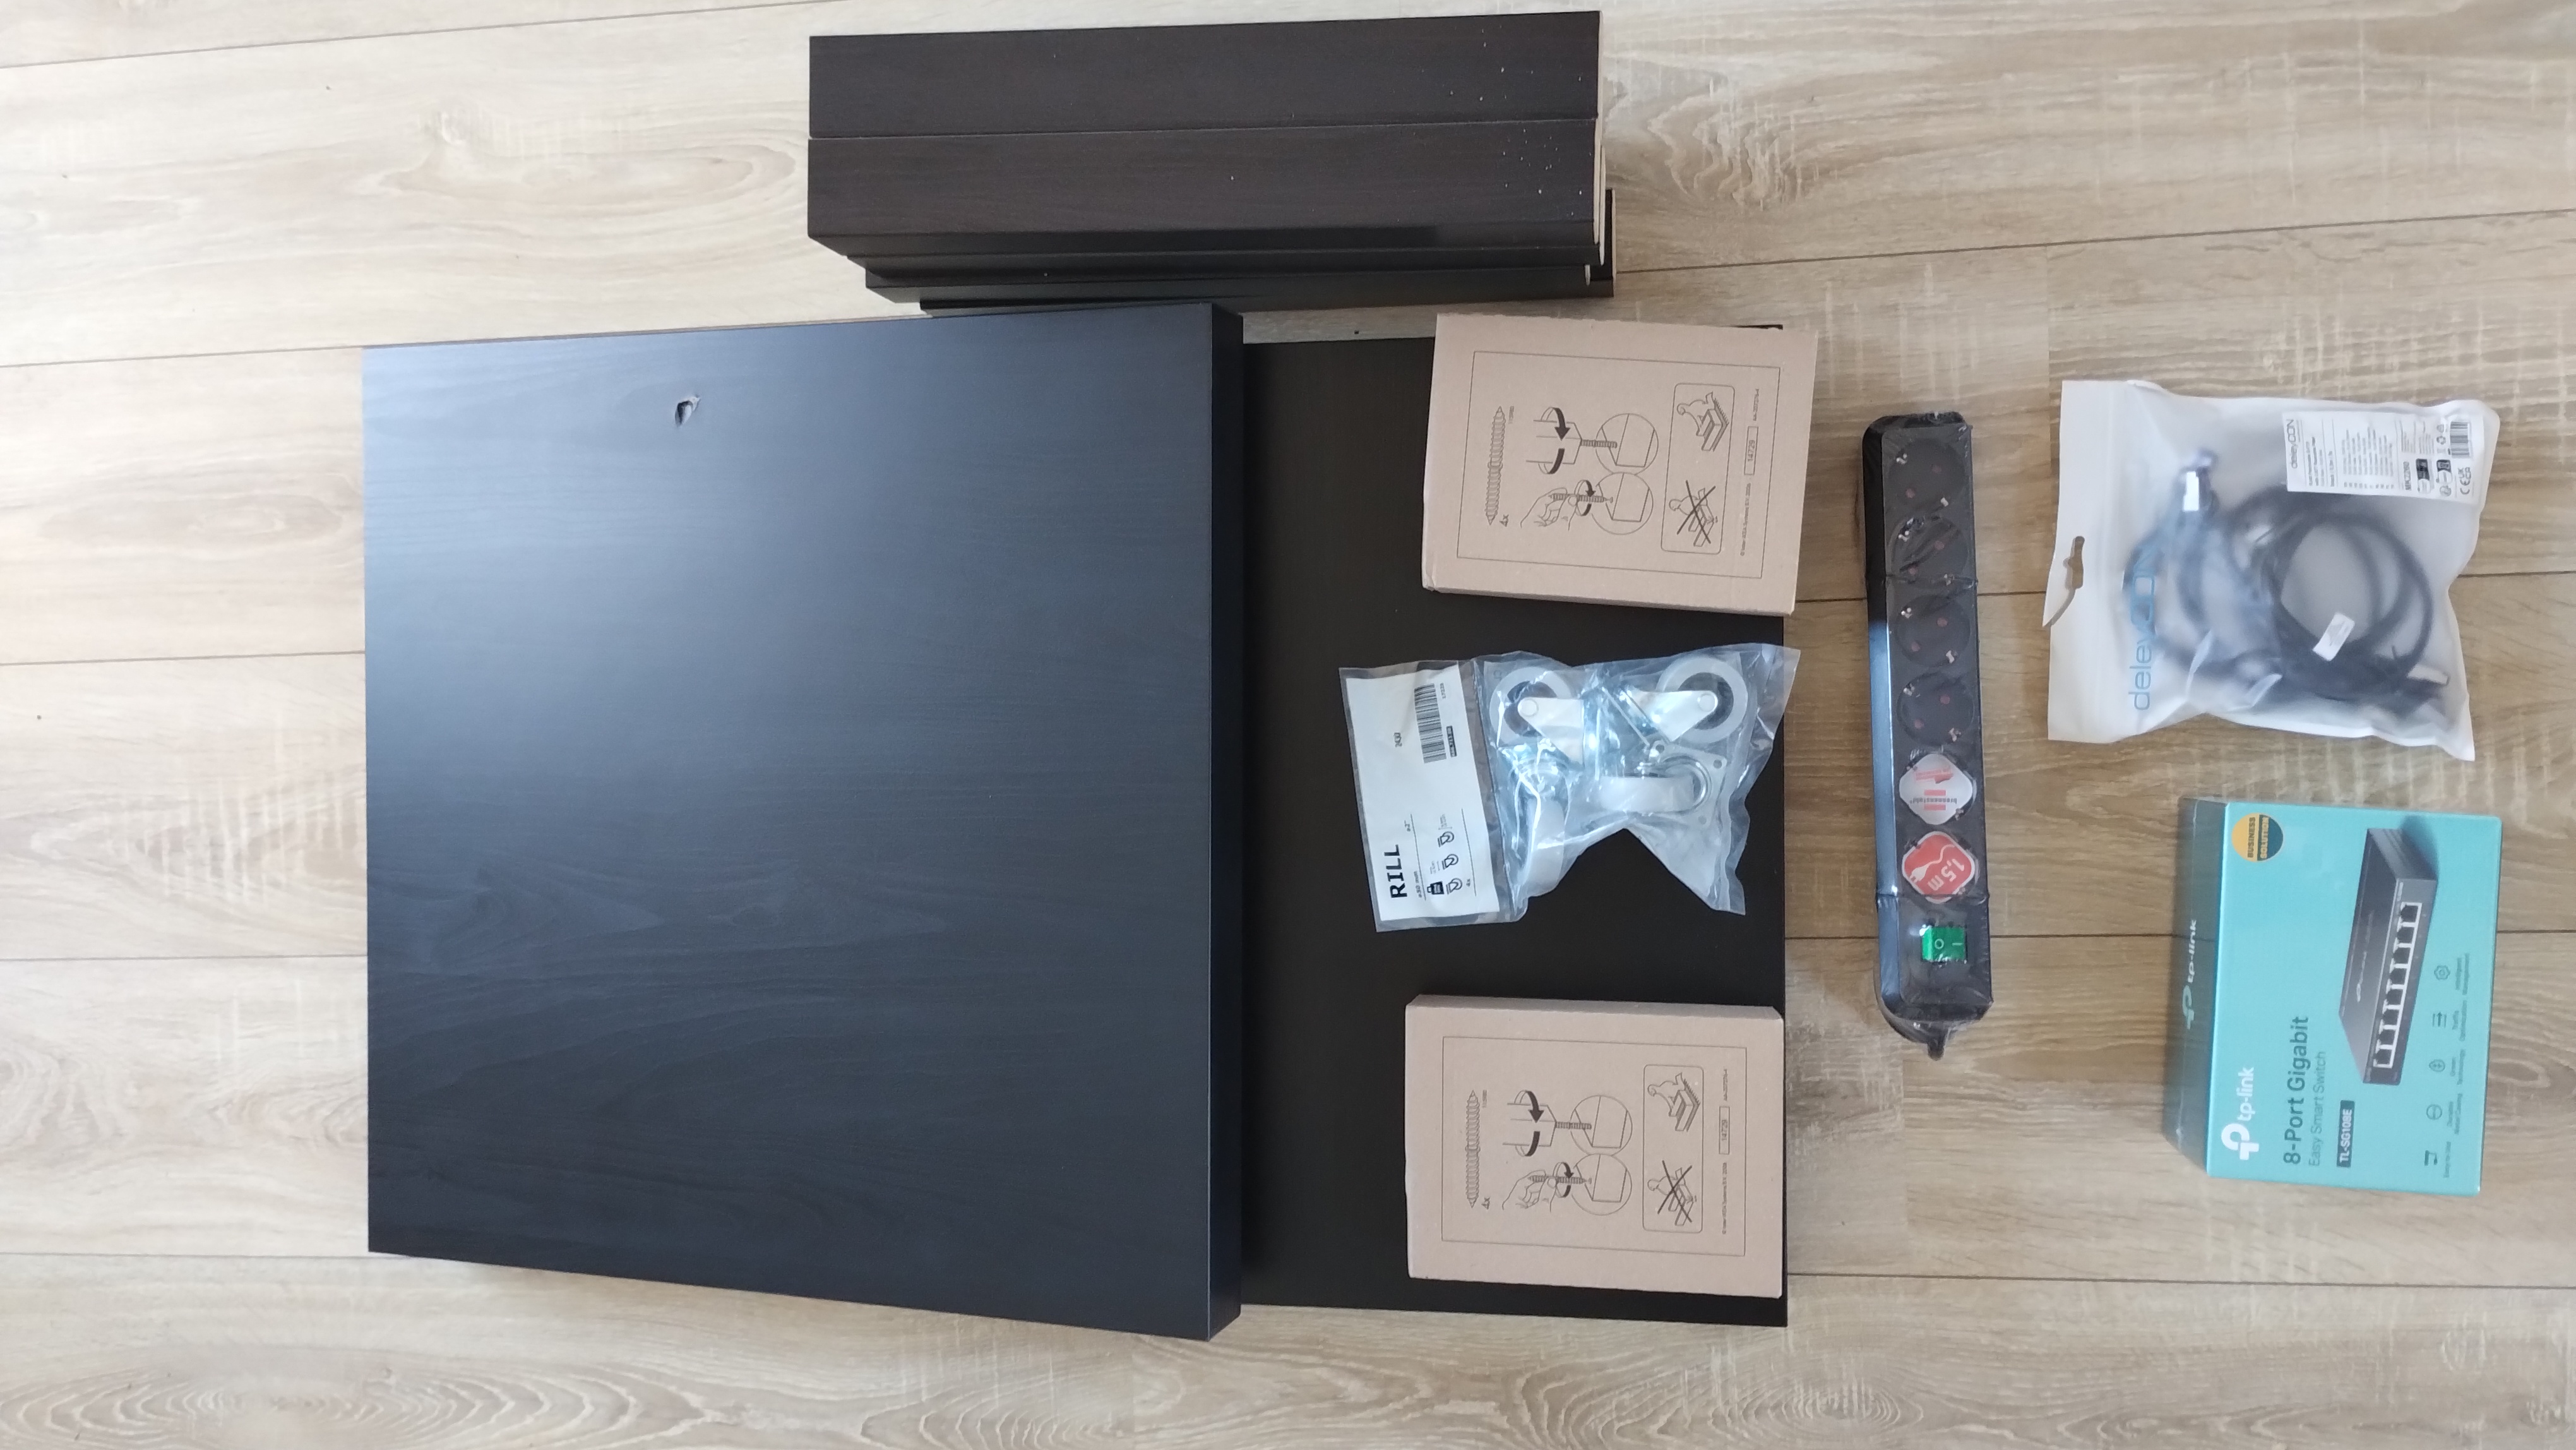
The first step is to open all the packages you have received and gather all the materials in one place. Then we can begin. For this, we proceed just like building a regular IKEA table: first, insert all the screws into the tabletop, then attach all the legs. Together, this will later become the top of the rack.
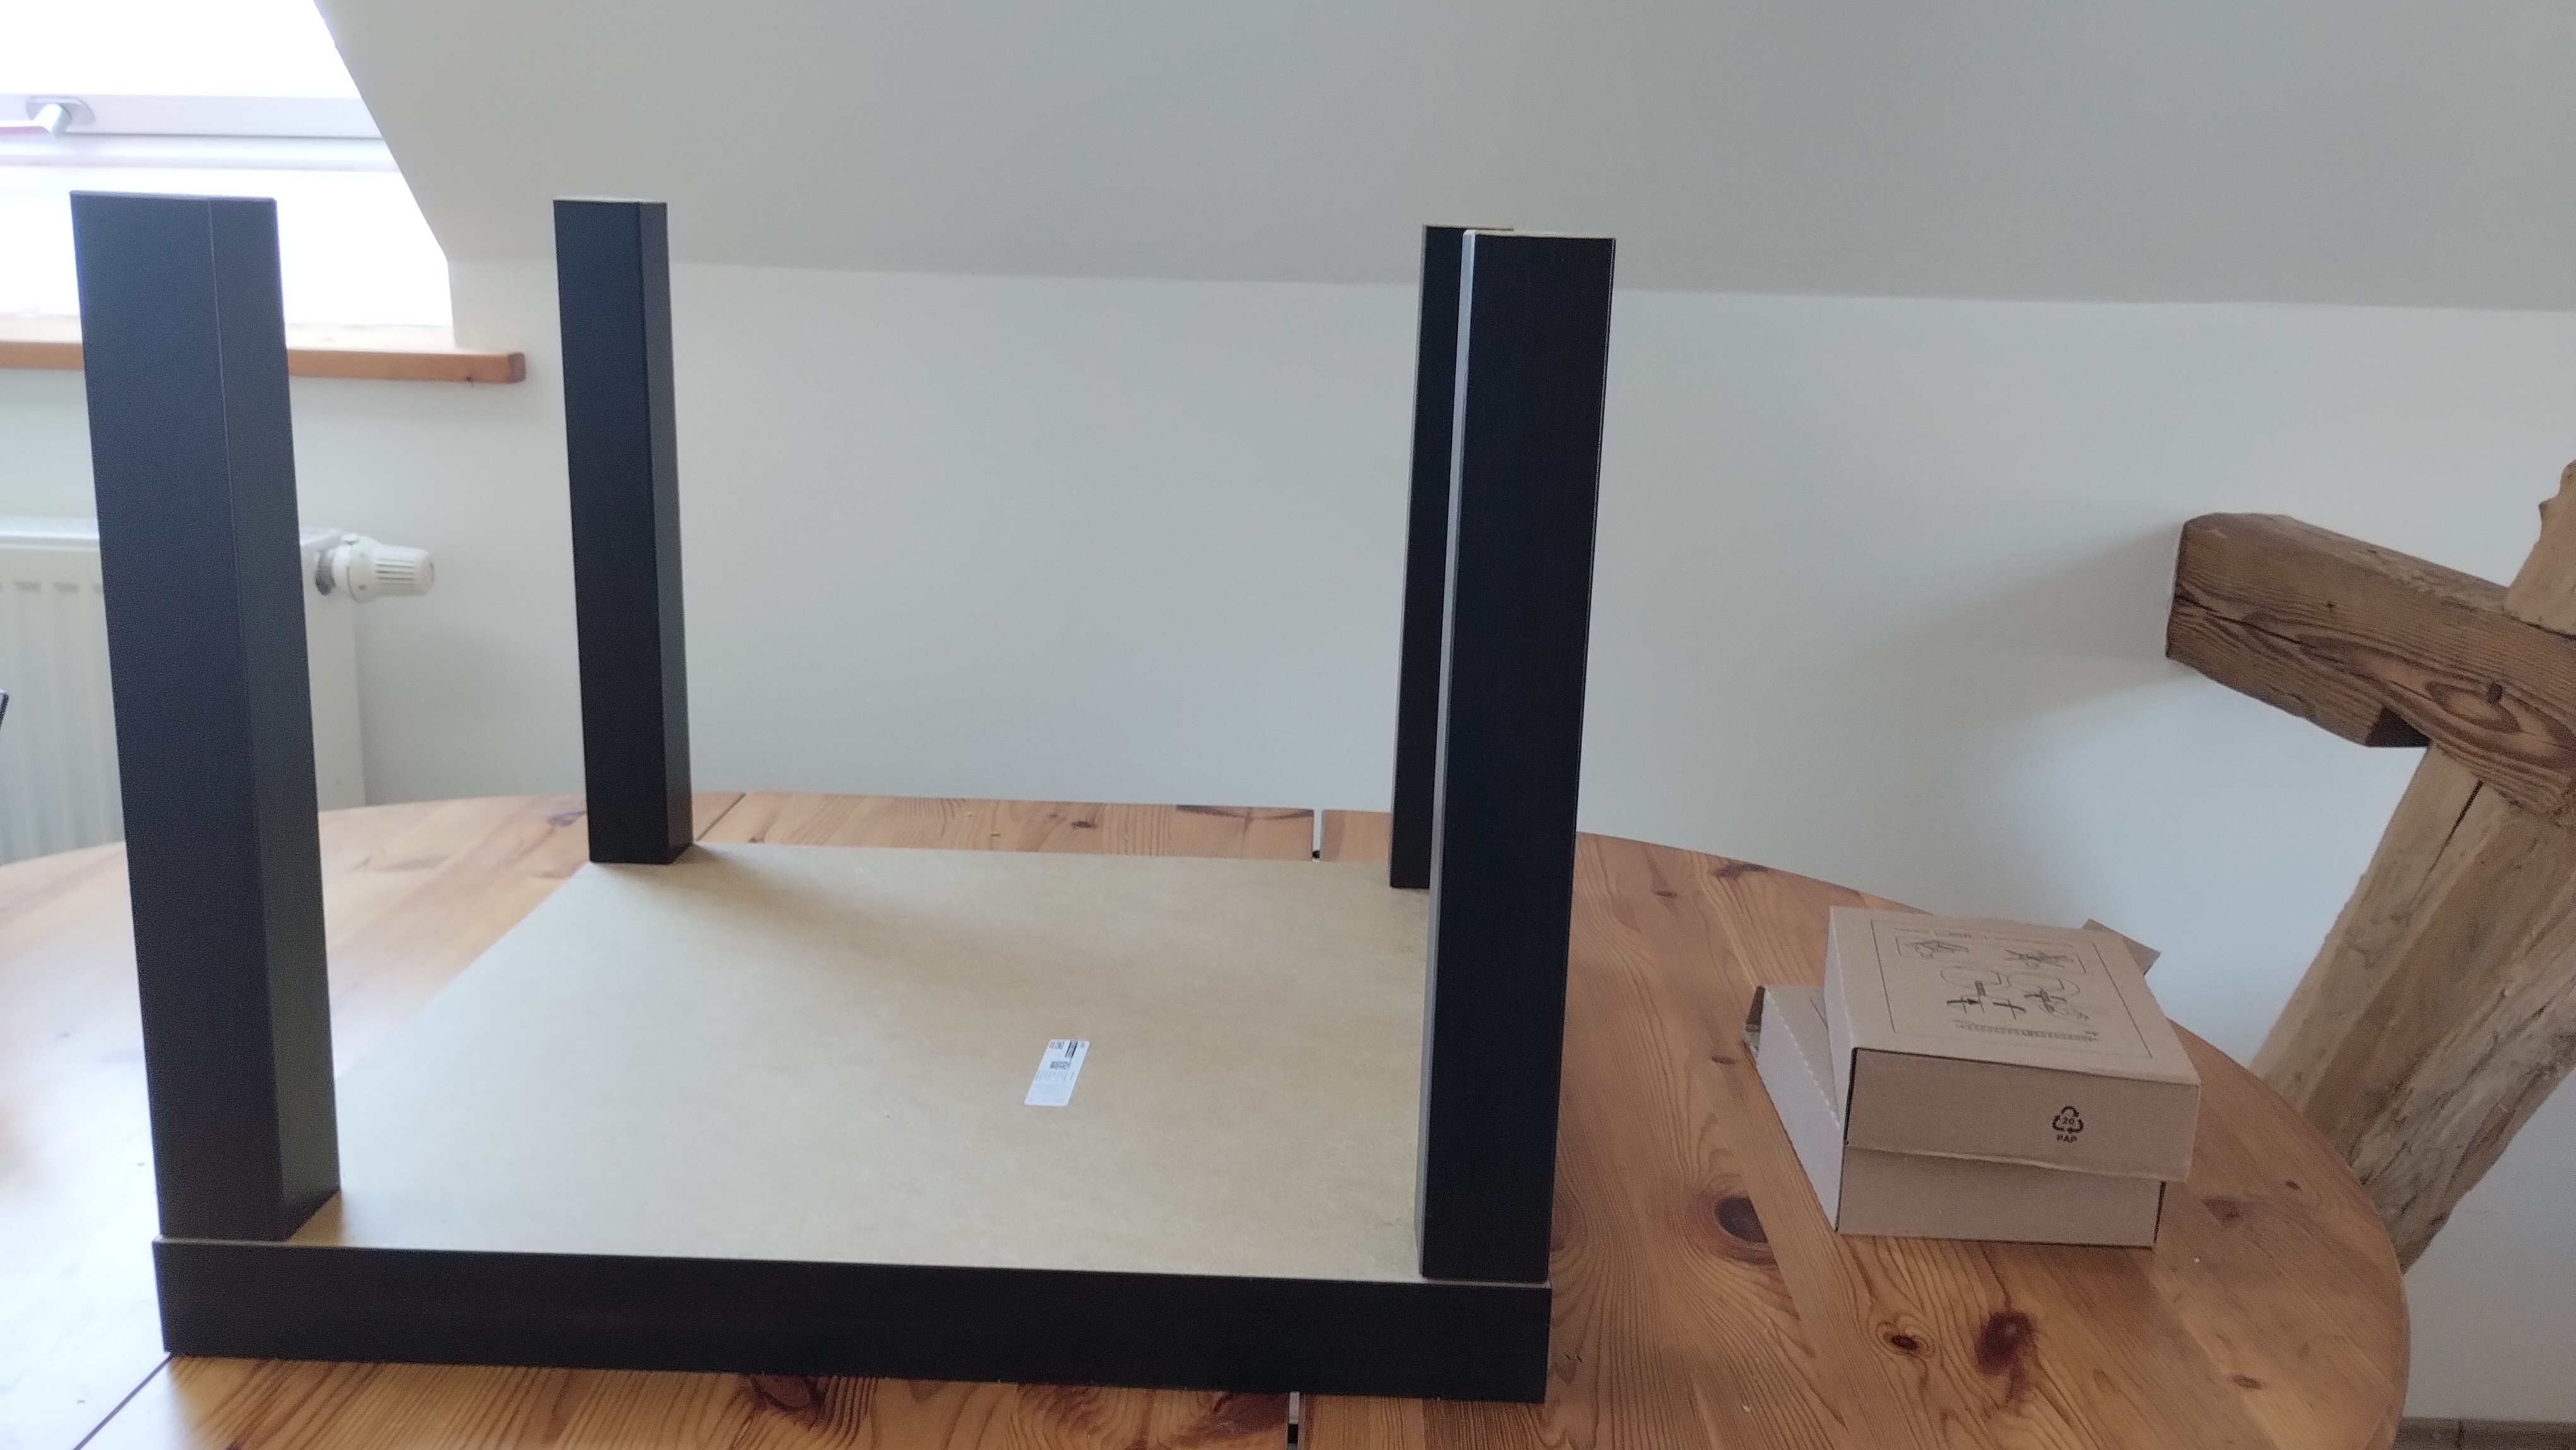
Now we can add the bottom of the rack (which is at the top in the picture). For this, we use the second Lack table and place it underneath the first one (again in the picture its on the top). For extra stability, I added wood glue, but I don’t think this is strictly necessary if you use angle brackets, so you can skip the glue if you prefer.
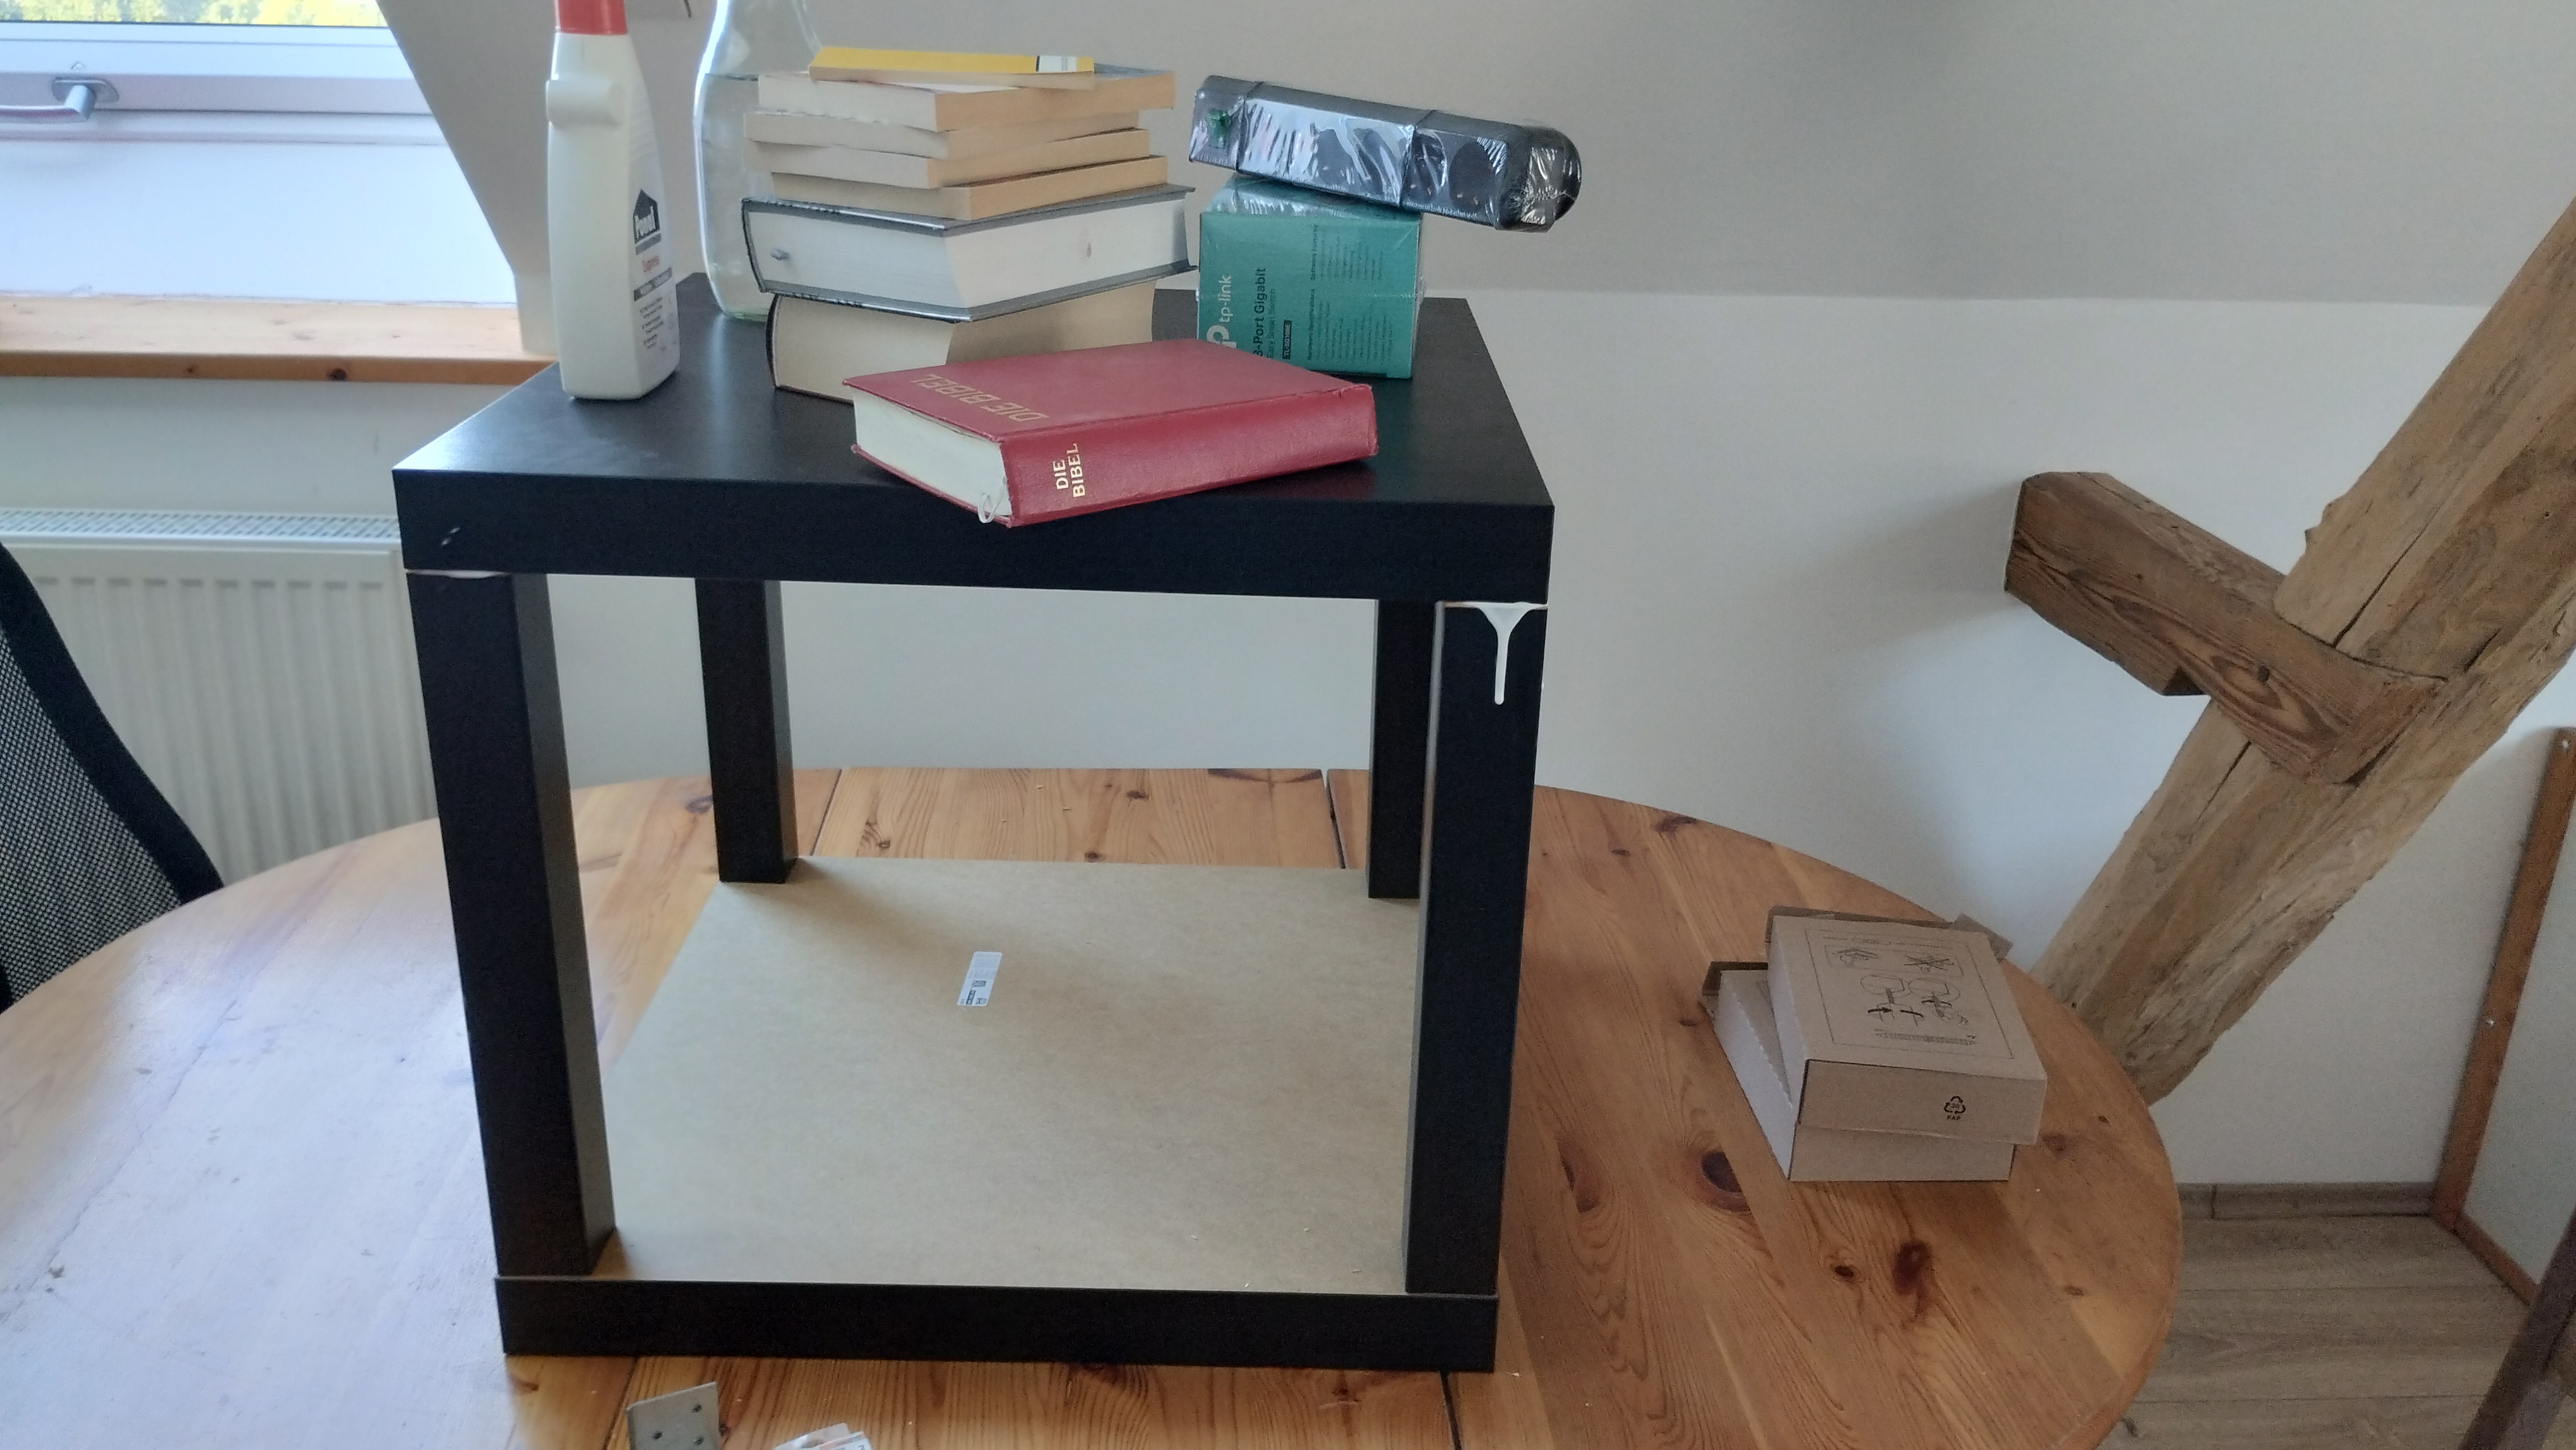
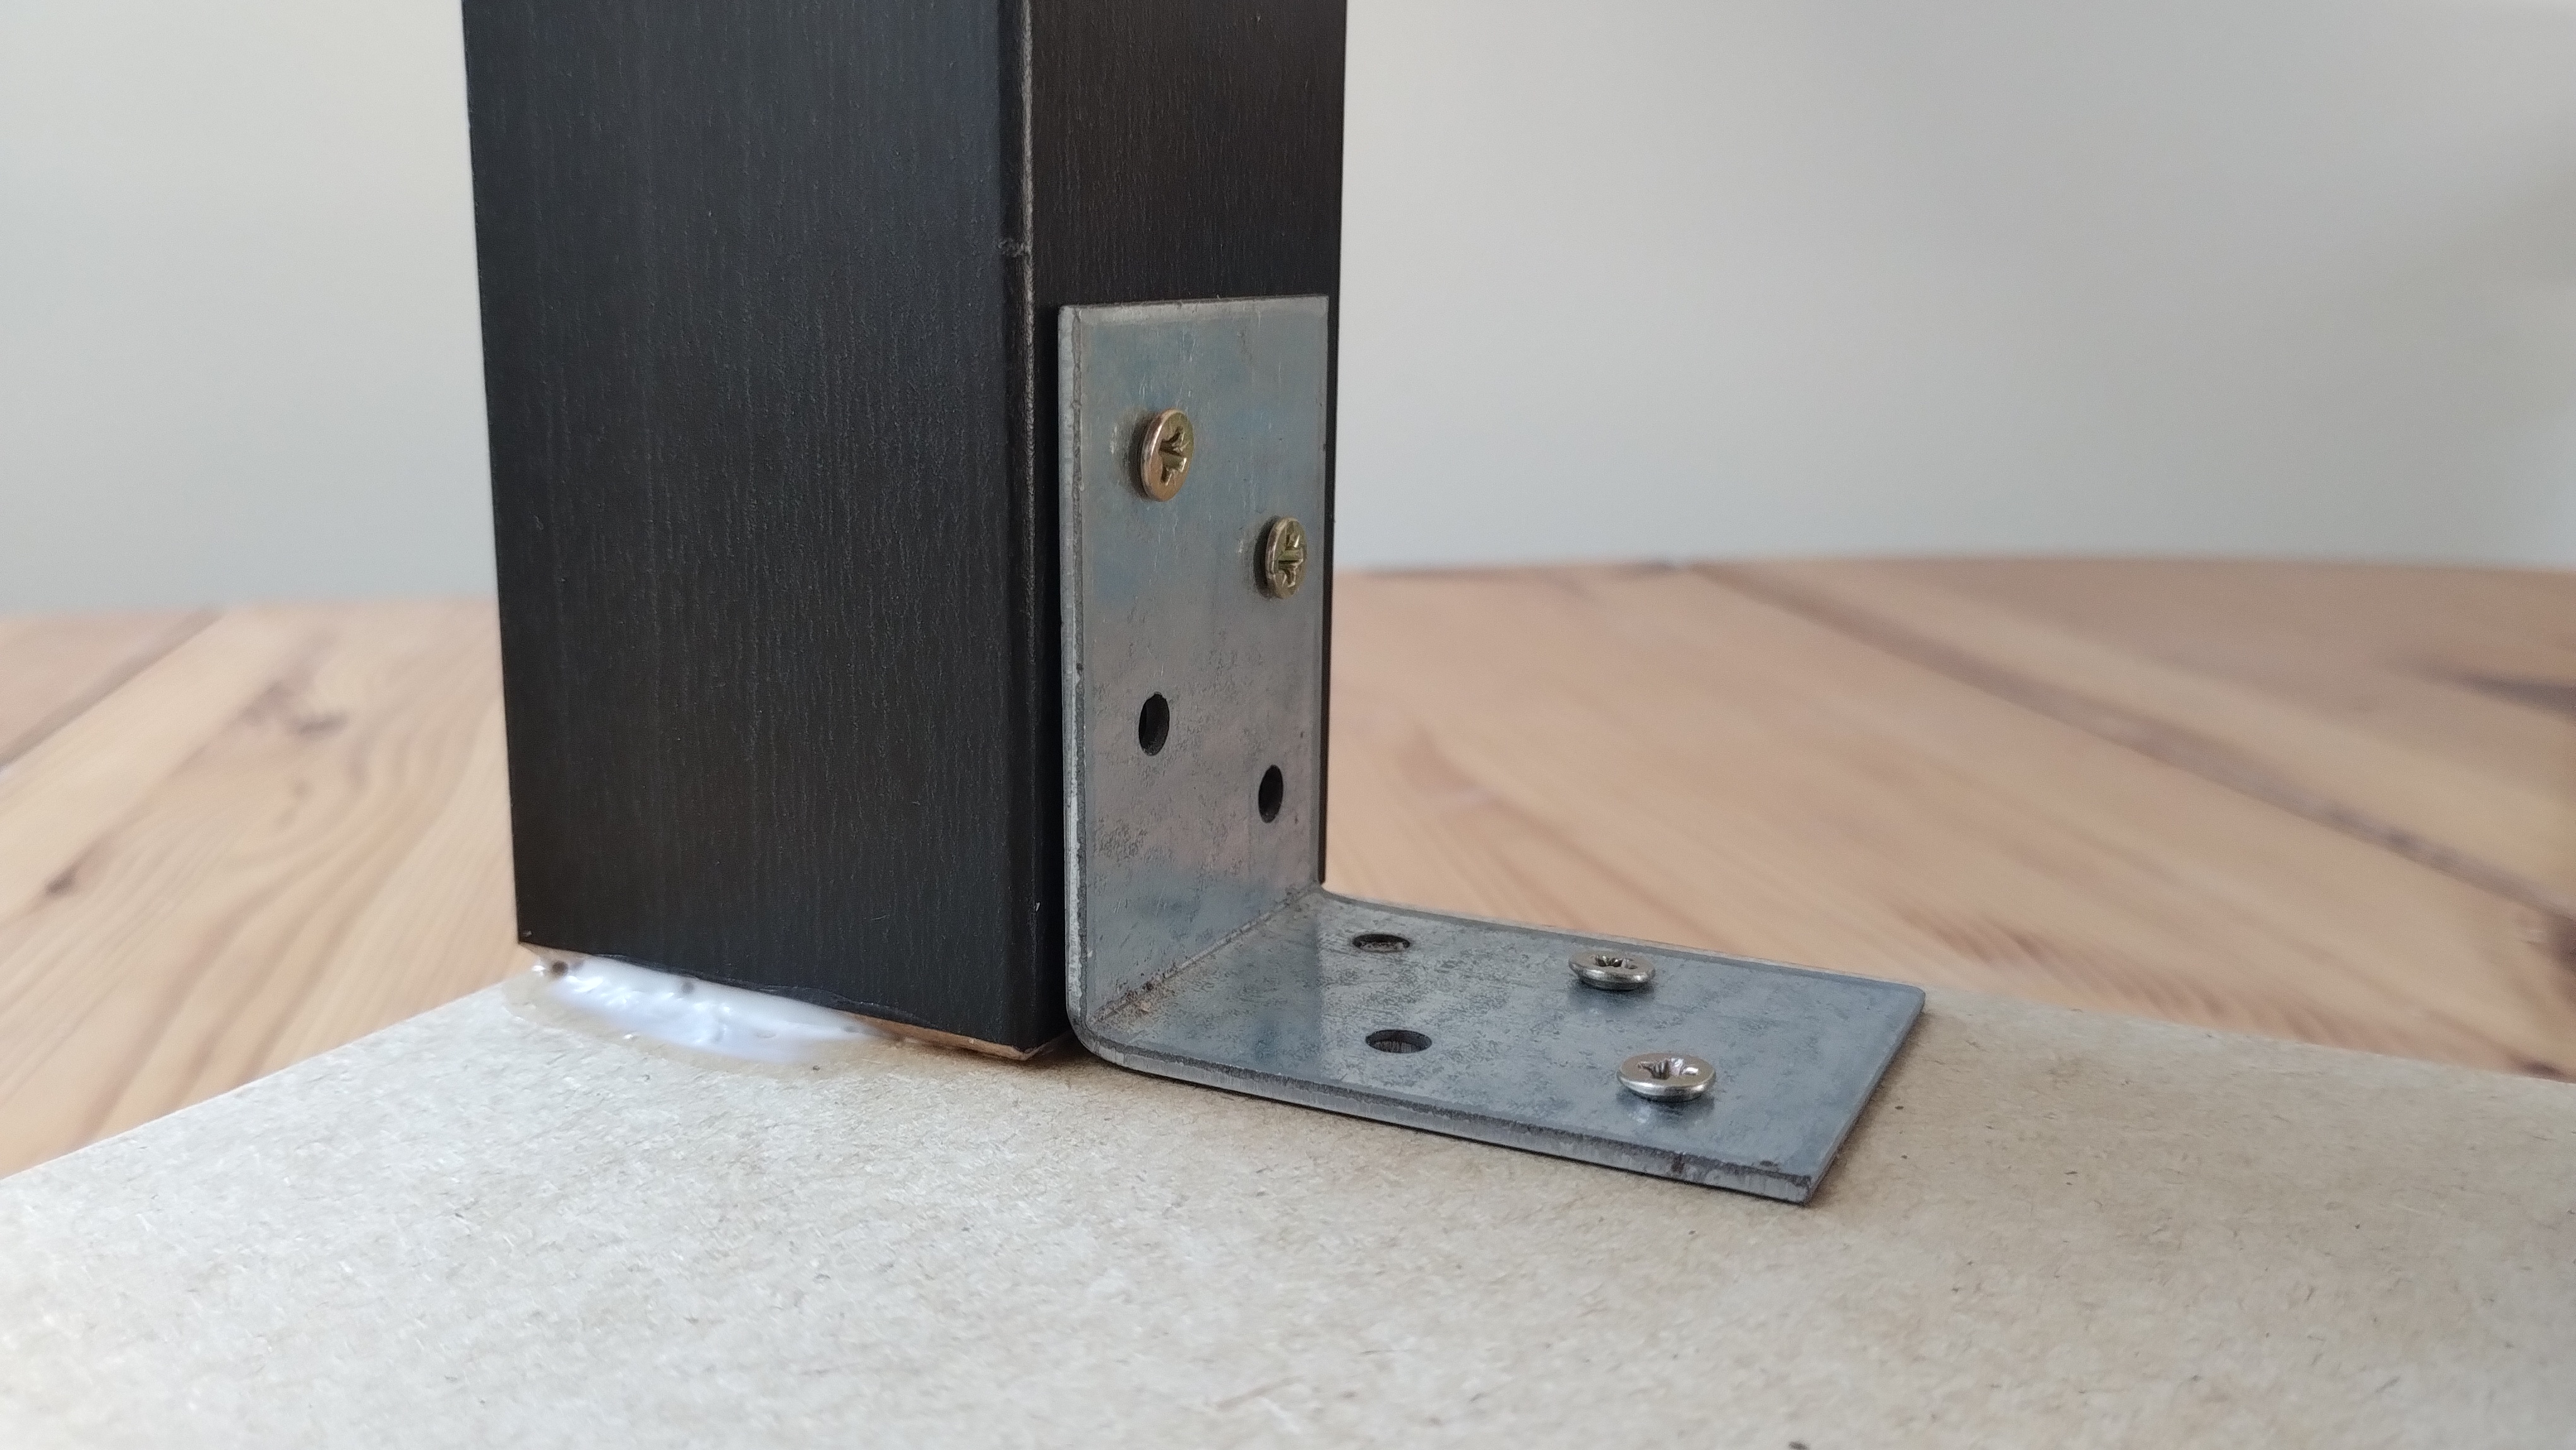
After that, we can use the angle brackets to secure the rack more tightly. Make sure the screws you choose are neither too long nor too short. Personally, I used the table I glued the legs to as the bottom, since it’s a bit less secure than the other half, which has screws in it.
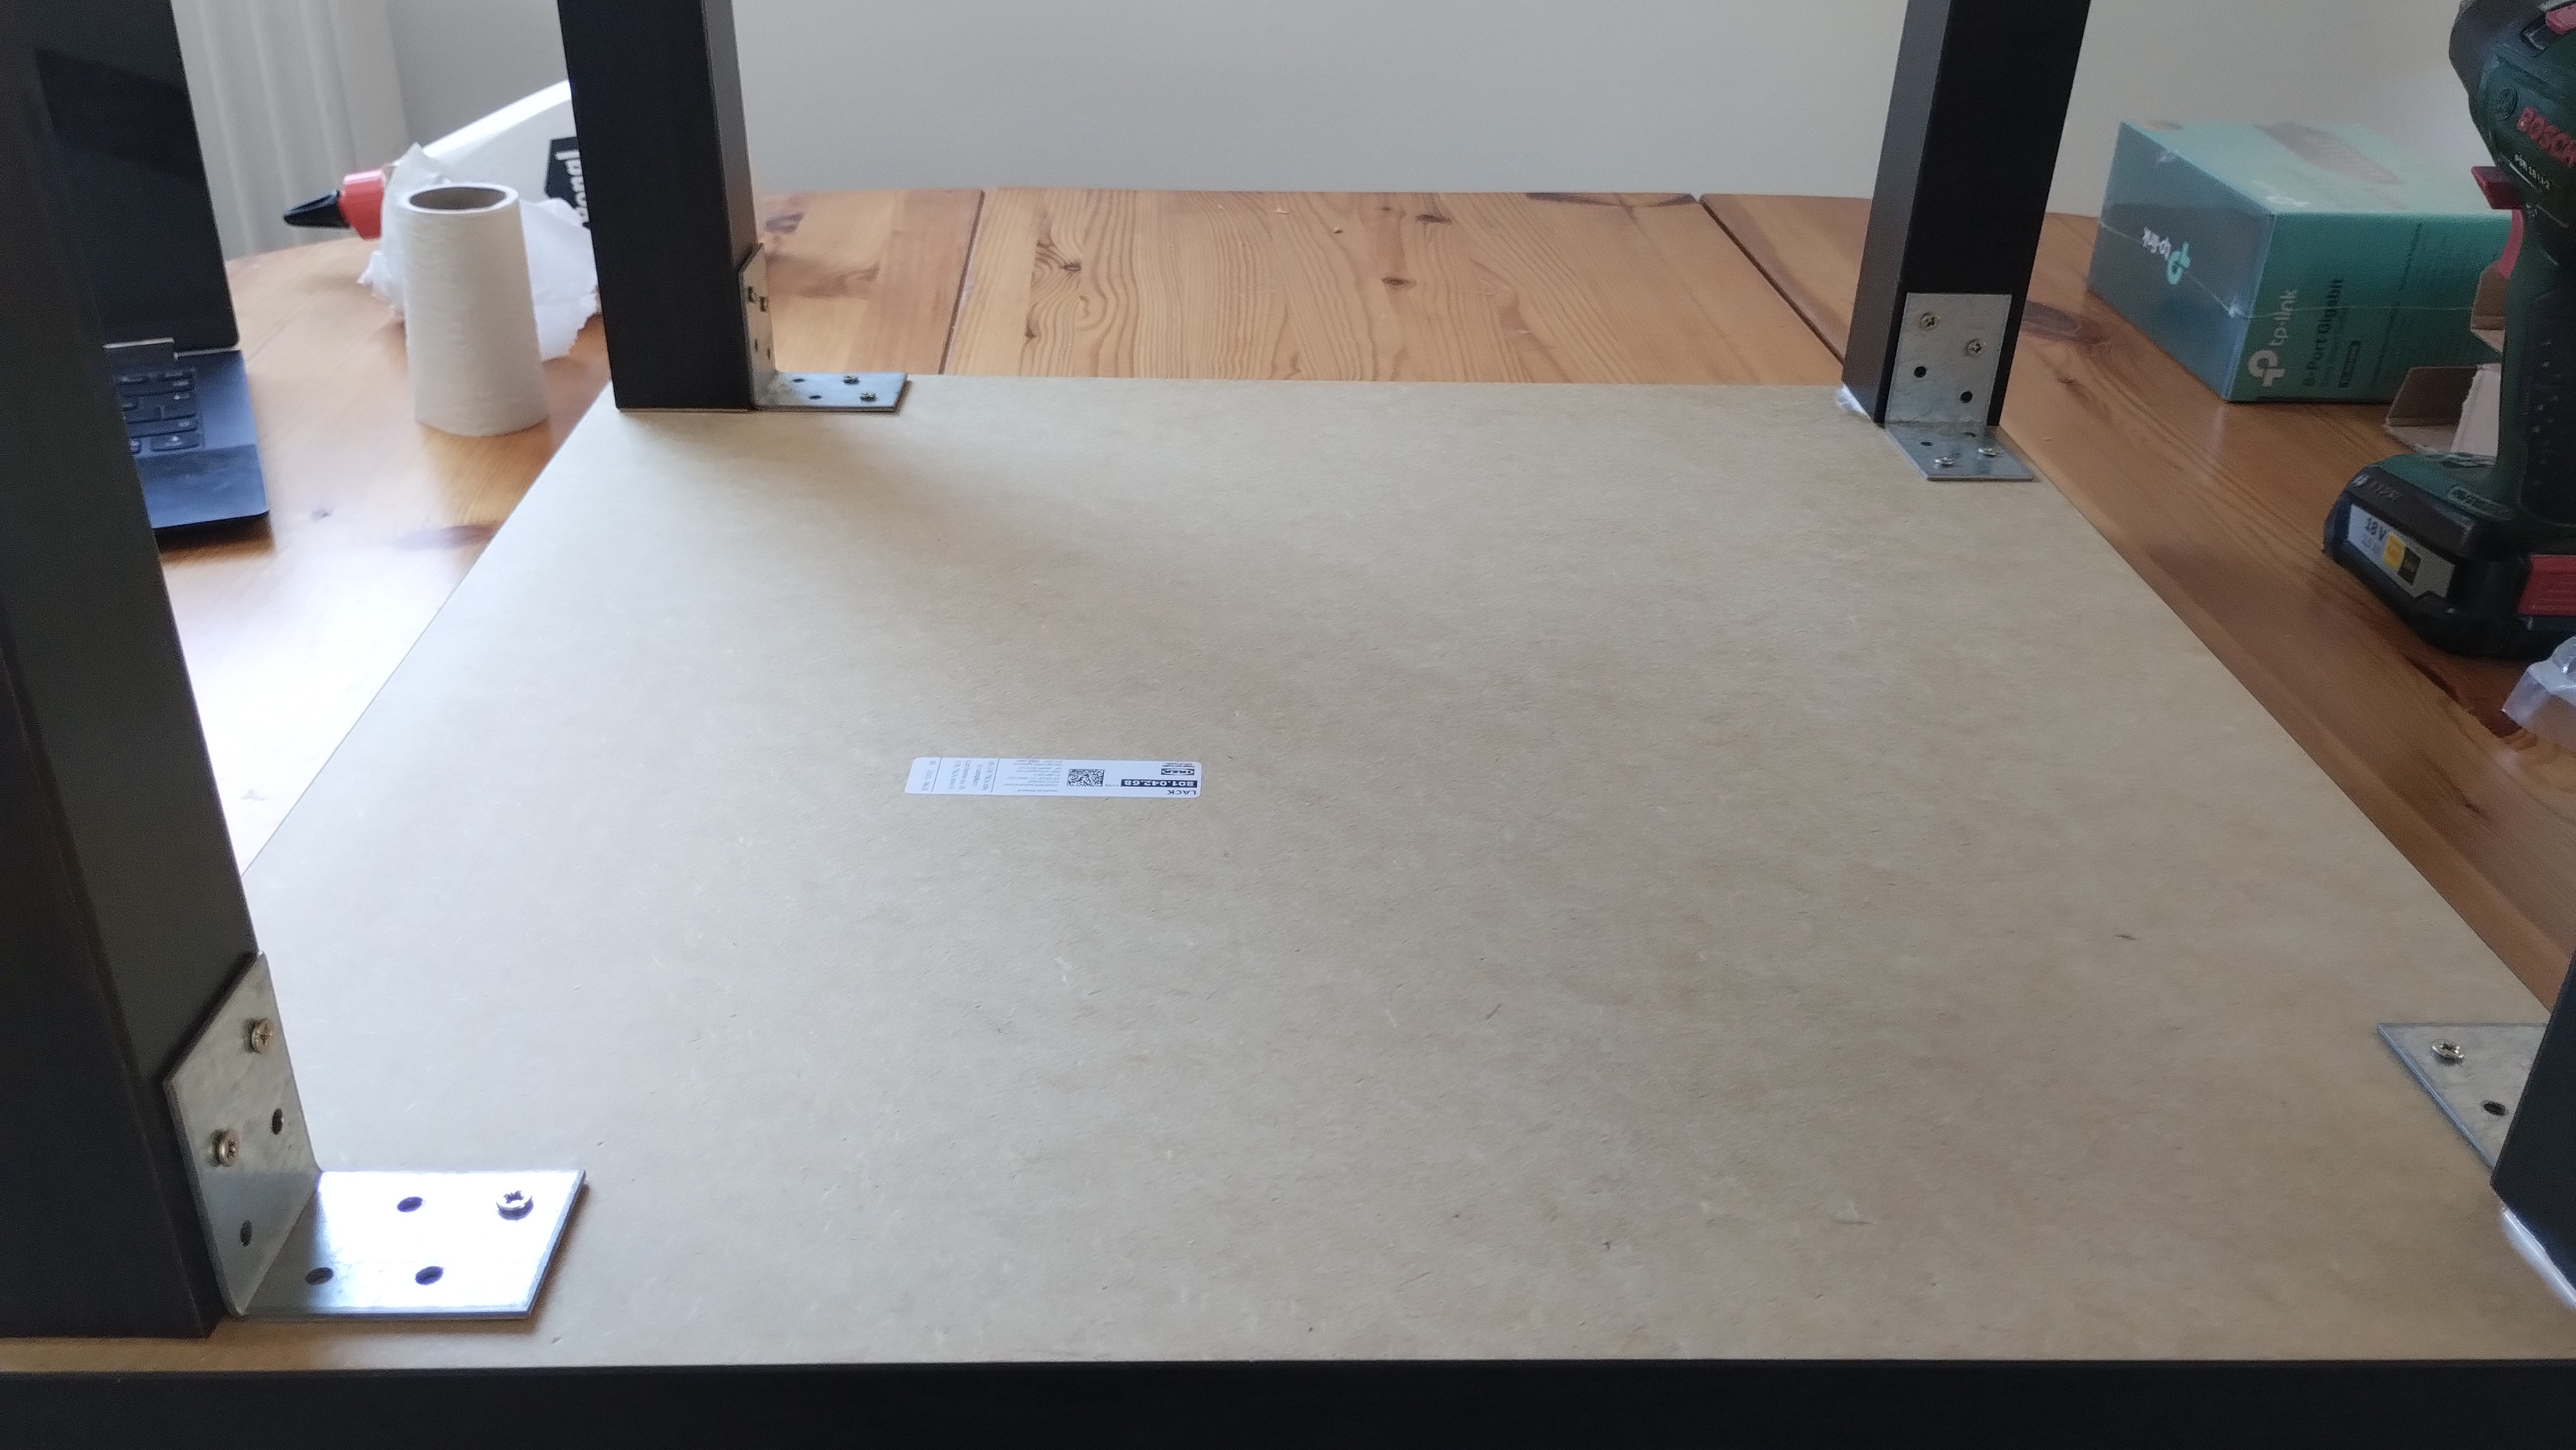
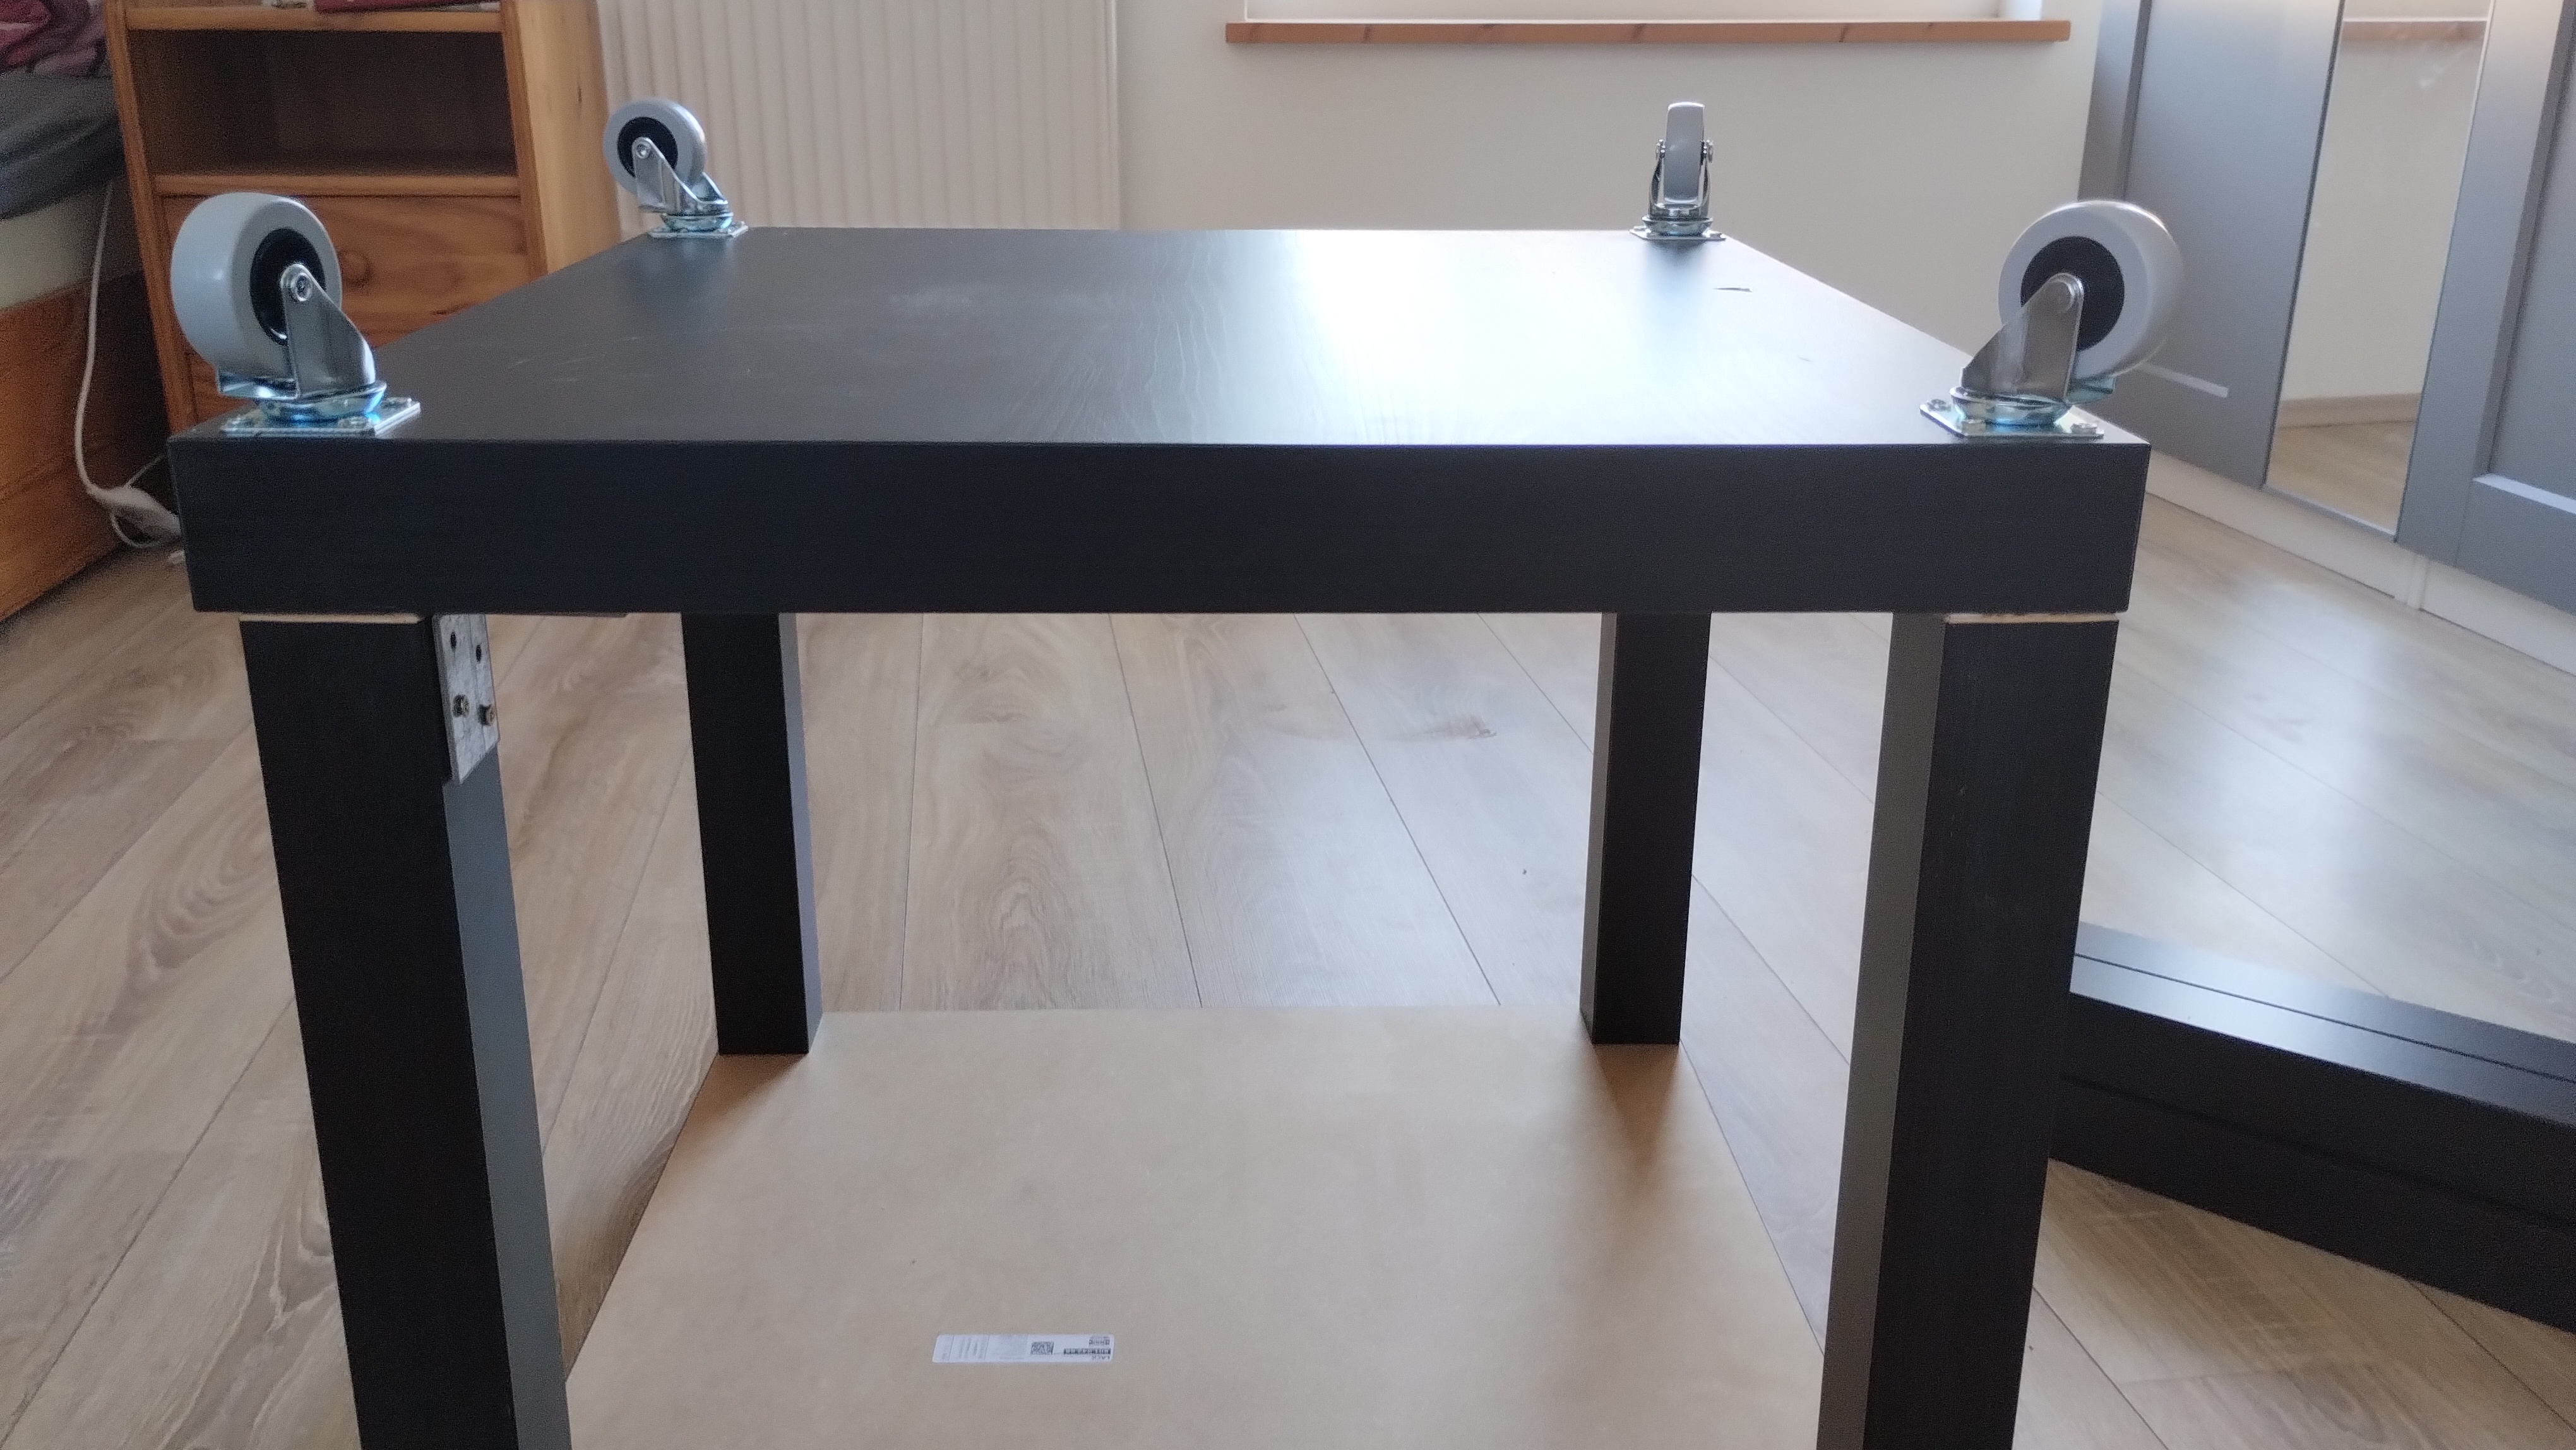
We are almost done! Now, we can add the wheels to the rack to make the whole thing roll around nicely.
Lastly, we can add all of our equipment to the rack. If you have server-mounted equipment, you can screw it into the legs, but be careful the legs are only really stable enough to hold weight at the top. So, if you want to screw multiple devices into the rack, either use more tables and always screw them in at the top, or screw them in from the bottom up so they rest on top of each other to support the weight.
Since I don’t have any rack-mounted equipment, I just used tape to securely stick everything to the tables.
And that’s it, you should now be able to build your own DIY Lack Rack. But don’t limit yourself to what I’ve shown here. The beauty of the Lack Rack is that it’s DIY, so you can build it to fit your specific needs.
 reply via email