Server Upgrade or Documentation of my new Homelab
October 5, 2024 | 15,822 words | 75min read
Table of Contents
0. Changes
List of Changes Made of This Article:
15.10.24: Fixed Typo.
23.01.25: Added a Spacer to the Article.
23.05.25: Added a new Section to Notification Managment.
28.05.25: Added a small Section for Quality Control of Radarr.
1. Introduction
For a while now I have been running a Homelab (:= A server that is running at home, often with low budget hardware, hosting several applications.) using a weak Raspberry 3b, originally I was using it to better regulate my sleep schedule using HomeAssistant. But over time the motivation for running my Homelab changed, I wanted to experiment more, learn about various new technologies and more philosophical I wanted to be less dependented on centralized services – Like, google drive for backups, netflix for entertainment, one drive for syncing devices and many more.
And with this change of motivation my demand for my Homelab increased no longer did I want to run a single application, I wanted to run several applications all at once all containerized and virtualized, my two meager external hard drives dangling of my Rasperry Pi was not adequate anymore for my storage need, I wanted more drives and I wanted them in a
RAID setup for redudancy and with ZFS to prevent bit rot.
Sadly, my trusted Rasberry 3b was no longer powerfull enough to fullfill my needs, so it was time to upgarde my Homelab to something more powerfull.
This post is a documentation of this upgrading undertaking, first going over the acquirement of the hardware of my homelab, then the proces of choosing a operating system, and finally through the different applications that I selfhosted with it and the different technologies they interface with.
This post will probably rather long, because of the sheer amount of software I decided to selfhost, so grab a cup of coffee or tea and enjoy the reading (or not since this will be a bit dry, I’ll try to add some semi funny images).

2. The Hardware Requirements
Before I could think about what kind of server I wanted to buy, I first needed to know what my hardware requirements were and how important they were. This allowed me to balance, my nice-to-have features with the cost of including them. Also, how could I waste hours looking for the perfect server, if I didn’t have a lengthy wishlist?
I’ve already touched on some of my server requirements in the introduction. Now, I would like to explore them in more detail. Below is a list of factors, along with related question, that shaped my final requirements:
- Size of the Computer: USFF, SFF, DT
- How many disks fit into the case?
- Motherboard
- How many SATA connectors do I need?
- Does it support ECC?
- Disks
- What disk capacity do I want?
- Refurbished Disks vs New Disks?
- How many disks?
- Processor: Intel vs Amd
- Does it support Quick Sync Video (QSV)?
- Which processor generation?
- How many cores do I want?
- What is it power usage?
- Does the processor include an onboard graphics card?
- RAM
- How much RAM?
- Do I need ECC?
- Power Usage
2.1 Storage Requirements
Using the server as a NAS and as a media center for streaming movies and TV shows to all my devices were two key factors that prompted me to upgrade my Homelab. With the NAS demanding significant storage capacity and the media center needing a more powerful processor than the one I currently had. As such I will analyze the requirements of these two functionalities first.

First of for the NAS, since I want to use my homelab as a media server for movies, tv-shows, music and photos, the most important aspect to consider for the NAS aspect of my server are the storage requirements. The biggest bulk of required storage will come from my media server, specfically movies and tv-shows. The size of tv-shows is really hard to compare from series to series, they have different amount of seasons, different amount of episodes per season, different length per episode. Movies on the other side, are a lot more handy, they all have roughtly the same length, making the average file size of a movie fairly repsresentetive. Allowing me to estimate my required storage needs, by estimating the average file size of movie first and the extrapolate from there.
So I created a table of various popular movies and their file size, by picking some well known movies and search for them on Piratebay, which reports for each torrent various statistics about it such as: used encoding, resolution, Video-Bitrate and many more. You can see the table below:
| Movie Name | Release Year | Movie Length | Encoding | Resolution | File Size(GB) |
|---|---|---|---|---|---|
| Interstellar | 2014 | 2h49m | x264 | 1080p | 2.20 |
| Interstellar | 2014 | 2h49m | x264 | 4K | 14.80 |
| Interstellar | 2014 | 2h49m | remux | 4K | 42.71 |
| Pulp Fiction | 1994 | 2h34m | x264 | 1080p | 1.40 |
| The Silence of the Lambs | 1991 | 1h58m | x264 | 1080p | 1.50 |
| The Silence of the Lambs | 1991 | 1h58m | remux | 1080p | 31.45 |
| Spirited Away | 2001 | 2h4m | x265 | 1080p | 7.99 |
| The Departed | 2006 | 2h31m | x264 | 1080p | 2.00 |
| All Quiet on the Western Front | 2022 | 2h28m | x264 | 1080p | 5.29 |
| Ad Astra | 2019 | 2h3m | x264 | 1080p | 5.99 |
| Ad Astra | 2019 | 2h3m | x265 | 4K | 11.37 |
| Jojo Rabbit | 2019 | 1h48m | x264 | 1080p | 1.93 |
| Jojo Rabbit | 2019 | 1h48m | x265 | 4K | 6.79 |
| Jojo Rabbit | 2019 | 1h48m | remux | 4K | 48.5 |
| Blade Runner 2049 | 2017 | 2h44m | x264 | 1080p | 3.14 |
| Blade Runner 2049 | 2017 | 2h44m | x265 | 4K | 19.2 |
| Blade Runner 2049 | 2017 | 2h44m | remux | 4K | 77.97 |
| Ex Machina | 2015 | 1h48m | x265 | 1080p | 1.63 |
| Ex Machina | 2015 | 1h48m | x265 | 4K | 22.13 |
| The Big Short | 2015 | 2h10m | x264 | 1080p | 3.28 |
| The Big Short | 2015 | 2h10m | x264 | 1080p | 3.28 |
| Inception | 2010 | 2h28m | x265 | 1080p | 2.87 |
| Inception | 2010 | 2h28m | x265 | 4K | 8.91 |
| The Dark Knight | 2008 | 2h32m | x265 | 1080p | 1.87 |
Source: Piratebay, August. 2024
You can skip the following boring python code section, which calculates the average movie file size, by collapsing the section and continuing reading from afterwards it:
Calculating the Average Movie Length
For the subsequent calulcations it is important to note, that they are only rough estimates. For example we can have two times the same movie which both use the same encoding, but drastically different file size based on the quality preset choosen when the movie was encoded.
Another example, I have seen a fair number of movies with the same resolution where they differ in encoding one using x264 and the other one x265 and even though x265 is supposed the more efficient one, the file with the x264 encoding ends up having a smaller file size (this too is the fault of the set quality preset when encoding).
I could have used an calculator to quickly crunch the numbers, but because I like doing it harder than it already is; I used python in combination with pandas, a data anlaysis libary.
The first thing we do is importing the pandas libary and/cap importing our data into python:
1import pandas as pd
2df = pd.read_csv("movies.txt", sep="|")
3df.head()
Which will return in the following output:

As you can see, there are multiple issues: for one we have two weird columns titld unamed: 0 and unamed 7 and second our first row is also weird, we should remove both.
1df = df.dropna(how="all", axis="columns") # drops the columns
2df = df.drop(0) # drops the first column
3df.head()
Which will result in the following output:

There are still one issue persisting, we have whitespaces in the column names and in the data fields, you can see that through the following command:
1df.columns
Which will return the following:
1Index([' Movie Name                         ', ' Year ', ' Movie Length ',
2       ' Encoding ', ' Resolution ', ' File Size(GB) '],
3      dtype='object')
In order to remove the white-spaces we can do the following:
1df = df.rename(columns=lambda x : x.strip()) # strips whitespaces from the columns
2df = df.apply(lambda x: x.str.strip() if x.dtype=="object" else x) # Remove white spaces in the dataframes
We have one last problem, when we execute:
1df.info()
We get:
 1<class 'pandas.core.frame.DataFrame'>
 2RangeIndex: 24 entries, 1 to 24
 3Data columns (total 6 columns):
 4 #   Column         Non-Null Count  Dtype
 5---  ------         --------------  -----
 6 0   Movie Name     24 non-null     object
 7 1   Year           24 non-null     object
 8 2   Movie Length   24 non-null     object
 9 3   Encoding       24 non-null     object
10 4   Resolution     24 non-null     object
11 5   File Size(GB)  24 non-null     object
12dtypes: object(6)
13memory usage: 1.3+ KB
As we can see the the column File Size(GB) is from type object, with which we can’t calculate, so we need to transform it into the float dtype:
1df["File Size(GB)"] = pd.to_numeric(df["File Size(GB)"])
Finally, we can calculate the average file size:
1round(df.loc[df["Resolution"] == "1080p"]["File Size(GB)"].mean(), 2)
2round(df.loc[df["Resolution"] == "4K"]["File Size(GB)"].mean(), 2)
3round(df.loc[(df["Resolution"] == "4K") & (df["Encoding"] == "remux")]["File Size(GB)"].mean(), 2)
4round(df.loc[(df["Resolution"] == "4K") & (df["Encoding"] != "remux")]["File Size(GB)"].mean(), 2)
Which gives us the following result:
15.05
228.04
326.39
413.87
Remux: The data was copied without being changed e.g. from the Blueray. It is most often the highest quality, the media can be.
With the previous calculation we get the following table:
| Avg. File Size(GB) | |
|---|---|
| 1080p | 5.05 |
| 4K | 28.04 |
| 4K & remux | 26.39 |
| 4K & non remux | 13.87 |
As we can see, the size increase from higher resolution movies is substantial, which makes sense since 4K contains 4 times more pixels than 1080p. Although I haven’t personally measured it, with reasonable quality presets, we can expect x265 encoding to save up to 50% bitrate compared to x264.
Assuming my estimates are accurate, this means we can store roughly 198 movies in 1080p or about 35 movies in 4K per terabyte of disk space. Since I currently don’t have any 4K-capable devices, I’ll go with the 1080p estimate.
With that in mind, 1TB should be sufficient for my movie media needs. However, it’s important to remember that movies aren’t the only data I plan to store on the server. Additionally, we want to leave room for future expansion should my storage needs increase significantly. What this estimate gives me is a rough idea of the storage I need—not 1000TB or even 100TB, but more likely around 10TB.

2.2 Processor Requirements
For my processor, there were three important aspects that I needed to consider:
- Number of Cores: Since the processor would run in a server environment, more cores would help with concurrency.
- Power Usage: Power costs where I live in Germany are rather expensive, so I wanted to minimize them as much as possible.
- Integrated Graphics Card: This would help when streaming movies and TV shows from my server to a client.
- Price: How expensive the processor is.
I quickly decided that the processor should be from Intel. Intel processors are great for media streaming due to Quick Sync Video (QSV), Intel’s video encoding and decoding engine, which excels at handling video formats like movies. Another reason is that Intel processors come with integrated graphics cards, which QSV uses for the encoding/decoding process. Additionally, Intel’s i3 and i5 processors, particularly from the later generations, are very power efficient—perhaps not as efficient as ARM processors, but still quite close.
It was also fairly easy to decide on which generation of CPU I wanted. Anything beyond the 13th generation was a no-go due to instability issues with the newer models. Anything older than the 5th generation was out of the question because they don’t support QSV. The 9th generation was ideal, as it was the first to support HVEC codecs, making any generation beyond that a solid choice.
An added benefit of processors from the 8th generation onwards is that the default number of cores increased from 4 to 6, which improves performance a lot for multi task workloads. The 9th generation processors use the UHD 630 as their integrated graphics chip, with the next major performance jump arriving in the 11th generation. For more details on codec support for Intel CPUs, you can refer to the Media Capabilities Supported by Intel Hardware List.
Finally, within the Intel Core series, the i9 and i7 models were too expensive, both in terms of price and power usage, leaving me with the option of either an i3, which is more efficient but less performant, or an i5, which consumes more power but offers better performance.
To recap, I am looking for an Intel i3 or i5 processor, preferably from the 9th generation, with the 11th generation as an even better option.
2.3 Computer Size
A quick note on the size of the computer: I wanted a server that had enough space for my disks but was still compact enough to fit comfortably in the corner of a room. Because of this, I primarily focused on small form factor (SFF) computer cases.

2.4 RAM Requirements
Regarding RAM, there isn’t much to say—you only need as much memory as you actually use (unless you’re doing something extreme like using ZFS Deduplication). I’ll start with a modest amount and buy more when needed. Scalability isn’t a big concern, as most modern motherboards have four slots for RAM sticks.
One thing worth mentioning is that having ECC RAM would be nice, but it’s not essential, especially for a small home setup like mine and it is rather expensive.
2.5 Short Interlude
From the decisions I’ve made so far, you’ve probably noticed that this server sounds more like a consumer desktop computer than a sleek, rack-mounted server. And that’s true, but in my defense, “real” servers are both expensive and power-hungry. Compared to my previous server (a Raspberry Pi 3b), this is already a significant upgrade.
3. Dr. Salesman or: How I Learned to Stop Waiting for the Perfect Deal
Now that we’ve gone through the server requirements, it was time to actually make the purchase. The first option I considered was buying all the parts separately and building it myself. However, after using pcpartpicker, I arrived at a total cost of around 600€, which was more than I wanted to spend. I could have bought the parts used and individually, which would have saved me a lot of money, but it also carried the risk of purchasing faulty components or exceeding my budget if I didn’t track the expenses closely.
So, I went with my second option: shopping for used office computers that met my specifications. Initially, I tried several random websites, but I eventually shifted my focus entirely to eBay, where I spent about two weeks checking deals every day before finding something that worked for me. There are certain manufacturers and product lines that work well as servers, such as:
- Fujitsu Thin Clients
- Dell Wyse
- Dell Optiplex
- HP ProDesk
Just keep in mind that different versions of these machines exist, and some are better suited than others. I’d recommend monitoring eBay for a while to get a feel for the prices, and when you see a good deal, go for it.
The only components I bought separately were the hard disks and, later, additional RAM when I needed it. For disks, many people recommend Server Part Deals, but using DiskPrices, I ended up purchasing my drives from Amazon.
Here’s a breakdown of my final costs:
- HP ProDesk 600 G5 (16GB RAM, i5-9500, 250GB SSD): 180€
- Kingston Fury Beast DDR4 2x32GB RAM: 120€
- 1x Intenso SSD 256GB: 20€
- 2x Seagate Enterprise v6 10TB ST10000NM0046: 220€
Total: 540€
It turned out to be a bit more expensive than I initially expected, mostly because I underestimated the cost of RAM and hard disks.

4. A look inside the Machine
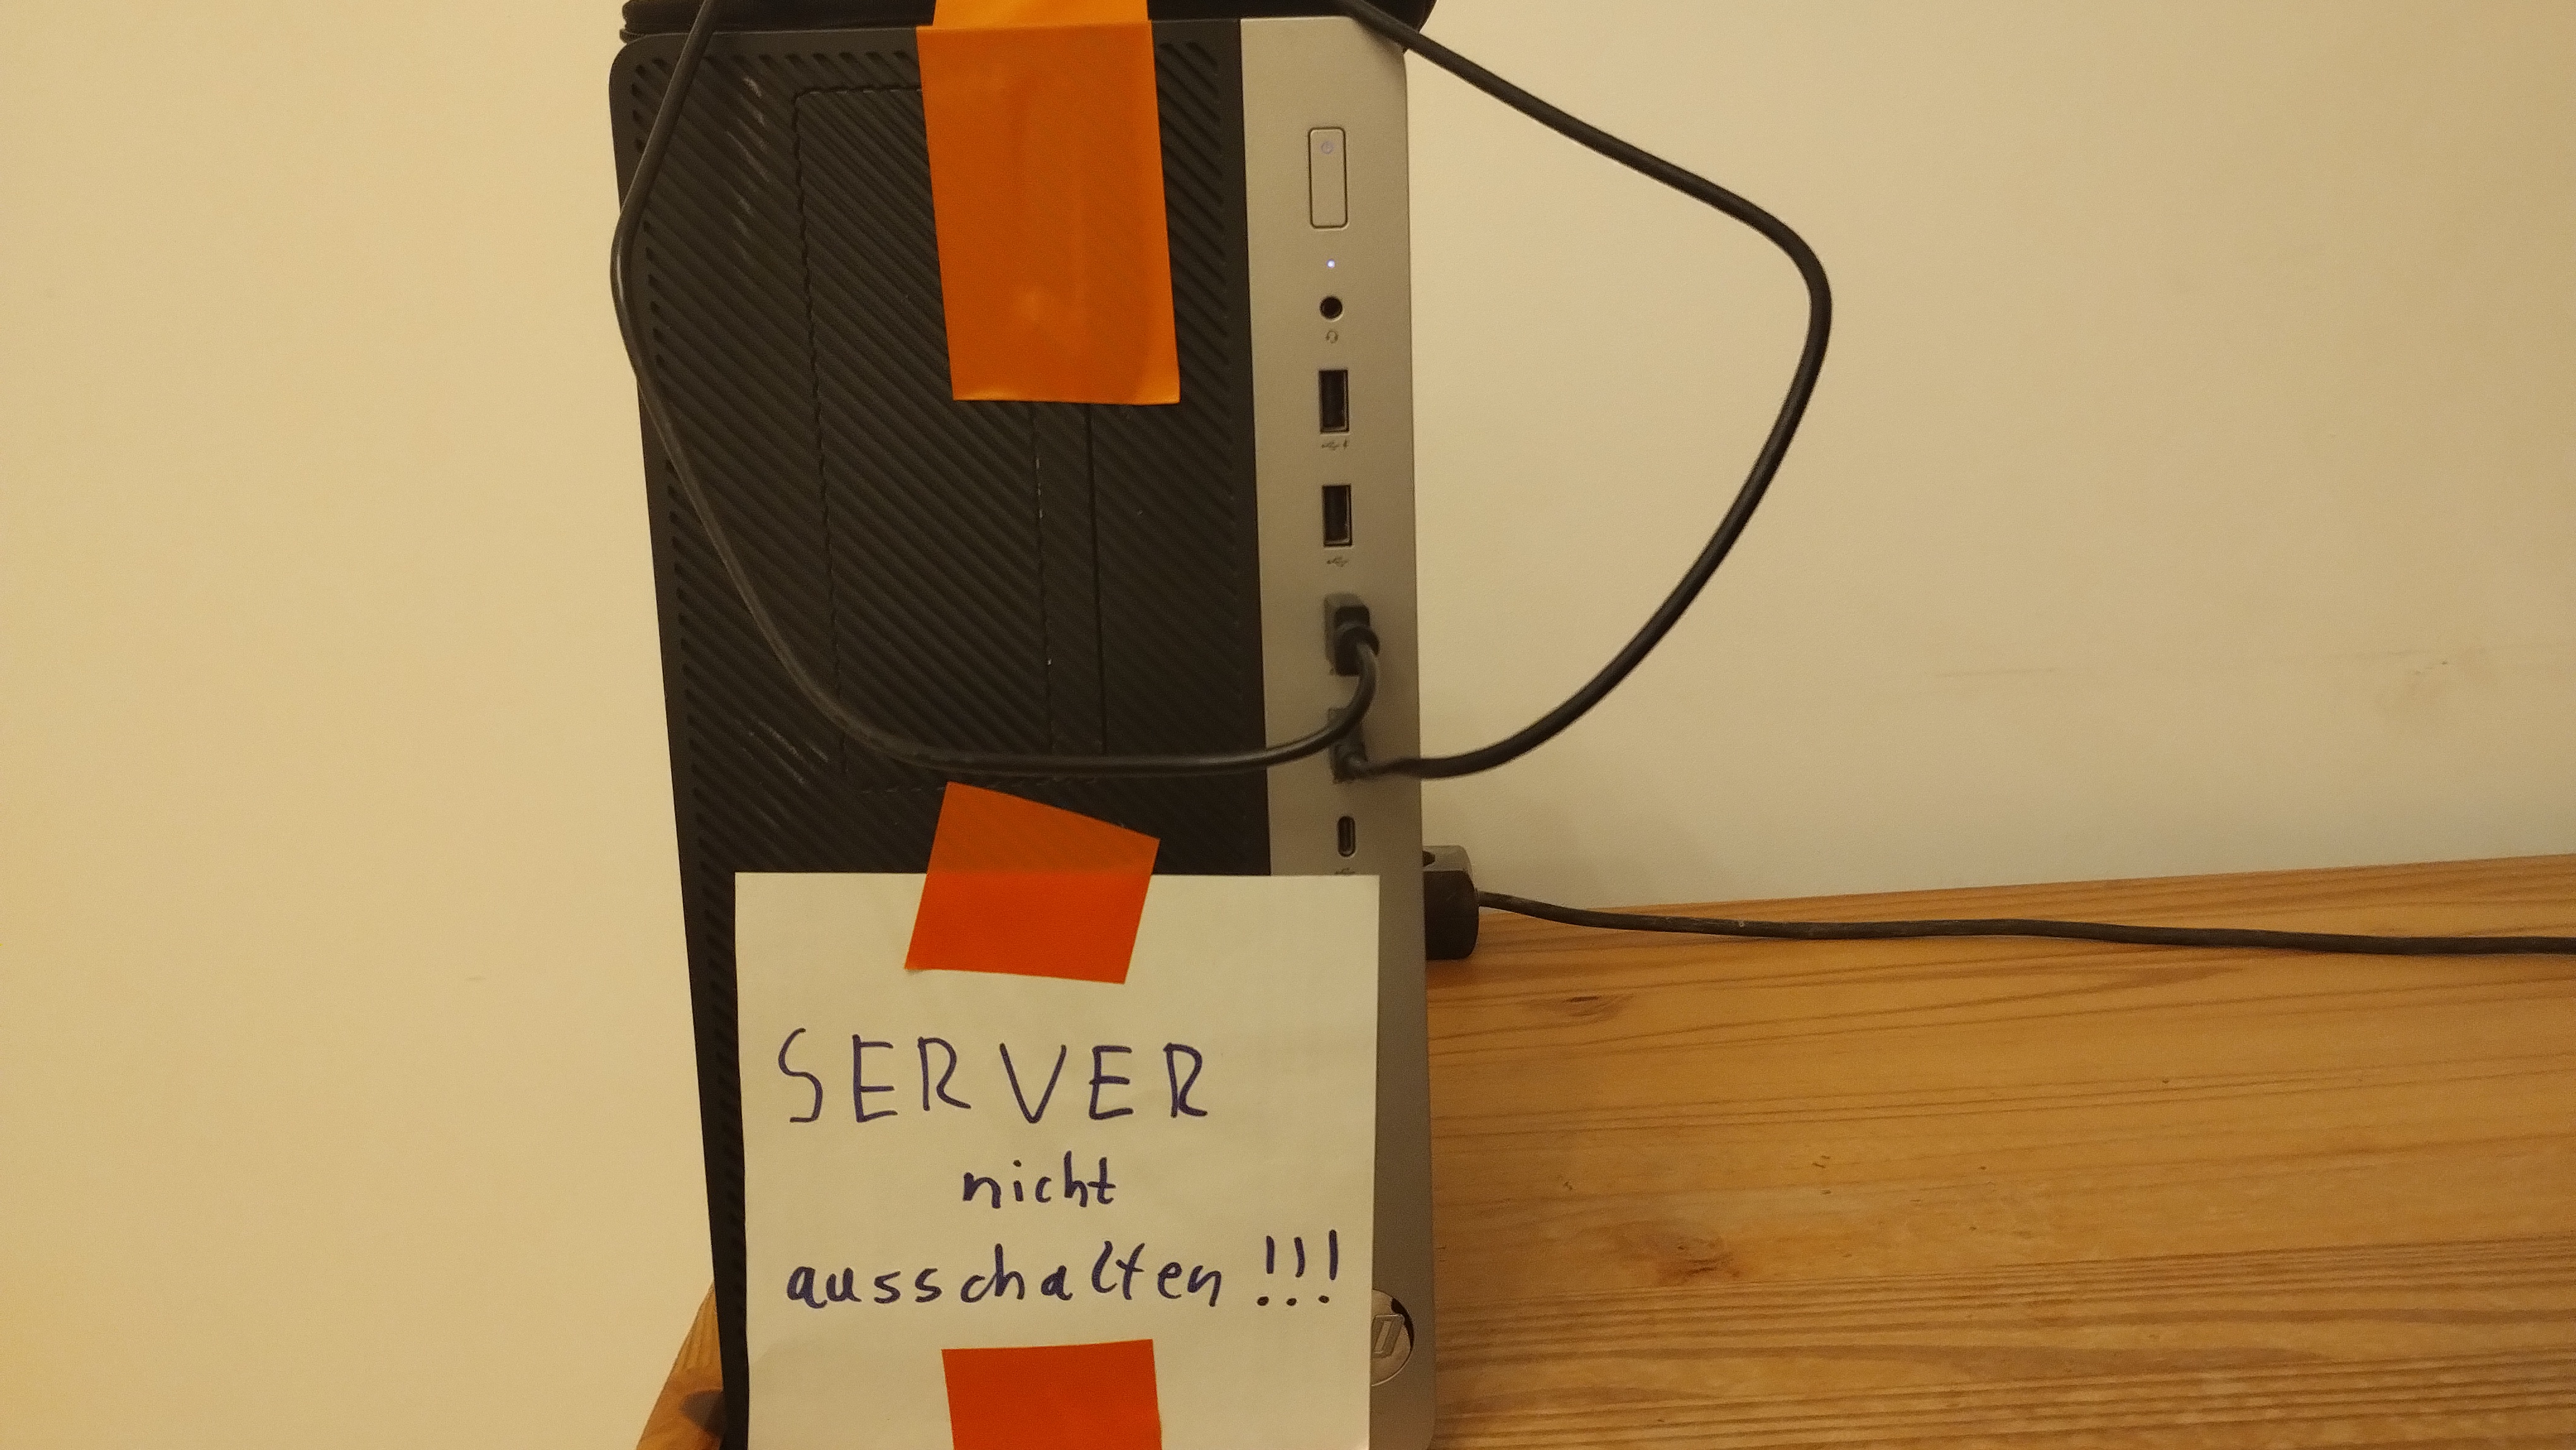
I thought I had taken a photo when the machine first arrived, but I didn’t, so here’s how the computer is currently set up. On top of the computer are two hard disks that I use for regular backups. You can’t really see them in the photo, but just because they’re not visible doesn’t mean they’re not there!
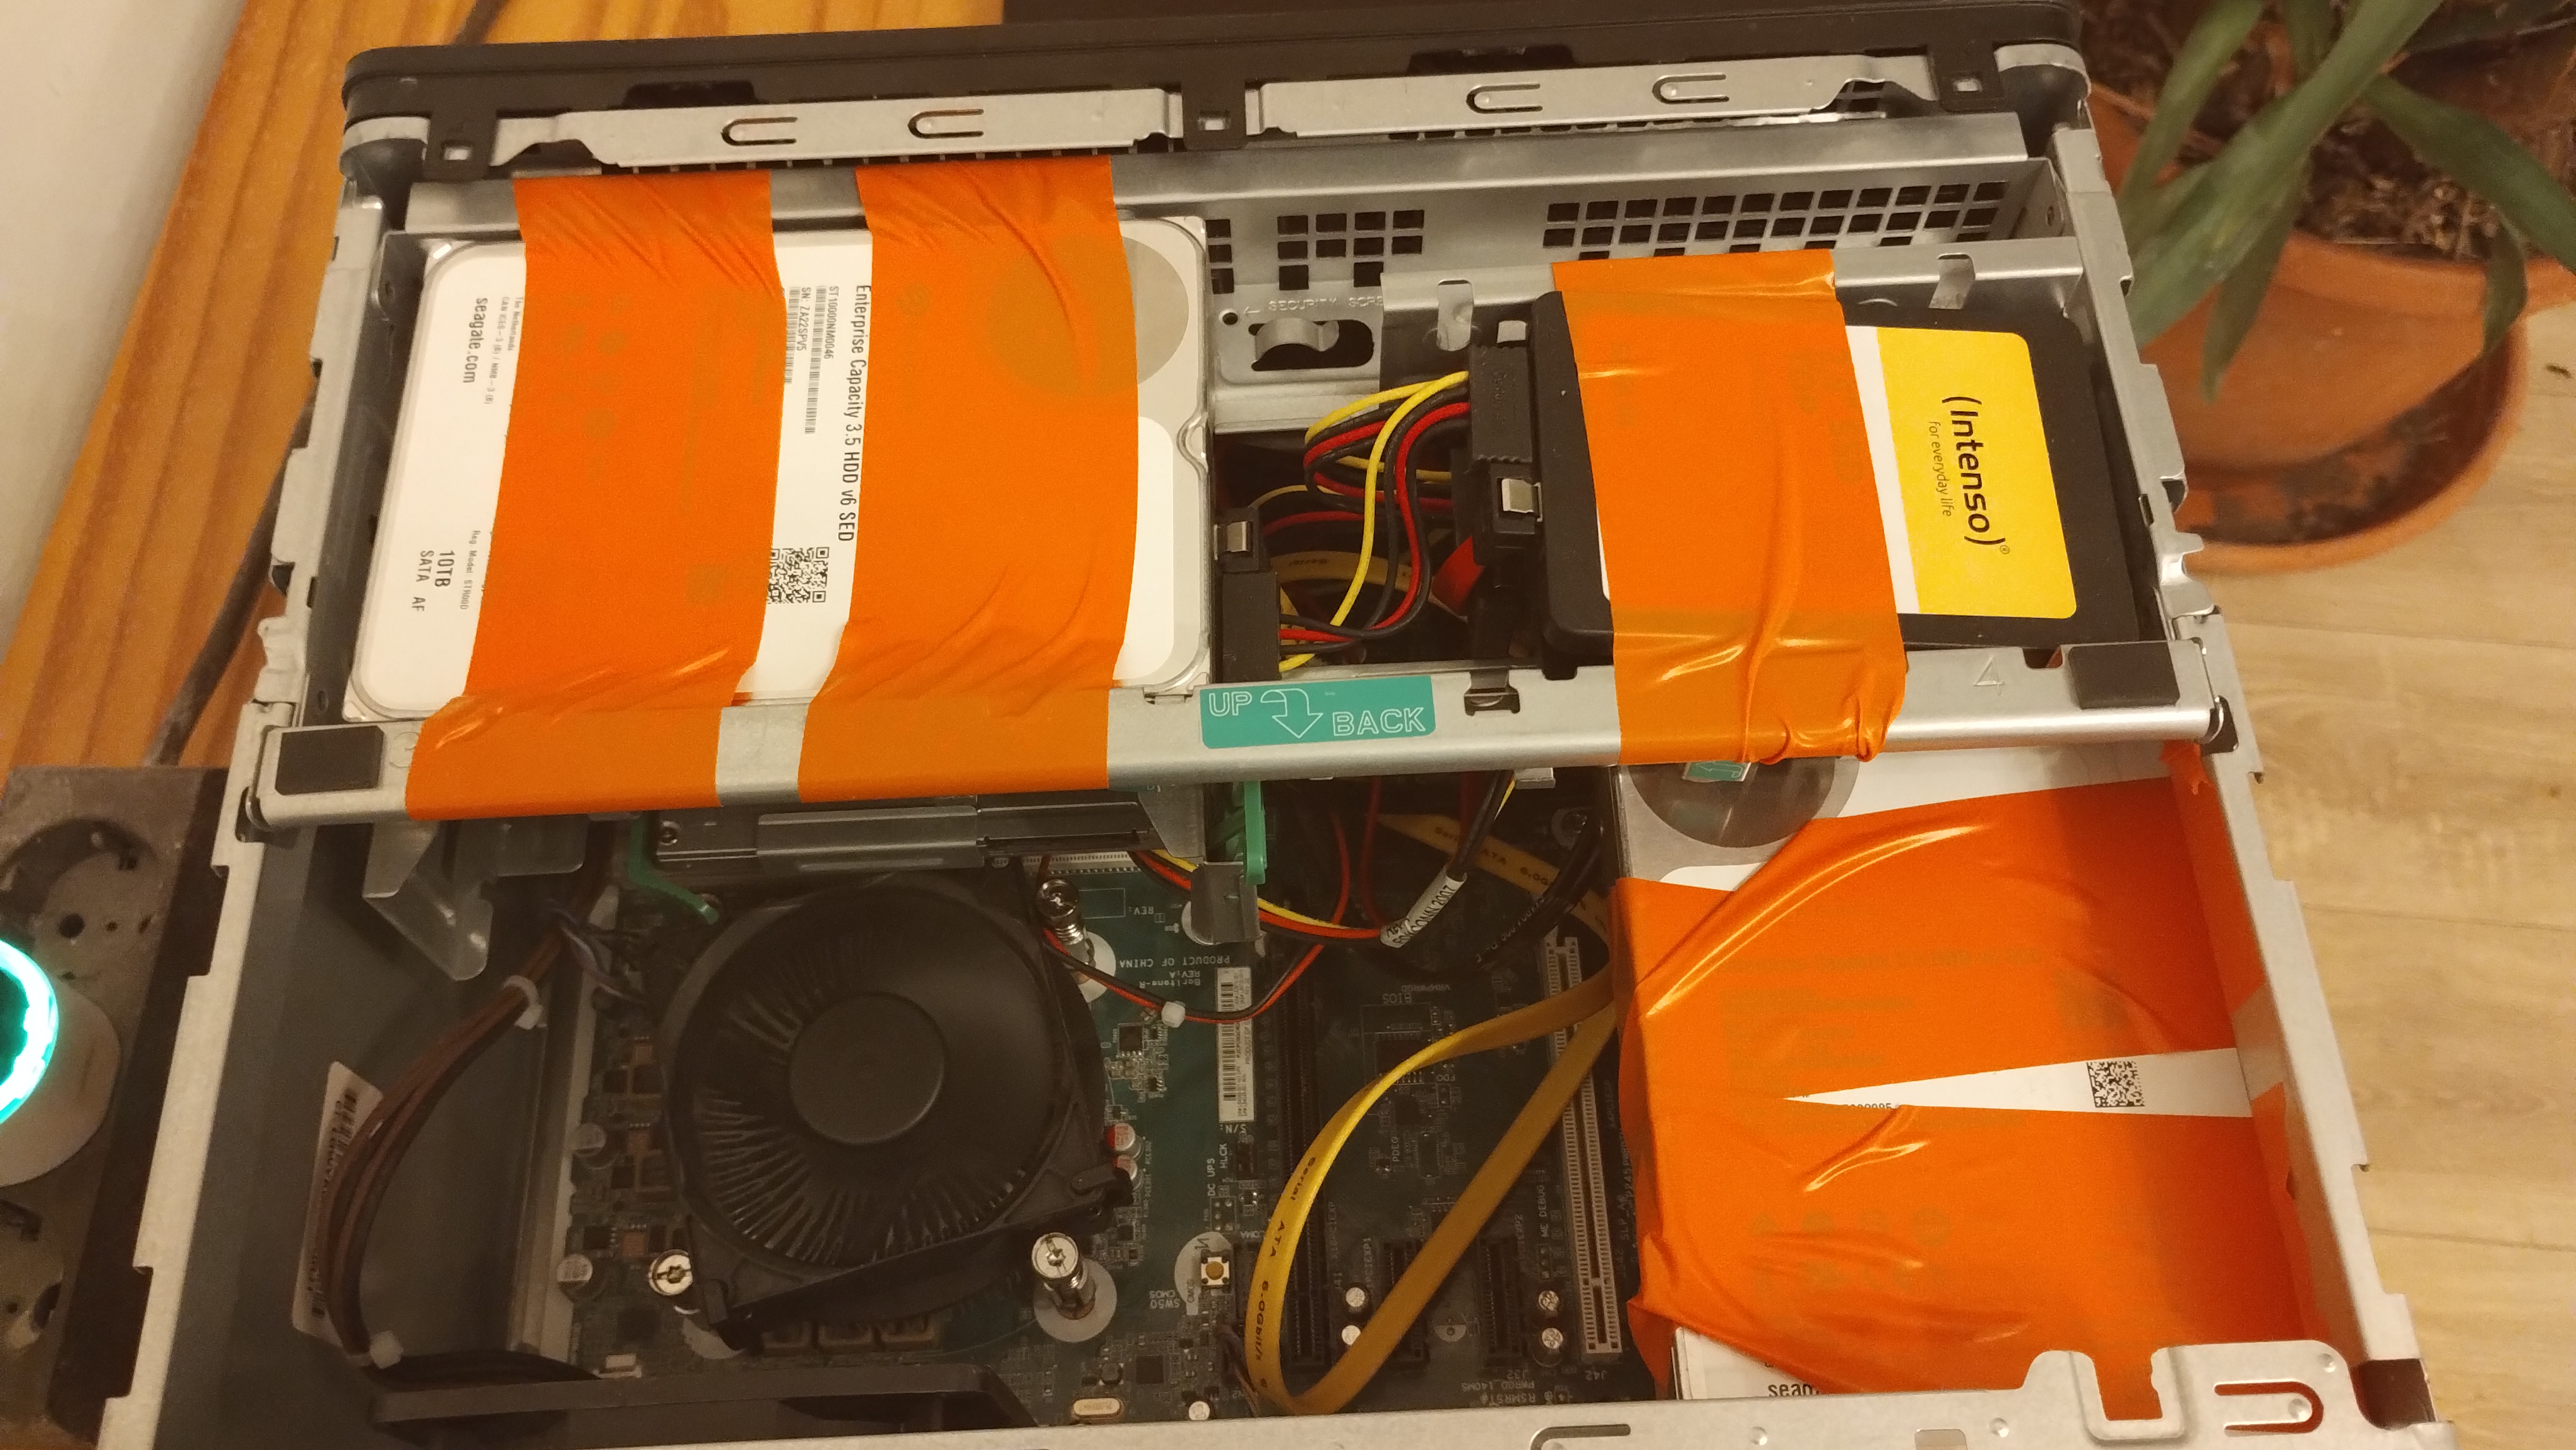
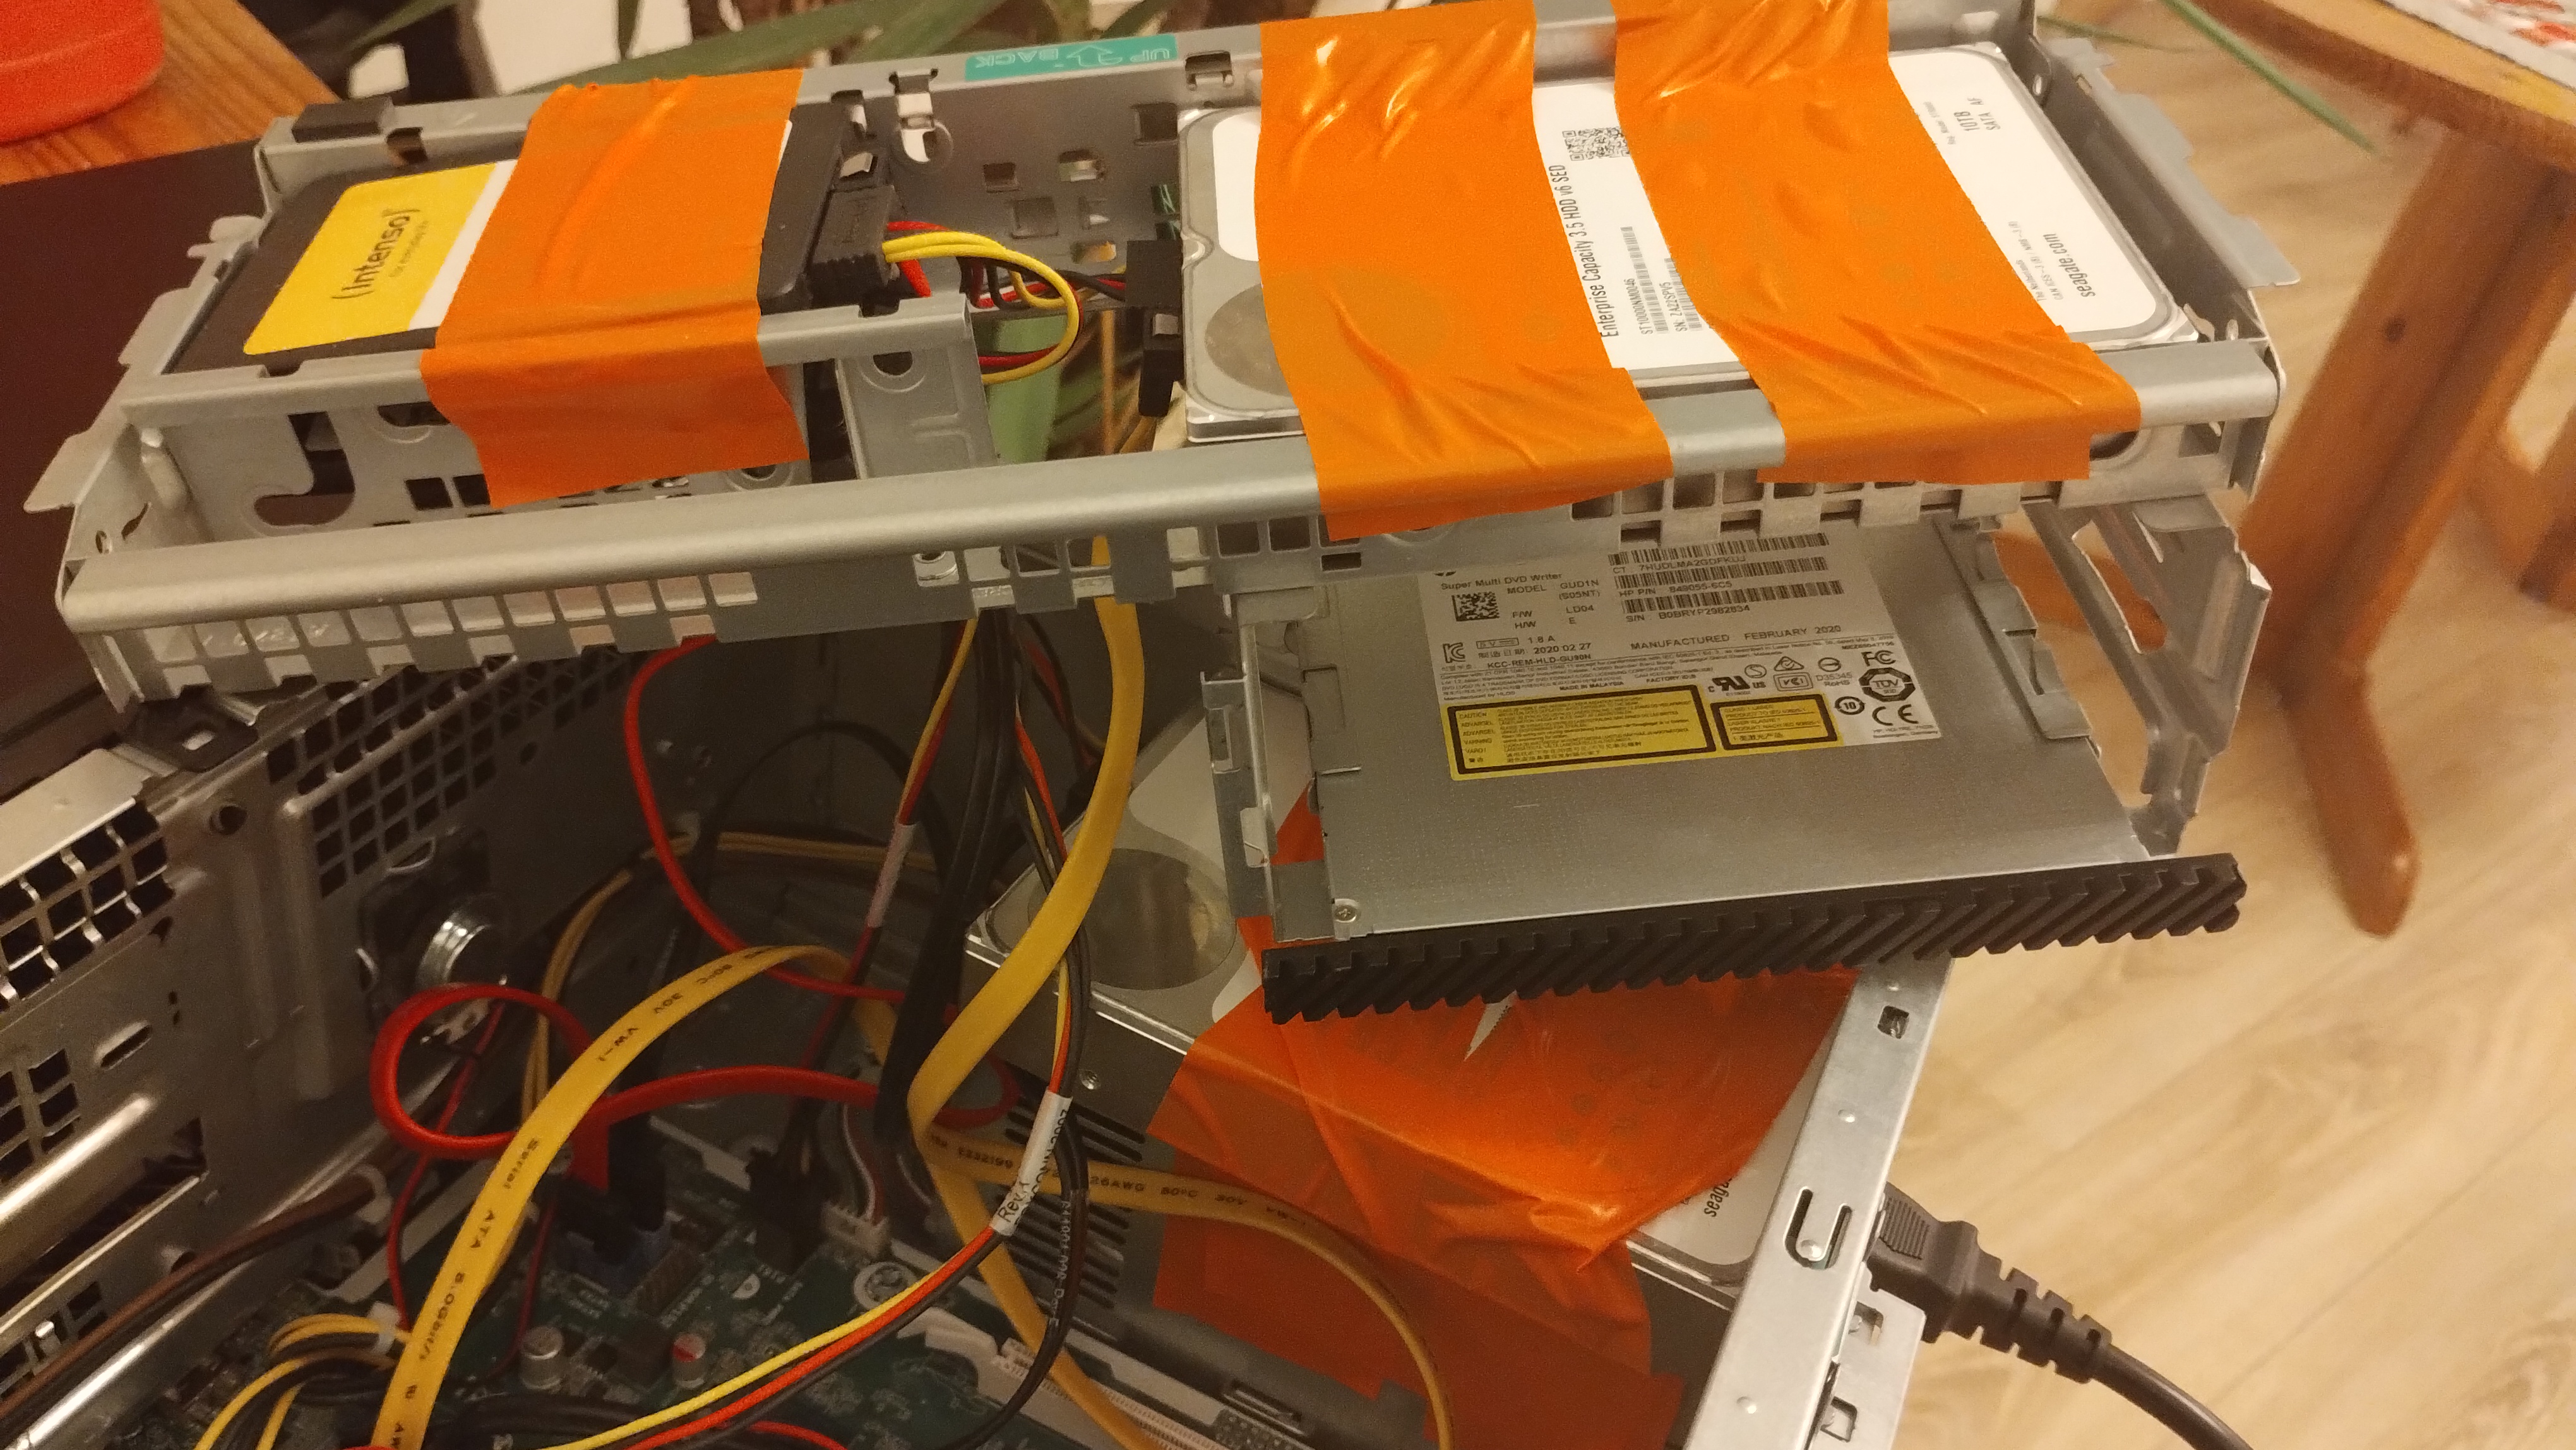
Below you can see how I installed the disks into the machine. The ProDesk 600 G5 has exactly four SATA connectors, which is just enough for the disks I needed. I had to get a bit creative with the mounting spots -— Yes, I did use duct tape to mount them.
5. My Storage Situtation
Before discussing the operating system I chose, I want to first touch on my storage setup. As mentioned earlier, I purchased two 10TB hard drives and a 256GB SSD, in addition to the 256GB SSD that came with the computer. I also had two 1TB external disks lying around that I wanted to use.
The big question now is: which disks should be responsible for what? Should I separate data from running software and configuration files? Should I use some disks for backup? Should I set up the drives in a RAID system? Should I go for hardware or software RAID? These and many other questions arose as I planned the setup.
5.1 What is RAID?
To better explain my decision on how I use the disks, I’d like to briefly introduce what RAID is.
Redundant Array of Independent Disks (RAID) is a system used to organize disk storage. It is a data virtualization technology that combines multiple physical disks into one logical unit, typically for performance gains, redundancy, or both. There isn’t a single RAID system; instead, there are multiple RAID levels, each with its own set of advantages and disadvantages. These levels are identified by numbers, which uniquely define the configuration and capabilities of each system.
In RAID-0, also known as striping, multiple disks are combined into one by distributing the data across the disks in rows, as shown in the image below. This configuration has one major advantage: performance. Since consecutive sectors are spread across different disks, when we need to access a large block of data, we can read from multiple disks simultaneously. This parallel access significantly increases bandwidth compared to accessing data from just one disk, which would be limited by the bandwidth of that single device.
However, RAID-0 also has a major disadvantage. If any of the disks in the RAID array fails, the data on that disk is permanently lost, with no chance of recovery. This can be catastrophic, as the lost sectors could be part of critical data, rendering the entire dataset unusable.

In RAID-1, also known as mirroring, two disks are synchronized so that when data is written to one disk, it is simultaneously written to the other. This ensures that at all times, you have two copies of your data. If one disk fails, the other still holds a complete copy, providing redundancy as the main benefit.
However, this setup comes with a downside: you sacrifice 50% of your storage capacity for redundancy, which can be costly. For example, if you buy two 10TB hard drives for €120 each, instead of having 20TB of usable storage, you only get 10TB because the other 10TB is used for mirroring, “wasting” 120€ in the process.

RAID-0 and RAID-1 can be combined into a setup called RAID-01, which provides both the redundancy of mirroring and the performance gains of striping. RAID-01 works by first striping the data across disks and then mirroring those striped sets.
With RAID-01, the performance improvement is even greater than with RAID-0 because now you can read from four disks simultaneously and write to two disks at the same time. This results in 4x read access and 2x write access.
The disadvantage of RAID-01 is that it requires at least four disks, and like with RAID-1, you lose 50% of your storage to redundancy. However, this redundancy allows one disk to fail without any data loss.

The last RAID system I want to introduce is RAID-5. To use RAID-5, you need at least three disks. Like RAID-0, it uses striping to improve performance. However, RAID-5 also provides redundancy, allowing for the failure of one disk without data loss.
This redundancy is achieved by using parity blocks, which are distributed across all the disks. If one disk fails, the system can use these parity blocks to reconstruct the missing data. However, after a disk failure, it may take some time to rebuild and restore full access to all data. RAID-5 is one of the most cost-efficient RAID setups, offering a good balance between performance, redundancy, and storage capacity.

There are many more RAID systems than the ones I’ve introduced, but these are some of the most important ones, especially for my use case. You can use the raid-calculator to explore more options.
5.2 The Magical Filesystem: ZFS
There are many file systems available to choose from, ranging from long-established ones like EXT4 and Windows-compatible NTFS to more modern options like Btrfs and the relatively new drama-infested file system, Bcachefs. Each of these file systems has its own strengths and weaknesses.
However, I want to briefly discuss a special file system called Zettabyte File System (ZFS). ZFS has been around in some shape or form since 2001, but it only became widely available on Linux in 2010. It offers some really powerful features. While I won’t provide a comprehensive overview, there are many guides that do a far better job than I ever could, I want like to highlight some of its cool features:
- Natively supports RAID storage.
- Prevents bit rot through automatic checksum calculation, enabling silent self-healing of data.
- Allows for automatic backups and version rollback through snapshots.
- Natively supports data compression, including for snapshots and deduplication.
Although ZFS is quite impressive, it is not perfect and can be somewhat inflexible, along with having a few other issues.
5.3 The Storage Plan
Normally, when building a RAID system, it’s advisable to buy disks from separate brands to reduce the likelihood that multiple disks will fail at the same time. I didn’t follow this guideline, so we’ll see if that decision comes back to bite me.
To recap, my available storage consists of:
- 2x 256GB SSDs
- 2x 10TB hard drives
- 2x 1TB external disks
The most important aspect for my server was redundancy. While extra performance would be nice, it was not essential for the type of software and use cases I planned to run, which excluded RAID-0. Additionally, since I only purchased two of each disk type, RAID-01 and RAID-5 were not viable options.
For a while, I considered buying additional disks to meet the three-disk requirement for RAID-5. However, the HP ProDesk 600 G5 I purchased didn’t have enough SATA connectors, and I would have had to buy an HBA card, which seemed like too much work and expense.
Ultimately, I settled on the following setup:
- SSDs in a RAID mirror configuration with ZFS for the operating system and running software.
- HDDs in a RAID mirror configuration with ZFS for all my data, such as movies and photos.
- External disks in a RAID mirror configuration with ZFS for backups.
6. The Server Operating System: Proxmox
For the Operating System, I decided to use Proxmox, which is an open-source virtualization platform. A virtualization platform allows you to quickly spin up containers and virtual machines to run programs in isolated environments. You might ask yourself, “What is the benefit of virtualizing my programs?”
I’m glad you asked, there are numerous benefits:
- Increased Security: Virtualization which containers your programs, enhances security. If one container is compromised, it’s very difficult for an attacker to escalate the breach to the entire system.
- Avoiding Dependency Conflicts: If you install everything directly on bare metal, you might run into a major issue: different programs may have conflicting dependencies. This can land you in “dependency hell,” resulting in a bloated system. For instance, have you ever (accidentally, of course) installed some programs that depend on Wayland and others that depend on X.Org? Then, when you try to remove one of them, you find yourself having to reinstall everything. Not fun, right?
- Impact of Failure: Virtualization ensures that if one of your containers fails, whether due to an update or something else, it won’t affect the rest of your system. This minimizes the impact a single program failure can have.
- Ease of Management: Managing your software becomes much simpler. You can start or stop containers in seconds, configure them to start on boot, duplicate them easily, and even limit how many resources each container is allowed to use.
- Simplified Backup: Backing up your software i.e. configurations and data, is also straightforward with containers. You can even back up the running state, minimizing downtime during the process.
- Dynamic Load Balancing: Finally, if you have multiple servers, you can combine them into one large data center cluster. This allows you to dynamically balance server loads, where a container can be moved from one server to another to reduce the load. If one server goes down, containers can be transferred to another, improving uptime.
You could also get all these benefits without using Proxmox by running an operating system like Debian or Arch with Docker or LXC. However, Proxmox provides a convenient web-based GUI that makes managing containers much easier.
6.1 Proxmox: Installation
Setting up Proxmox is fairly straightforward. First, download the ISO and create a bootable medium. I recommend using a USB stick, and one tool you can use for this is Popsicle.
Next, ramm the USB stick with all the force you can into the correct port of your newly purchased computer (trust me, it helps!). Boot up the computer, enter the BIOS/EFI settings, and select the USB stick as the boot device. Then, follow the installation guide. You’ll need a monitor, keyboard, and mouse during the installation process, but once it’s done, you can safely disconnect them.
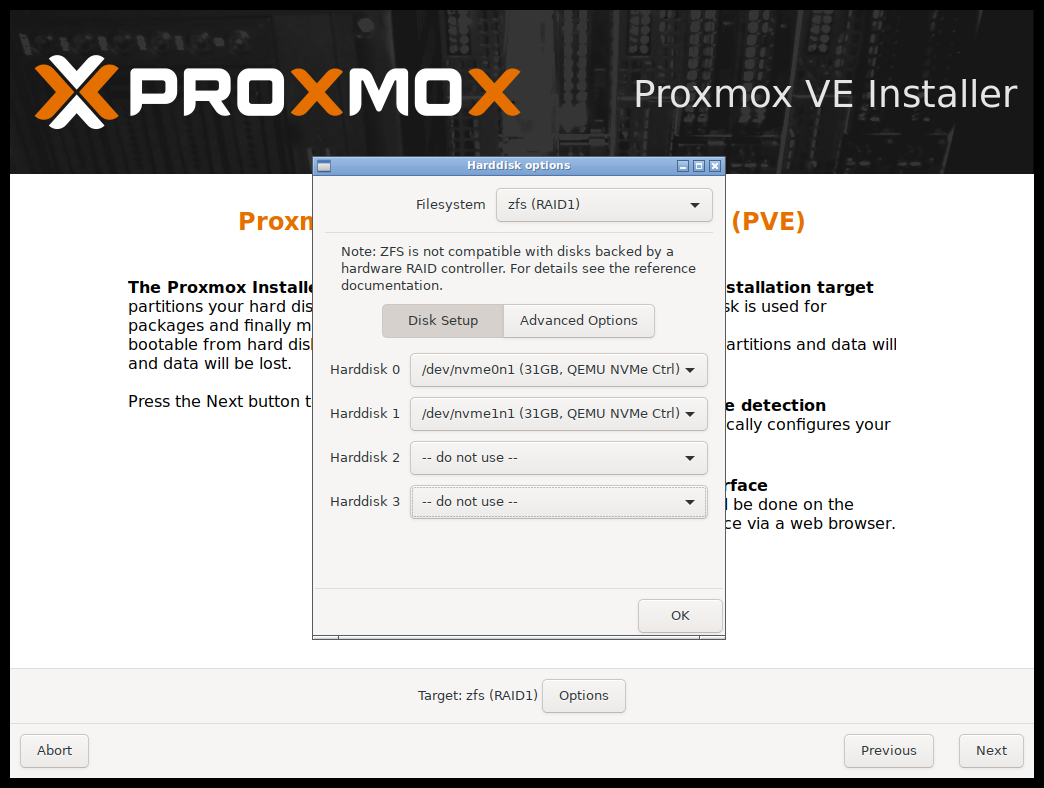
When you reach the screen where you need to choose the installation destination and if you’re following the same set-up as me, select ZFS with RAID 1 and choose the two SSDs as the target disks. We’ll deal with the external disks and hard drives later.
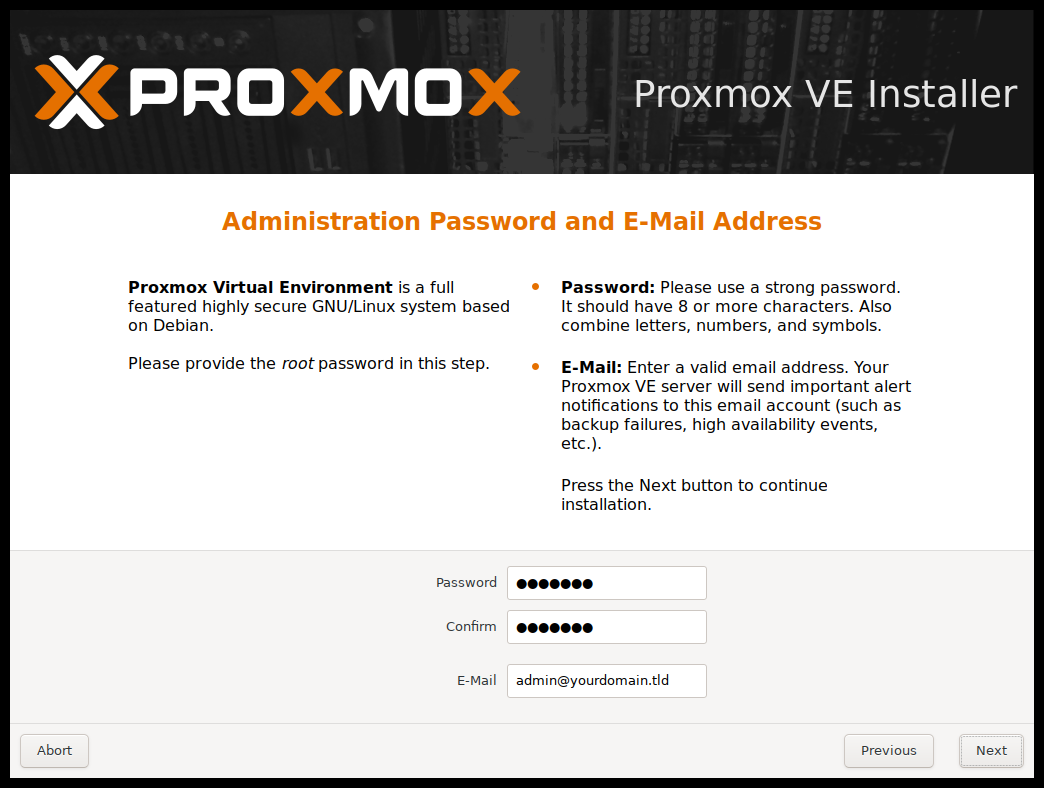
When prompted to create an account, I highly recommend using a real email (or even creating a separate email just for your server). This will allow you to receive regular reports on backups and alerts when something goes wrong, such as a hard disk failure.
For the network configuration, make sure to select an IP address that is actually free. You can check your router to see the currently occupied addresses. Your DNS server will most likely be your router, so enter its address. The netmask will probably be 255.255.255.0, but verify this with your router to be sure.
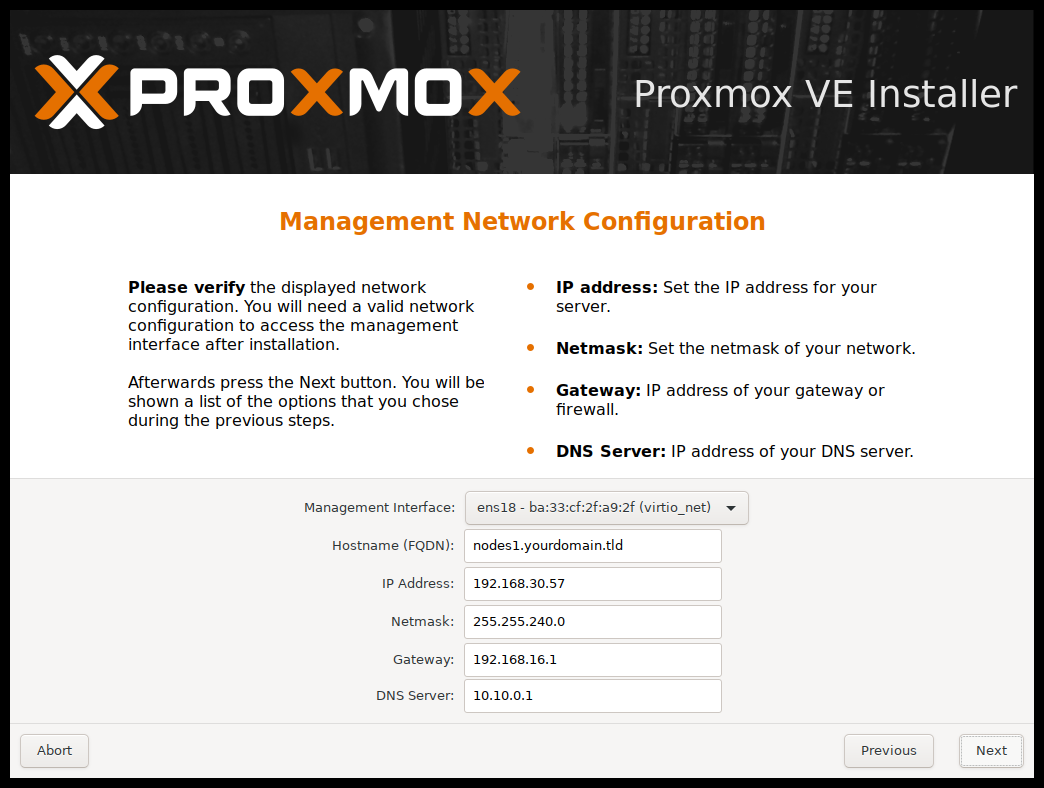
After the installation is complete, you can remove all peripherals and connect to your Proxmox server via the selected IP address and port 8006: http://<selected-ip>:8006.
6.2 Proxmox: Post Installation Steps
After connecting to Proxmox via the web app, you’ll be prompted to log in. Use the login credentials you created during the installation process, and make sure to write them down somewhere —- It would really suck to forget them. The default username is root. When logging in, ensure that PAM is selected as the realm, or you won’t be able to connect.
6.2.1 Activating No-Subscription Repo
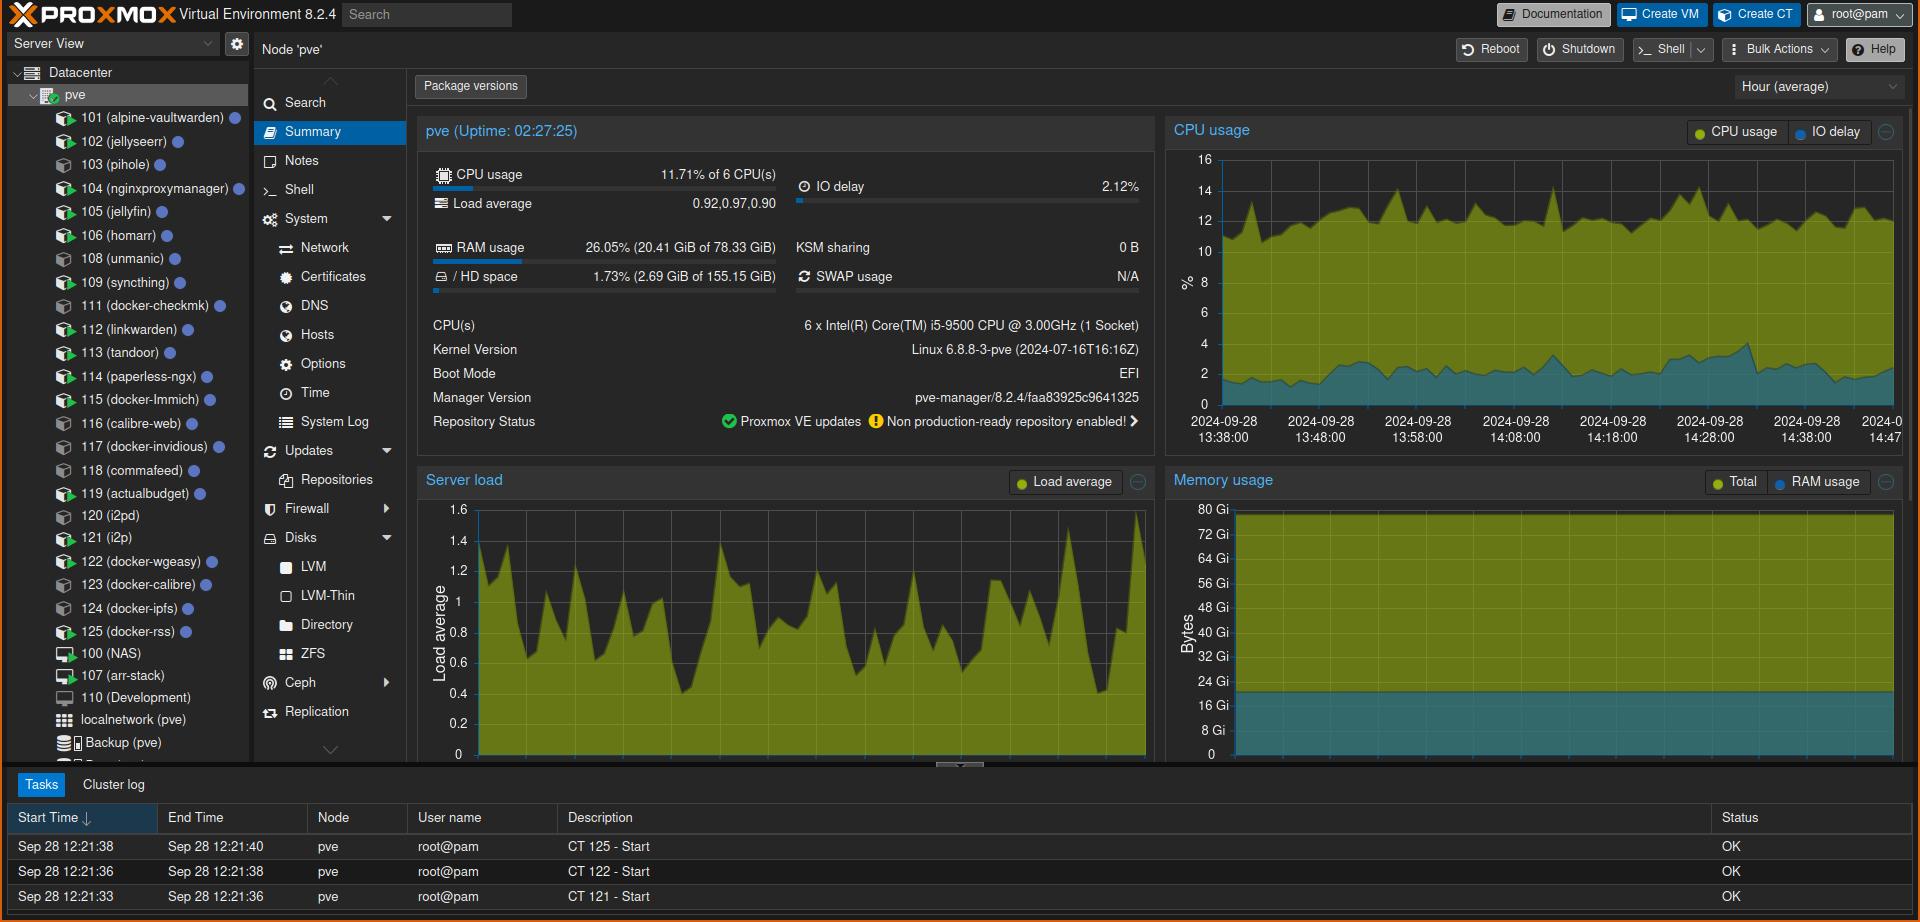
The first thing you’ll probably want to do is enable the “No-Subscription Repository” for updates. To do this, navigate to: machine (pve) -> Updates -> Repositories -> Add -> No-Subscription.
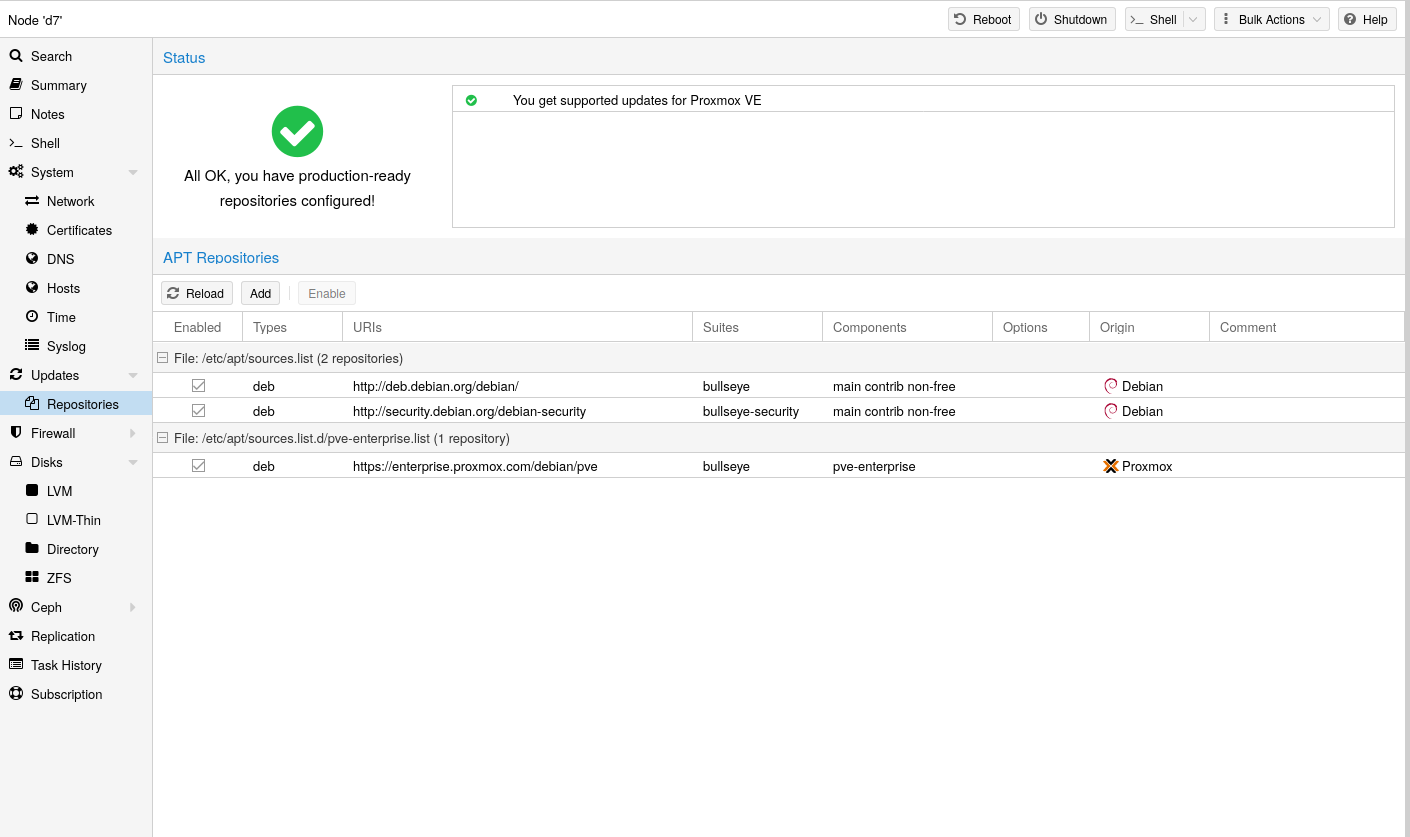
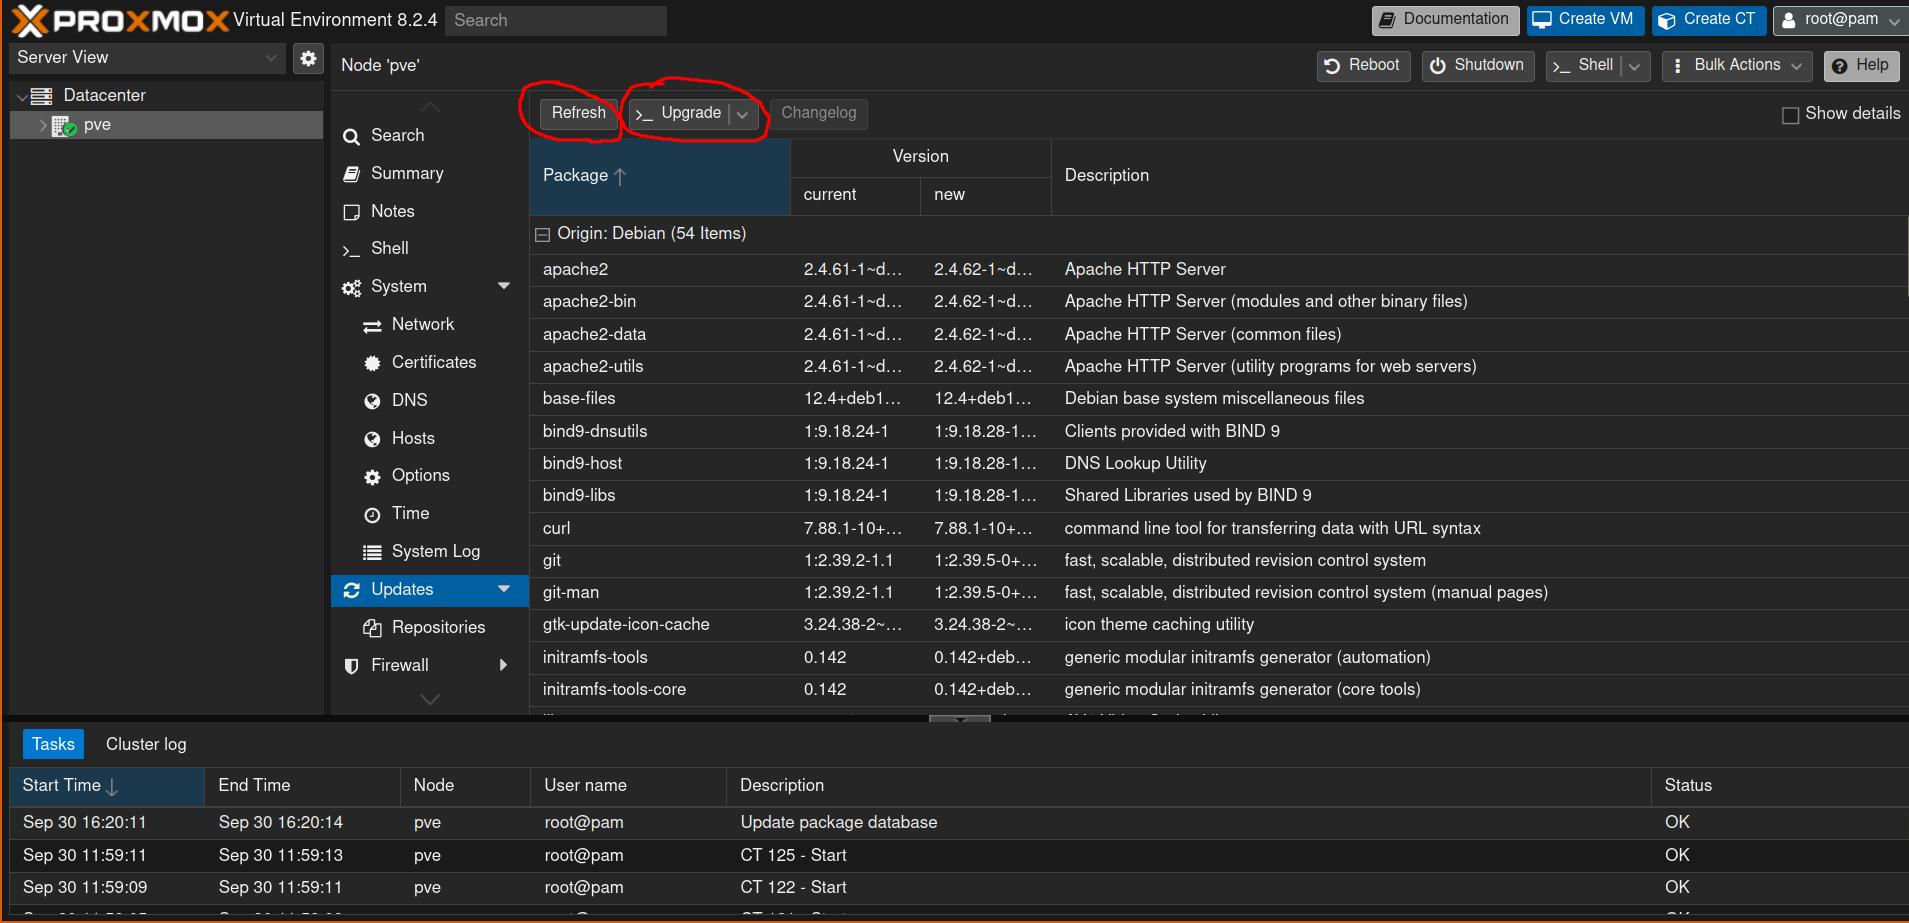
After you have enabled the community repository, you can update Proxmox by navigating to: machine (pve) -> Updates -> press refresh & press upgrade.
6.2.2 Creating ZFS-Pool
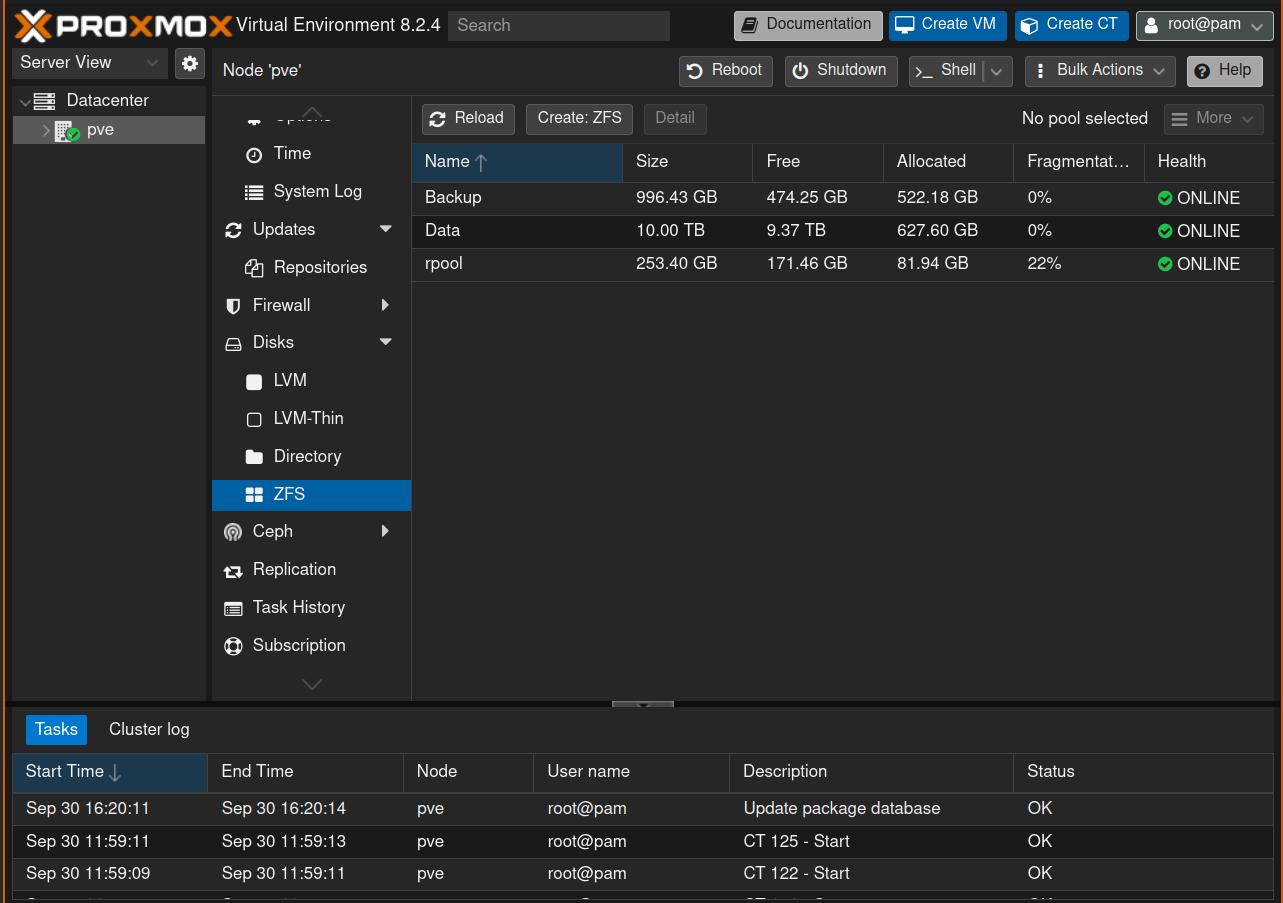
Next, we want to create a ZFS pool for the four remaining disks (the two external ones and the two hard drives). To do this, navigate to: machine (pve) -> Disks -> ZFS -> Create ZFS. For the RAID level, select Mirror, and leave compression set to on. This will slightly reduce performance, but you’ll save disk space. Do this once for the external drives and name the pool backups, then repeat this for the hard drives and name the pool data.
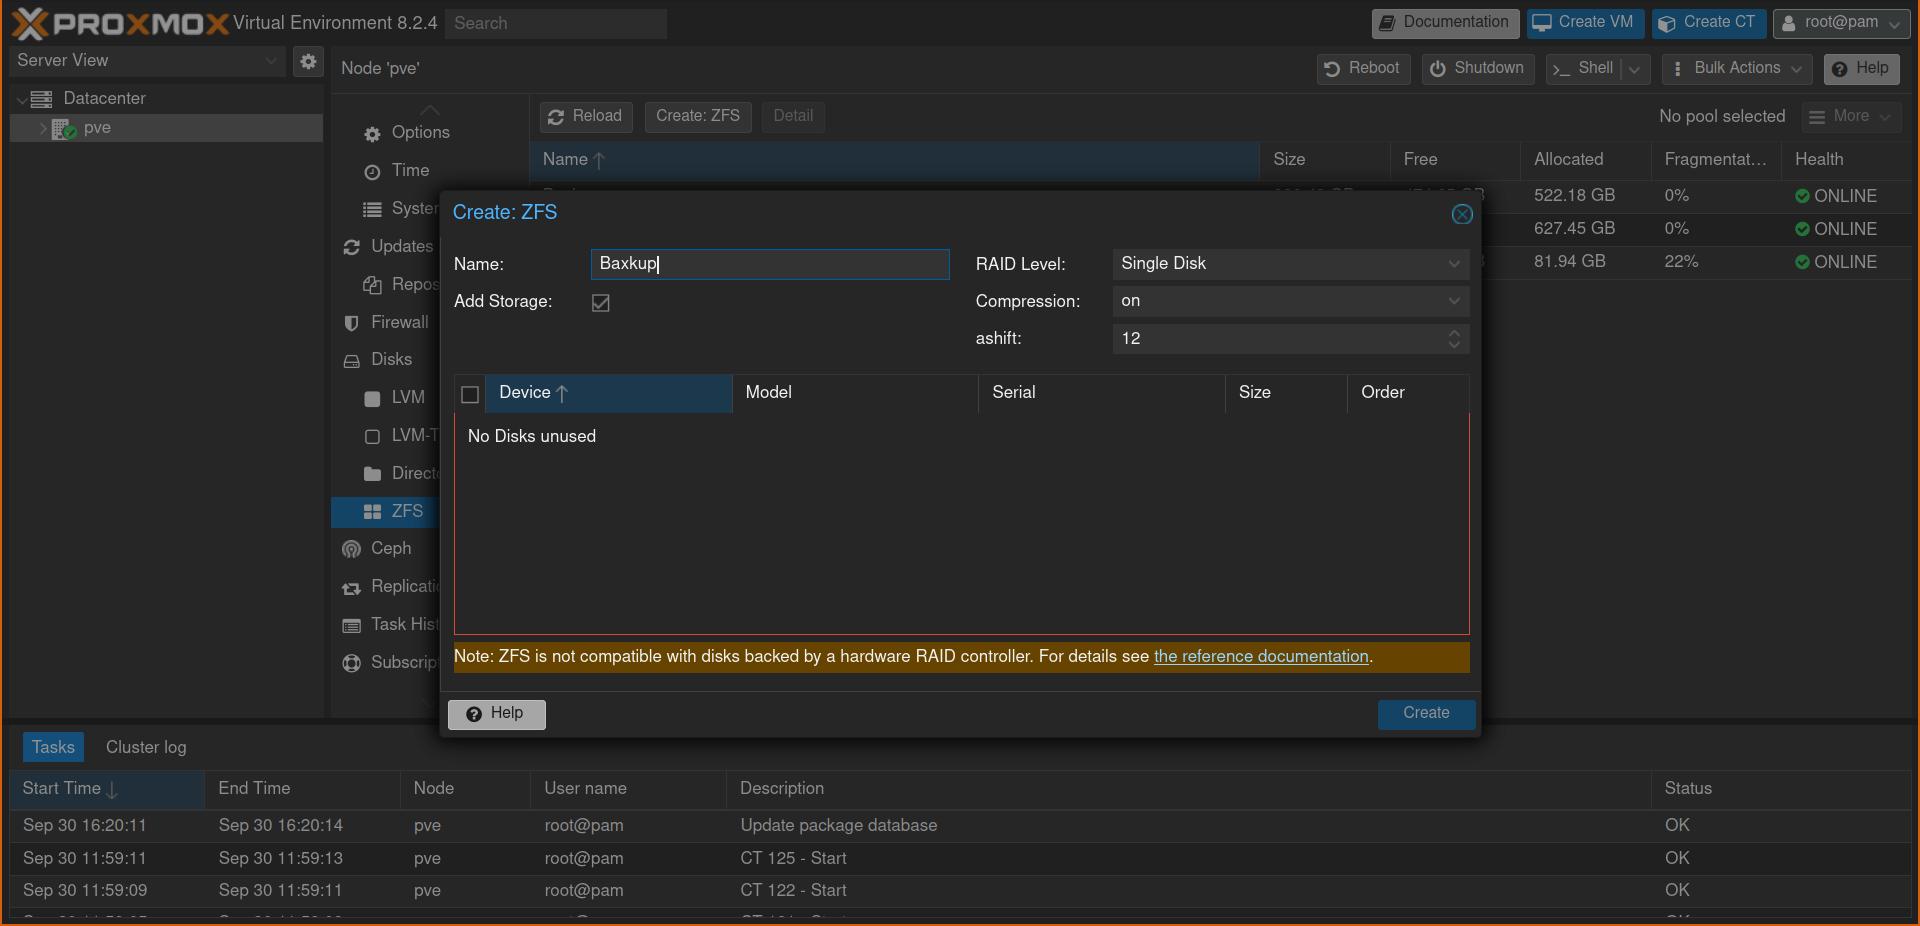
If you are finished, this should look like this:
6.2.3 Check Disks S.M.A.R.T Settings
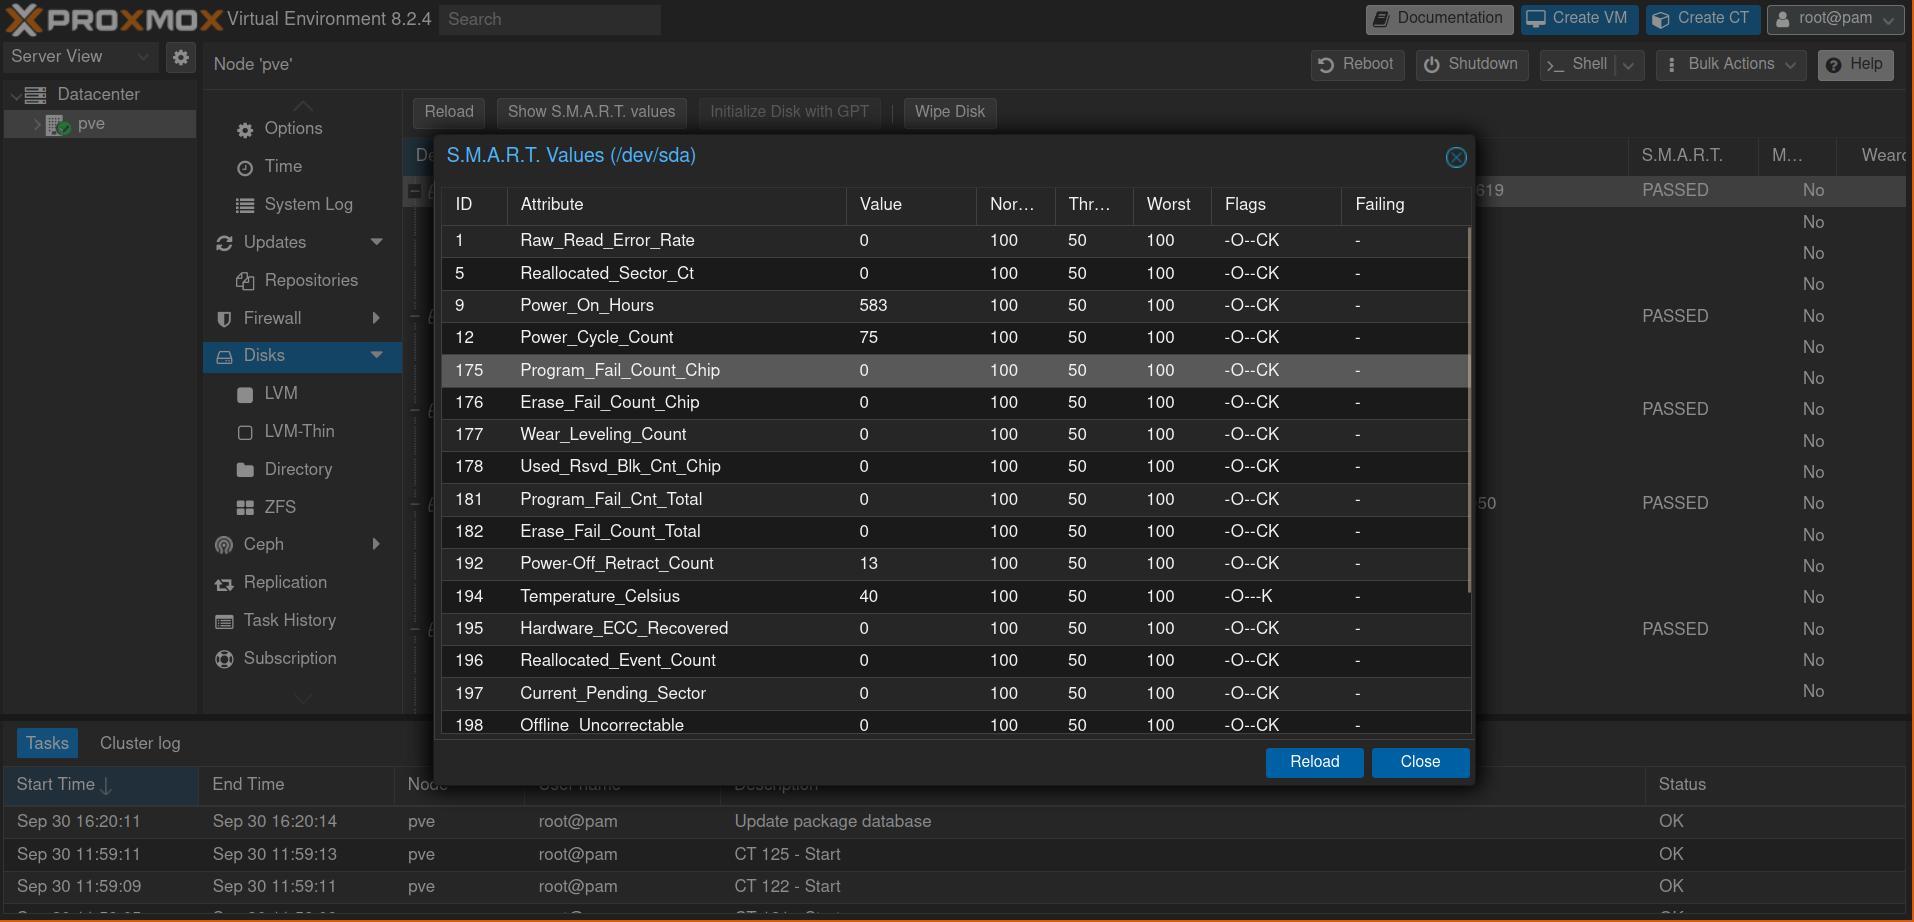
Next, we want to check if S.M.A.R.T. monitoring is enabled and functioning. S.M.A.R.T. is a vital monitoring service that performs checks to detect the health of HDDs and SSDs, which is crucial when running a server, as disk failures can happen easily through the constant disk usage. Navigate to: machine (pve) -> Disks you can then select the disks and press the Show S.M.A.R.T values button. This should similar to this:
6.2.4 IOMMU
If you plan to use a graphics card or other PCIe devices inside your containers and VMs, you’ll need to enable IOMMU. This can be done in your computer’s BIOS. The exact steps vary depending on the manufacturer, so I won’t provide further details here. Later, when this is really important I will say more to this.
7. Creating Our Data Vault with OpenMediaVault NAS
I wanted one central service to manage all the data on my disks. Typically, you’d use an external NAS in addition to your server, which helps with redundancy—if the server fails, your data is still safe on another device. However, since I’m as poor as a church mouse, I need to combine the server and NAS into one system.
To achieve this, I’ll use a VM running the Openmediavault operating system. It provides a nice graphical interface for managing permissions and shared folders. Initially, I considered using software like Cockpit to create NFS shares instead of a full NAS operating system, but I ultimately decided that using a full VM as a NAS would make the process easier.
7.1 Openmediavault: Installation
The first step is to download the OpenMediaVault ISO to your computer. After that, you can upload it to the server by navigating to: local -> ISO Images -> Upload.
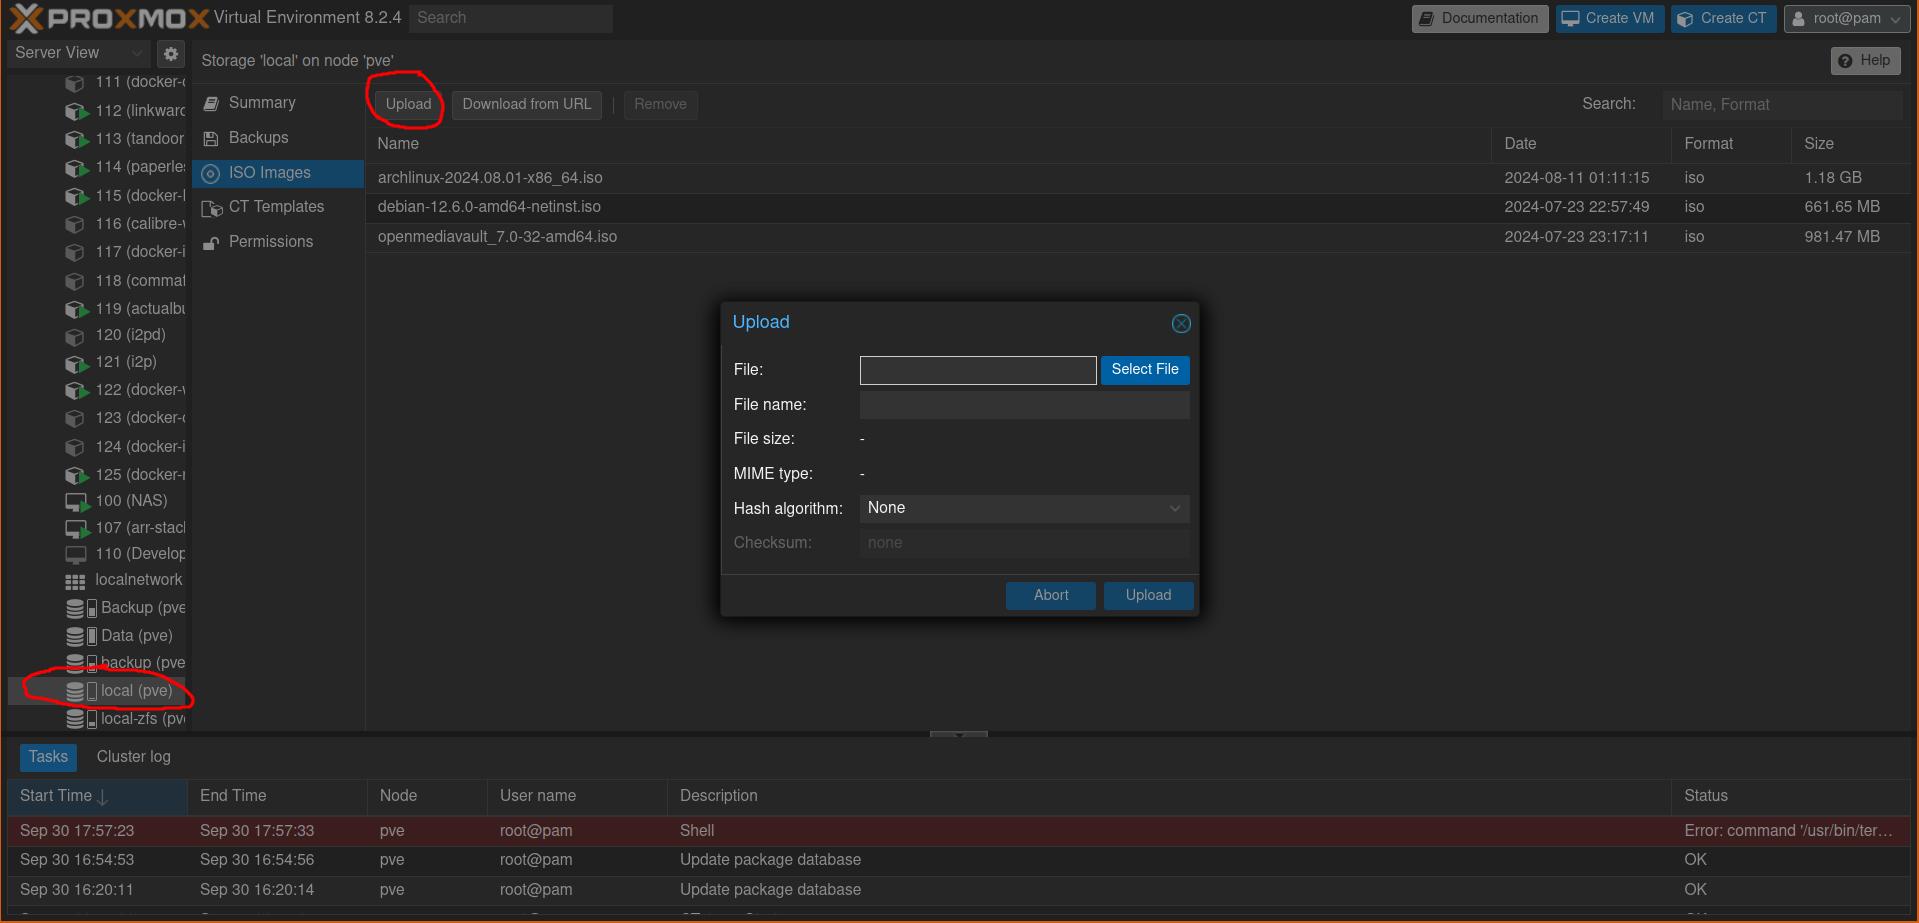
After this you can press the big blue button with the text Create VM in the top right to create a virtual machine. For the storage choose local we want the VM to run on the SSDs, choose openmediavault as ISO image, for the hardware 1 core with 6GB RAM and 32GB disk space should be enough.
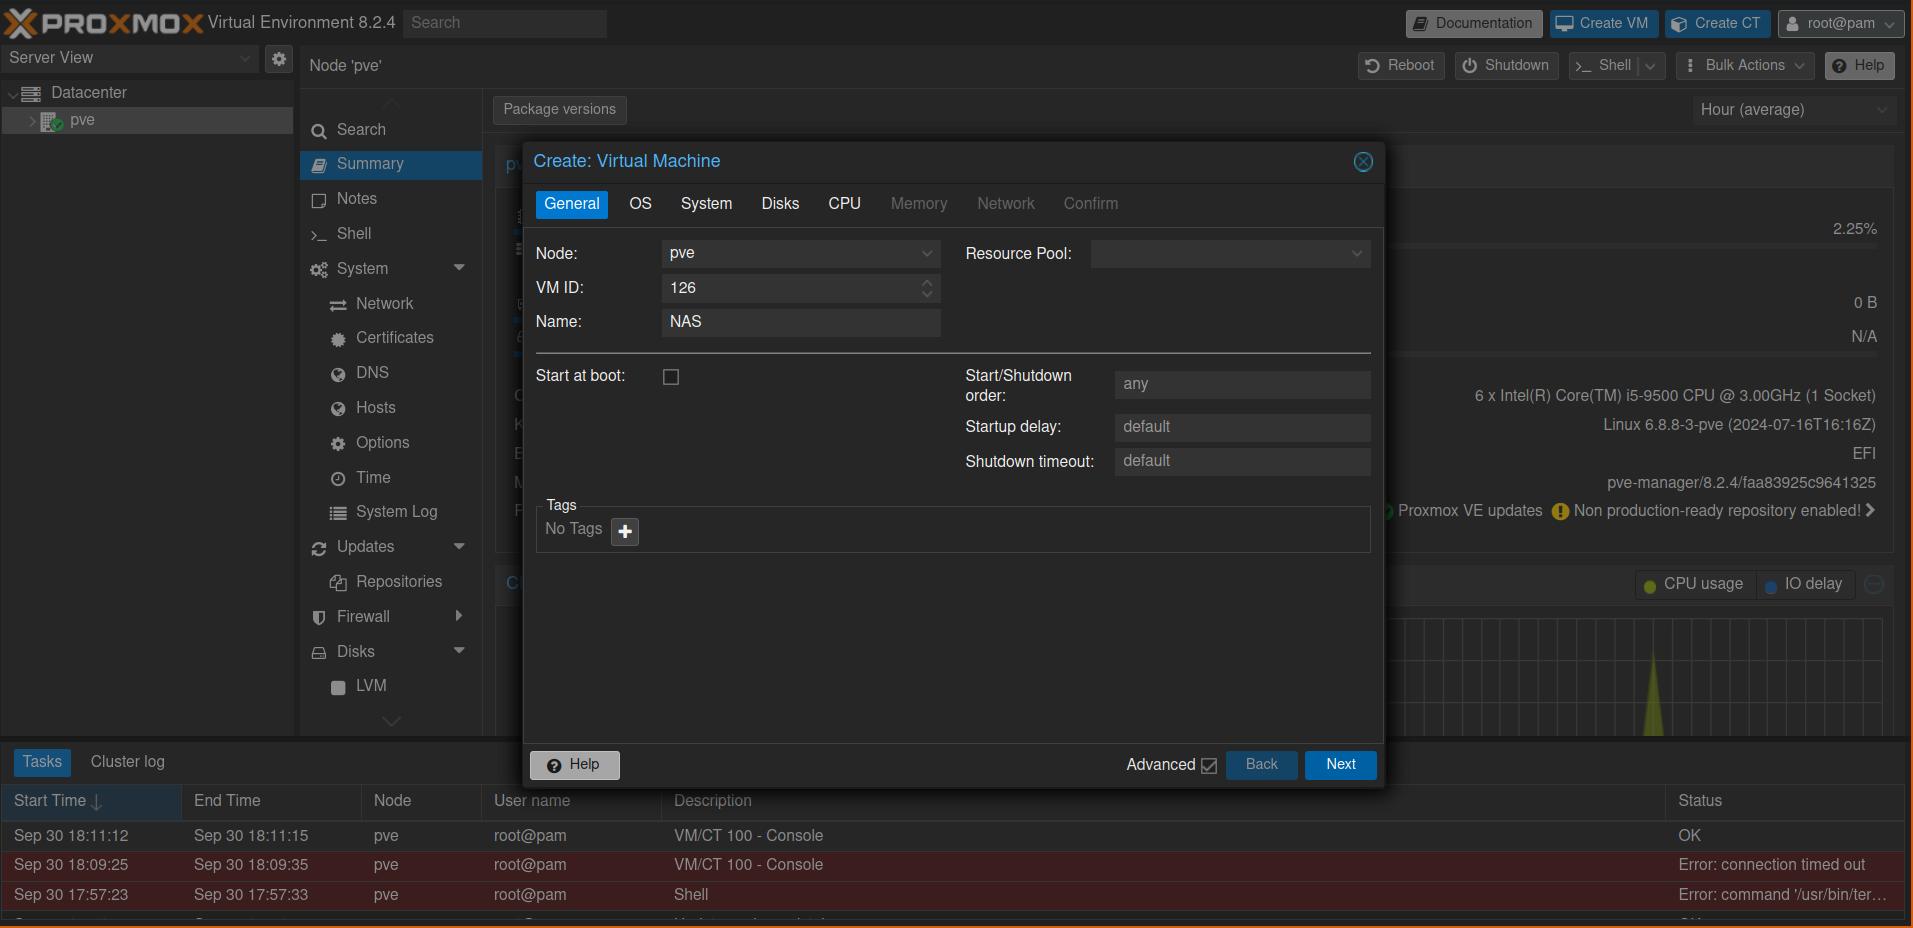
In the Proxmox sidebar, you can now double-click on the NAS, which will open a new browser window, allowing you to access the NAS interface. You should be able to see the IP address in the terminal. Alternatively, you can copy the IP address and use proper remote access software to connect to the NAS. The default login name when connecting via ssh is root.
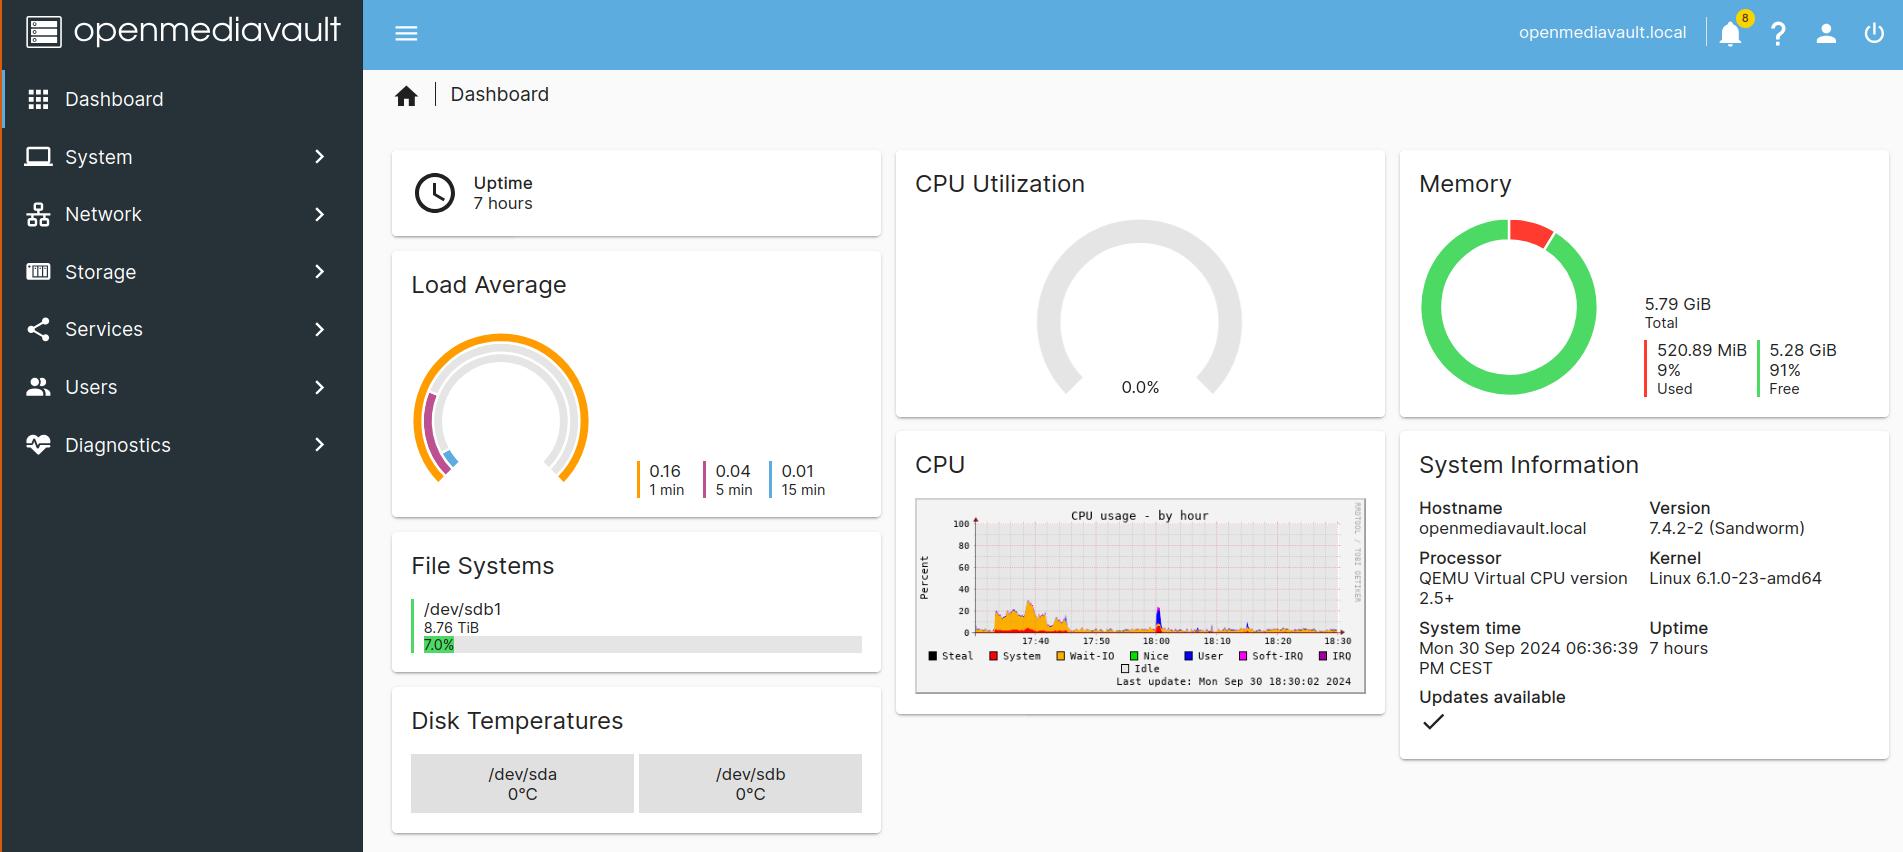
OpenMediaVault (OMV) should now be available as a web service. This means you can open your browser and enter http://<nas-ip-address>, where you’ll be greeted by a login screen. The default login credentials are admin as the username and openmediavault as the password. After logging in, you should see the OMV dashboard (your version might look slightly different).
7.2 Openmediavault: Post-Installation Steps
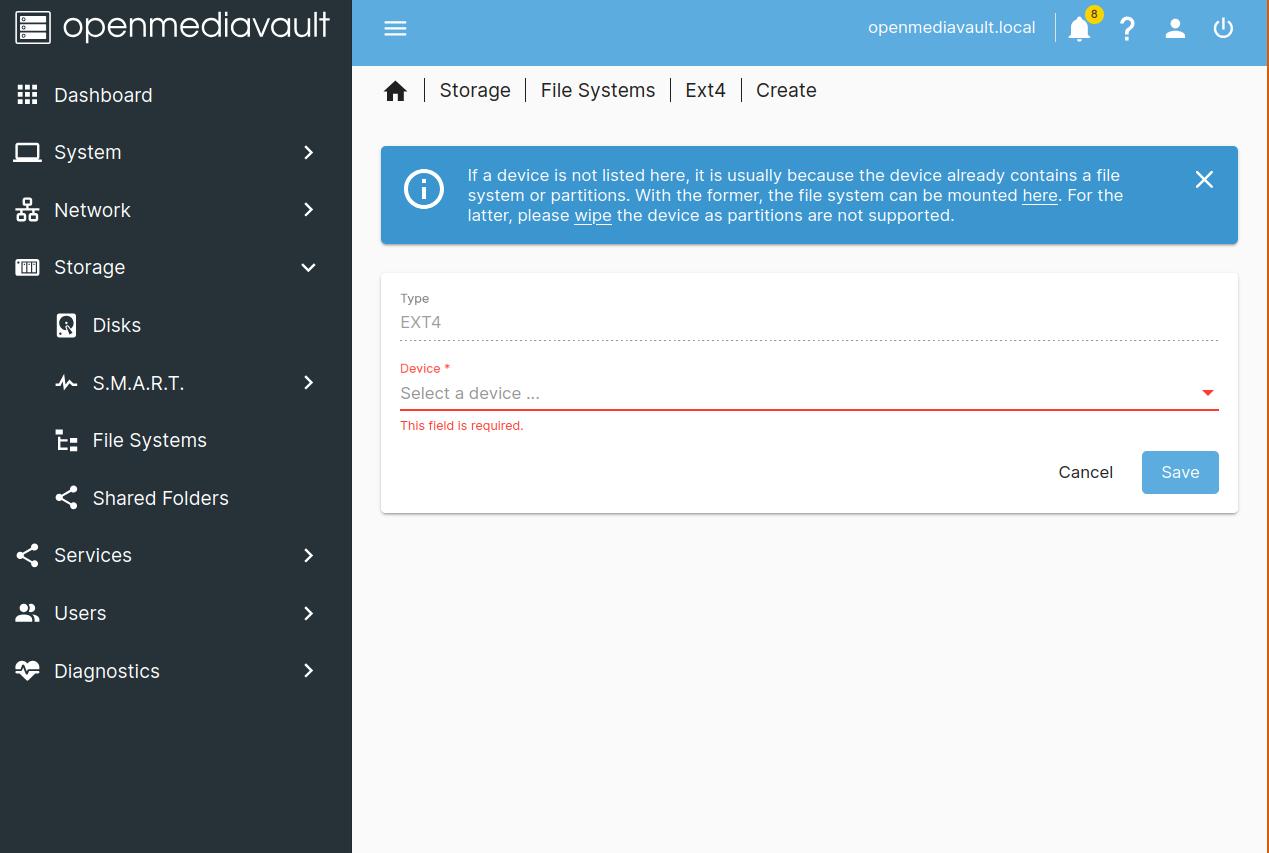
The first thing you should do is change the default password. Click on the person icon in the top right corner and select Change Password. Next, we want to create a filesystem that we can later use for all our data. Navigate to: Storage -> File System -> Create. Since we are already using ZFS for the underlying disks, be sure to choose ext4 as the file system. You can mount the file system by pressing the play button while having selected the new file system.
Next, we want to create a user who will be able to access the data on the file system over the network. To do this, navigate to Users -> Create.
Once you’ve created the user, we can finally set up a shared folder, which will allow access to its data as long as you are connected to the network. Go to: Storage -> Shared Folders -> Create, give it a name, and select the new file system.
After creating the shared folder, you need to grant your newly created user permissions to access it. Select your shared folder and click on Permissions, where you can assign read or read-and-write access to users.
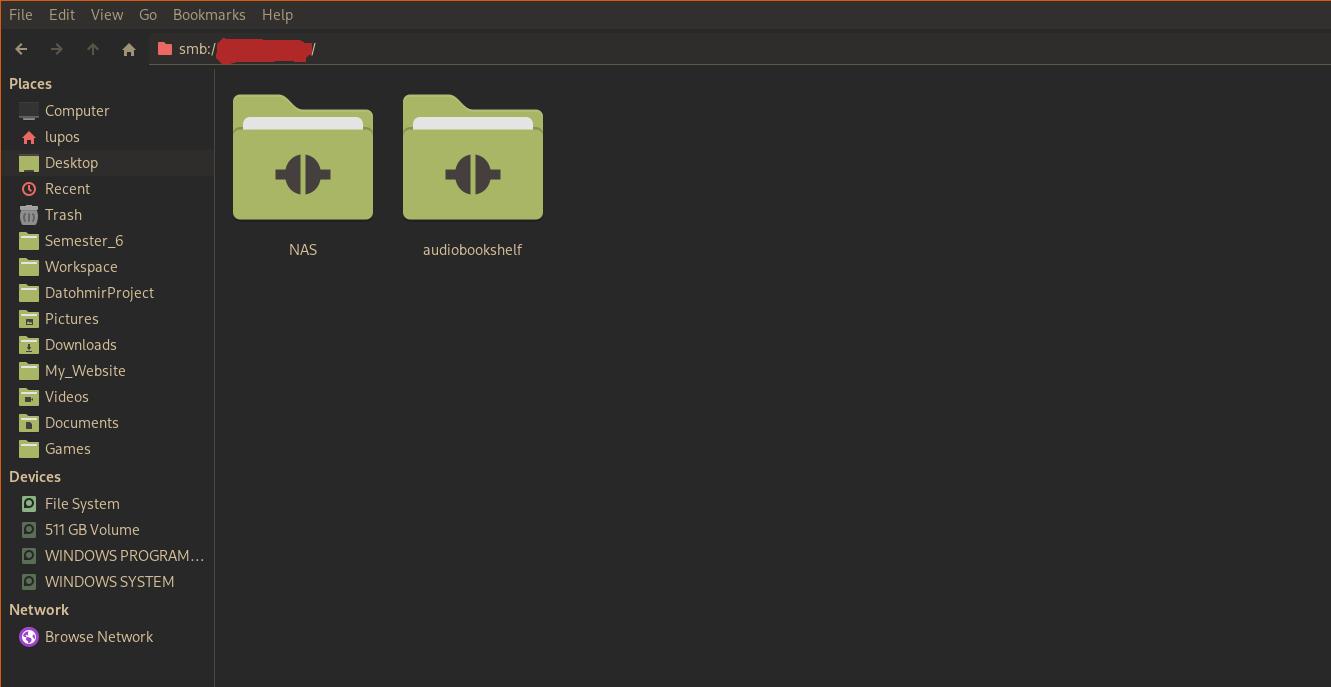
In the end, we need to enable the SAMBA service and add our shared folder to it, to make it accessible. For this navigate to: Service -> SMB -> Settings -> Enable and then Services -> SMB -> Shares -> Create select your previous created shared folder. Make sure to save the changes in OMV.
You should now be able to connect to your shared folder via your file manager both in linux and windows.
8. Simplifying Your URLs with Nginx Proxy Manager
Nginx Proxy Manager is, as you might have guessed from the name, a proxy manager. A proxy manager is essentially a central routing service through which all requests to access a service must pass. This setup enhances security and simplifies access to those services. If you’d like to learn more about proxy managers, you can check out a previous article of mine on the Caddy Proxy Manager. In this article, however, I’ll focus on how I installed Nginx Proxy Manager.
8.1 Nginx Proxy Manager: Installation
For the installation, I used the Proxmox Helper Scripts by tteck. I installed the service on the SSD ZFS dataset. To install Nginx Proxy Manager, simply copy the helper command from the website and paste it into the terminal of your Proxmox machine (pve). You’ll then be greeted by the tteck installation script, which will guide you through the installation process.
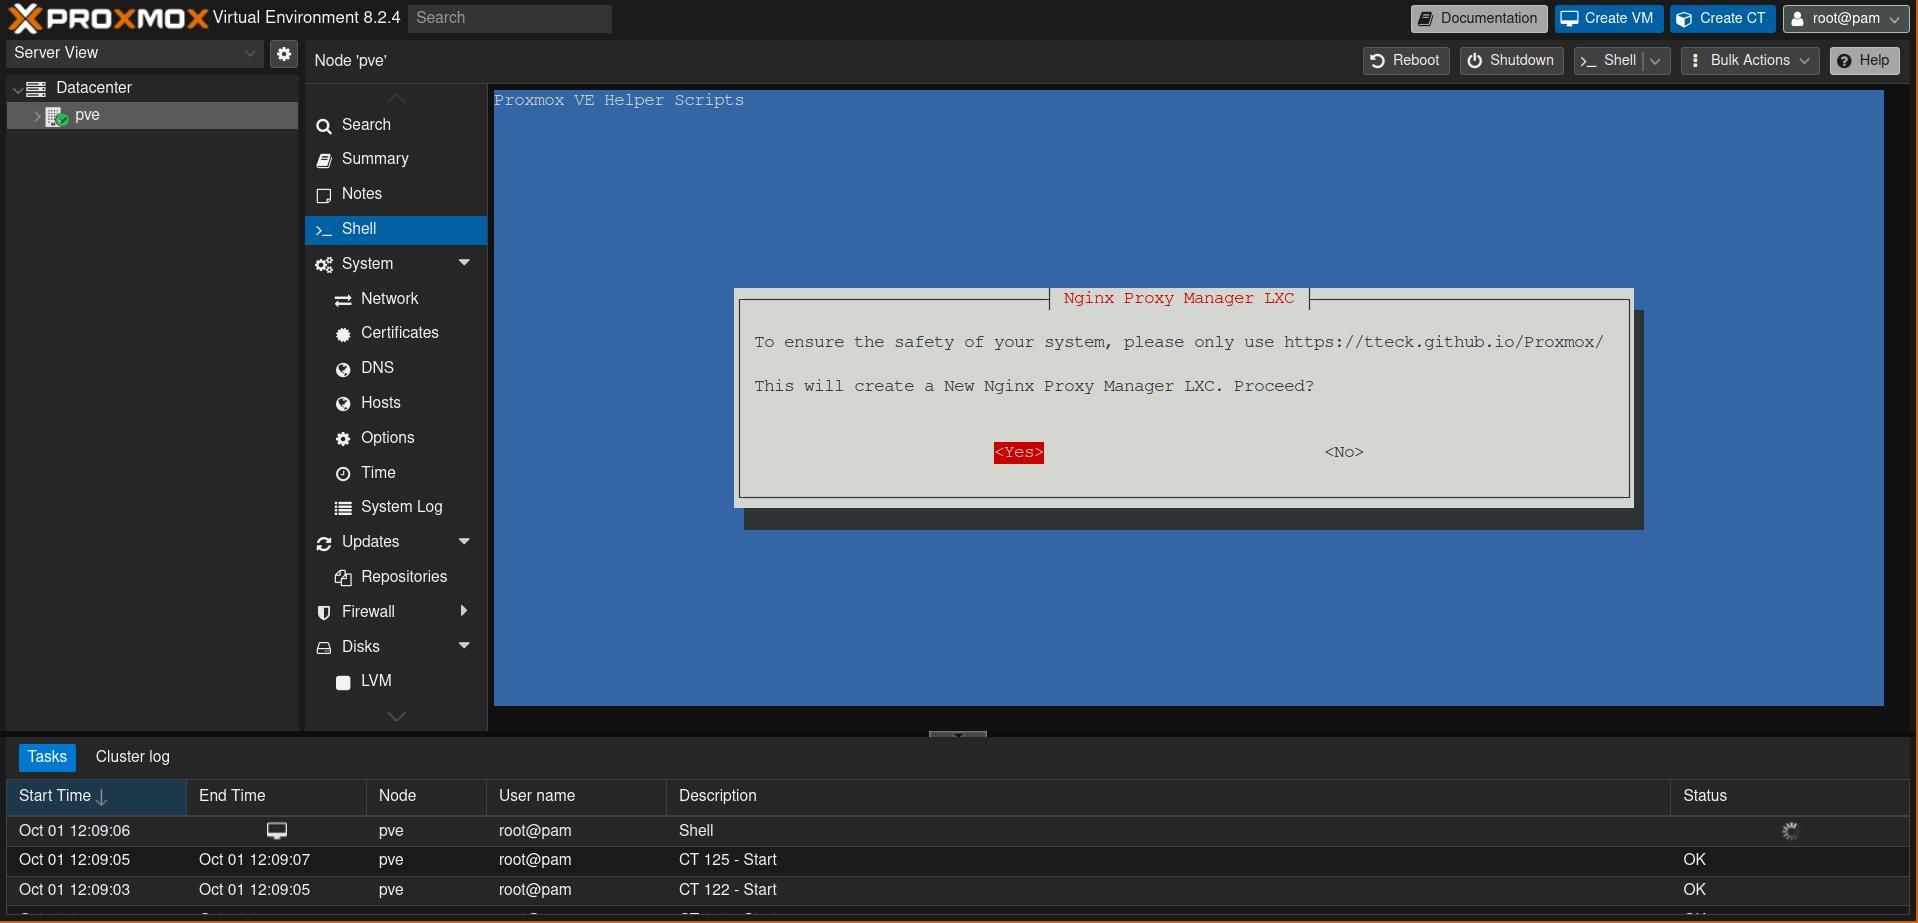
Once the installation process is complete, you should see a new container under your Proxmox machine (pve) in the sidebar. You can click on it to view its details. In the top-right corner, you’ll find options to start or shut down the container. Under the Options tab, you can enable the container to start automatically if you wish.
Similar to the OpenMediaVault virtual machine, you can double-click the new Nginx container to connect to it. In the container’s shell, use the command hostname -I to view its IP address. Once you have the IP, you can connect to the Nginx web service by visiting http://<your_ip>/admin. The default login is admin@example.com, with the password changeme. As the name suggests, make sure to change both the email and password in the Nginx settings.
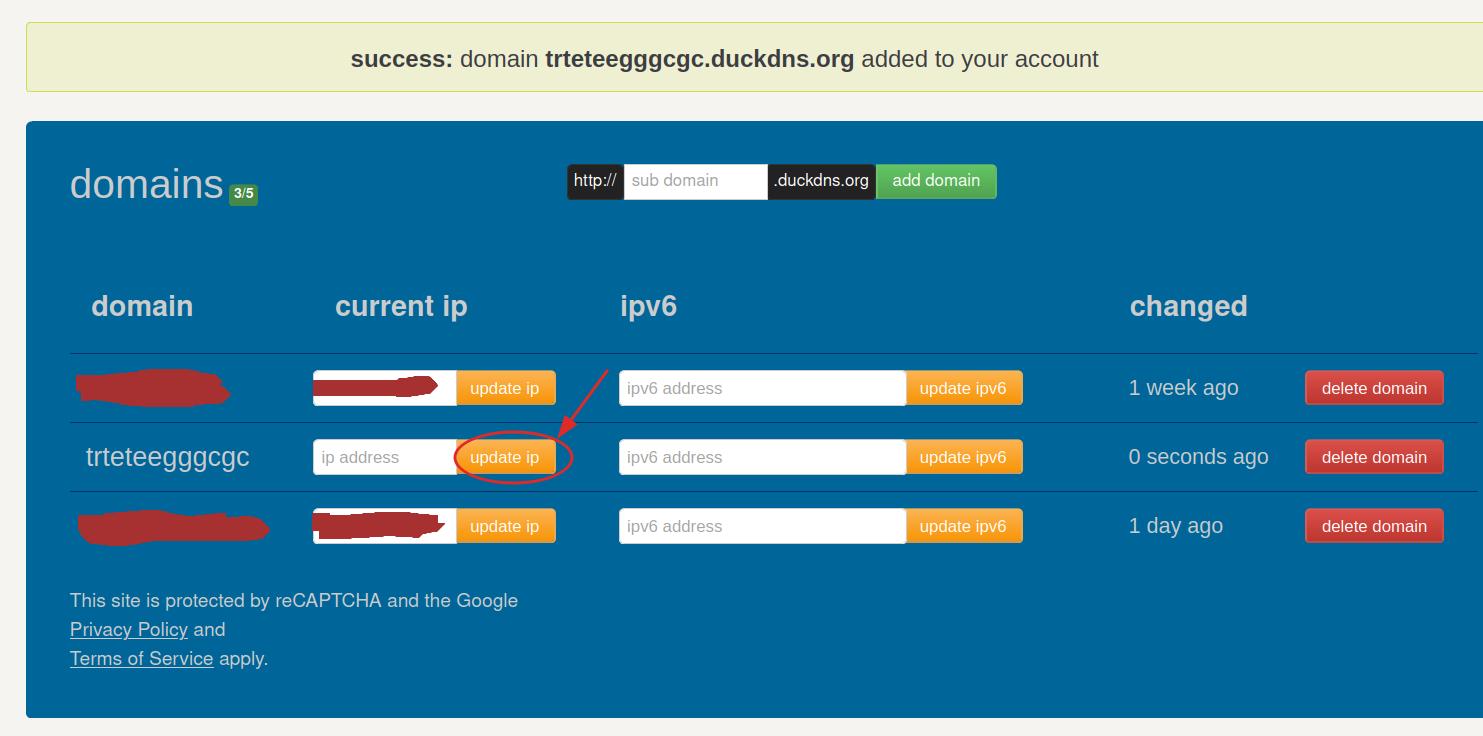
You can use DuckDns to make your service accessible via a domain name like myverycoolserver.duckdns.org. However, to use this with Nginx Proxy Manager, you first need to install its dependencies. You can do this by accessing the container’s shell and typing: pip install certbot_dns_duckdns.
At this point, you have two options:
- You can make your services (currently just Nginx, but later we’ll install more) accessible from anywhere on the internet.
- You can restrict access to your services so they are only available on your local network.
I chose the second option. Making your services accessible over the internet can be risky, as it allows attackers to potentially infiltrate your home network. I recommend doing this only if you’re confident in securing your setup.
To proceed with the second option, go to DuckDns (although you can also use a purchased domain or another free domain name service, but for this guide, I’ll use DuckDns). Once logged in, create a new domain by entering a name in the subdomains field.
After creating the domain, it will point to your external IP address. Since we only want to access the service on the local network, you’ll need to change this to the local IP address of your Nginx Proxy Manager. This is the same IP you used to access Nginx through your browser. For example, my local IP address follows the format 192.168.xxx.xxx, but this may vary for you.
We can now make Proxmox and Nginx Proxy Manager accessible through your newly created domain. If you want your service to be accessible via https (instead of just http), you can use Let’s Encrypt, which provides free certificates for your domain using ACME challenges. Fortunately, Nginx can handle this automatically.
Go to the Nginx web interface and navigate to SSL Certificates -> Add SSL Certificate. Choose Let’s Encrypt, and for the domain name, enter two entries: <your_domain> and *.<your_domain> from DuckDns. The * in front of your domain is called a wildcard and allows you to secure subdomains like proxmox.<your_domain>, which is very useful for all the services we will add here later on.
Activate the slider for the DNS challenge, select DuckDns as the provider, and enter your DuckDns token (you can find it under your email address when logged into DuckDns). After this, press save. It may take some time for the certificate to fully propagate, so if there’s a delay, you can edit the SSL certificate and increase the propagation time.
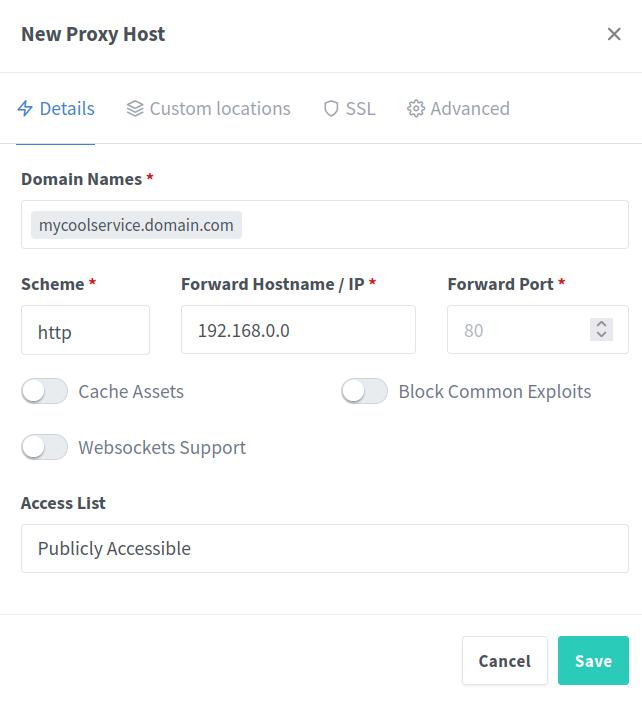
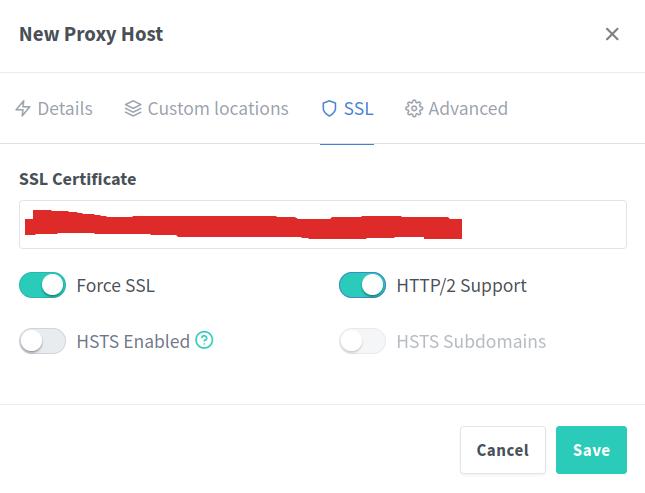
Now, let’s add your first proxy. Go to Hosts -> Proxy Hosts -> Add Proxy Host. Enter the domain name you want for your service. For Nginx, I recommend using just your domain name, and for Proxmox, use something like prox.<your_domain>. Don’t forget to select the SSL certificate you created earlier, I also recommend to enable Force SSL and HTTP/2 Support.
In principle, you can add all the services you self-host that are accessible via an IP address to Nginx Proxy Manager. This will allow you to access them using a domain name instead of needing to remember the IP address. However, some services may not work right out of the box with the proxy manager and might require additional configurations, such as Home Assistant.
9. Vaultwarden the Password Manager
I’ve also previously written about Vaultwarden in a prior post. To recap, it’s a self-hosted, free, open-source password manager based on the popular Bitwarden software.
Vaultwarden can be easily installed using the Proxmox Helper Scripts by tteck, I recommend isntalling it on the local SSD ZFS dataset. Once installed, you can add it to the list of proxy hosts in Nginx, as shown in the previous section. Just remember, when adding a service to Nginx, you should use the internal IP address (the one you use to access the service, which you can find using the command hostname -I in the container’s shell), not the external IP address.
10. News Aggregation with FreshRSS
Really Simple Syndication (RSS) is a protocol used for news aggregation. Websites can offer an RSS feed that users can subscribe to, allowing newly released information on the feed to be forwarded directly to the user’s RSS client. The content of an RSS feed can vary widely, though most of it is text-based. It can also notify users of new podcast episodes, among other updates. FreshRSS is one of these RSS clients, that is selfhosted free and open source.
Why use RSS?
Nowadays, more and more platforms use automated recommendation systems to suggest new content. Whether it’s social media like Facebook, or even worse, TikTok—where all content is driven by recommendation algorithms—or the news pages on Android phones or Windows machines, the trend is the same.
I believe that, on a large scale, these recommendation systems are unhealthy for society. They are optimized for user retention, which often leads to the promotion of more extreme content. AlmostFridayTv has a great semi-related sketch on this, which I highly recommend.
This is where RSS comes in. It gives people the power to take control back from the algorithm by allowing them to curate their own news feed, free from the influence of any recommendation system.
10.1 Installation FreshRSS
The installation for this setup is a bit more complicated than for Vaultwarden since there isn’t a single script available. However, we can use tteck’s Docker LXC script and then utilize Docker Compose. Just like with Vaultwarden, copy the command from tteck’s page and paste it into the shell of your Proxmox machine (pve). Be sure to use the first link, not the second one, which is based on an Alpine container. When asked whether you want to install additional software, only agree to docker-compose.
Once the installation is complete, a new container should appear in your Proxmox sidebar. It’s a good idea to give it a more specific name, which you can do under DNS -> Hostname. Enter the container’s shell, as we’ll now create a docker-compose file to define the settings for your software. I’ve discussed this process in more detail in my posts My Homelab Part 1: Introduction and My Homelab Part 3: Calibre, if you’d like to learn more.
You can create the docker-compose.yaml file using vi or nano. If you prefer another editor, you can install it using apt-get, for example, apt-get install vim. Once the file is created, add the following content to it:
 1version: "2.4"
 2
 3volumes:
 4  data:
 5  extensions:
 6
 7services:
 8  freshrss:
 9    image: freshrss/freshrss:latest
10    container_name: freshrss
11    hostname: freshrss
12    restart: unless-stopped
13    volumes:
14      - ./rss/data:/var/www/FreshRSS/data
15      - ./rss/extensions:/var/www/FreshRSS/extensions
16    environment:
17      TZ: Europe/Berlin
18      CRON_MIN: '3,33'
19    ports:
20      - "8080:80"
After you’ve created the docker-compose.yaml file, you can run the software using the command:
1docker compose -f docker-compose.yaml up -d
To check the status of the running Docker containers, you can use the command:
1docker ps -a
The output should look similar to this:

As with the previous services, you should be able to connect to the web service using the container’s IP address and port 8080. The URL will look like this: http://<your_ip>:8080. With this setup, you now have a central server for aggregating news and blog posts.
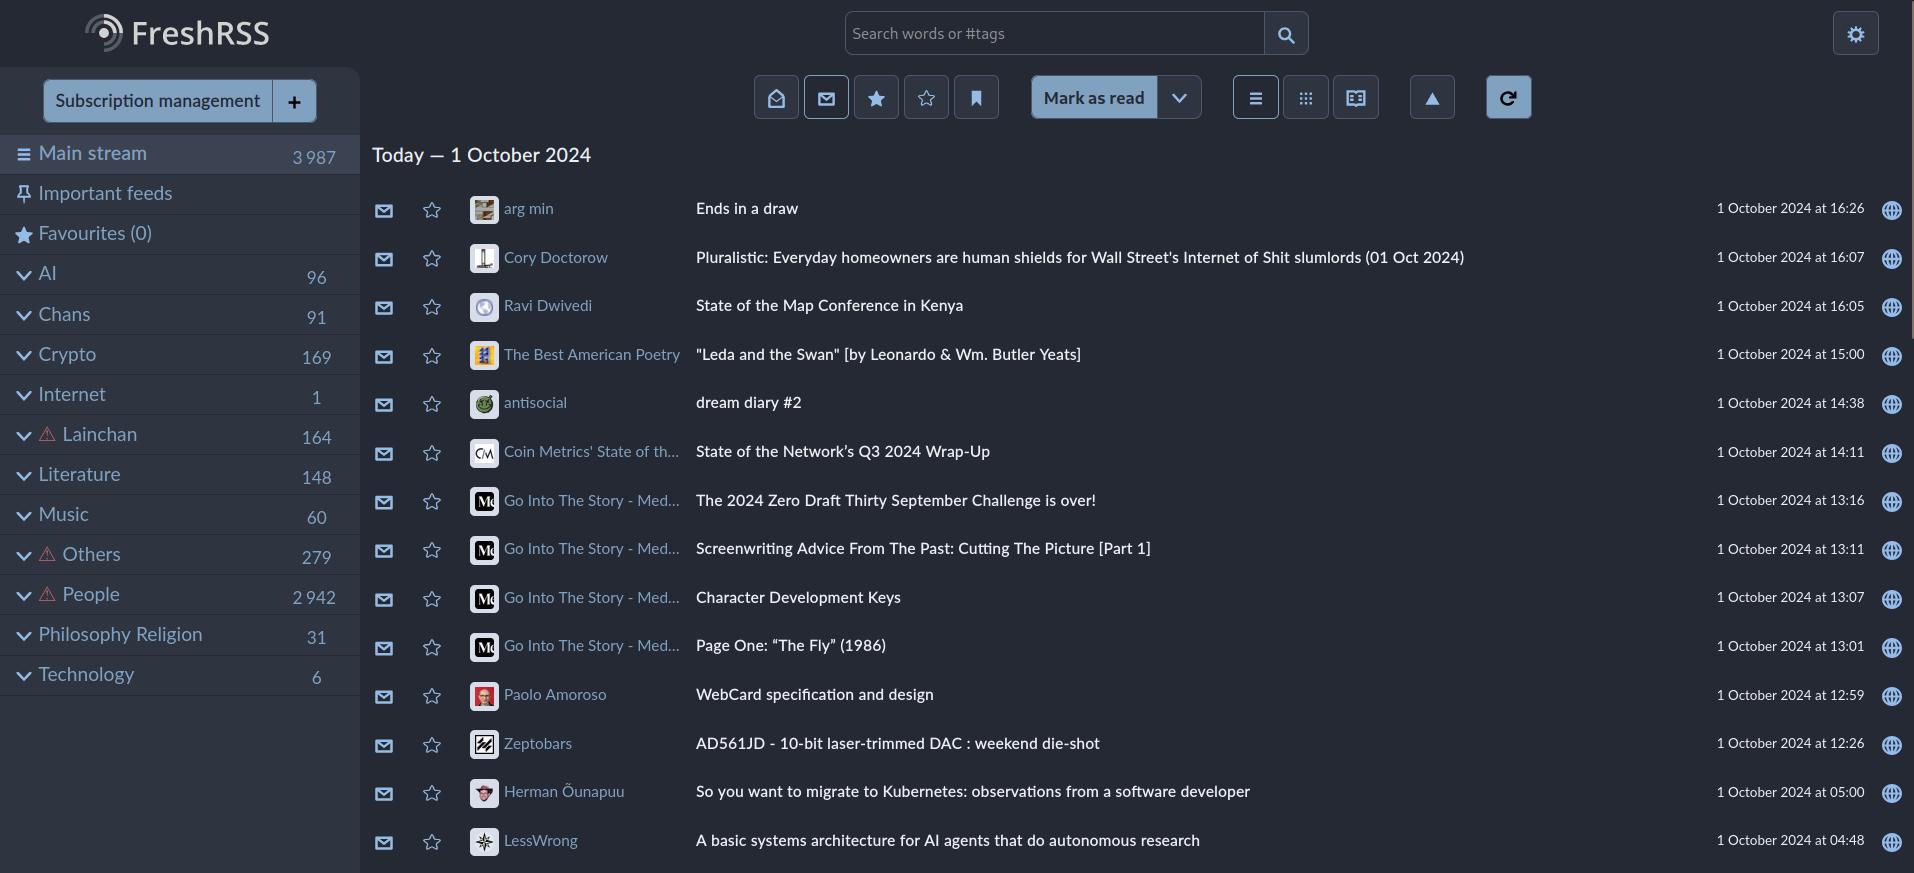
Your site’s appearance can be customized under Settings -> Display -> Theme. Here, you can change the look of your RSS reader. Personally, I prefer the Nord theme, which is also what you can see in the image above.
If you’re behind a reverse proxy like Nginx, you may need to change the base address of FreshRSS. To check this, visit https://<your_domain>/api/. If you receive a warning or see the IP address instead of the domain name, you’ll need to update the base URL.
To do this:
- Shut down FreshRSS by running the command
docker stop freshrss. - Enter the config folder via the container’s shell and look for the
data/config.phpfile. - Open the file and change the base URL to match your domain name.
- Once done, restart FreshRSS with
docker start freshrss.
You can verify if the base URL is set correctly by going to Settings -> System Configuration -> Base URL.
10.2 Third Party Clients
You have now a central website from which you can read blog posts from, but maybe you want to read some of RSS content offline, for that you can use client that synchronizes your read articles and favourites with your server. A full list of compatible clients can be found here. I personally use RSSGuard for my windows laptop and Read You for my phone.

To allow clients to synchronize with your FreshRSS instance, you first need to enable this. Navigate to Settings -> Authentication and check the box for Allow API Access. Then, go to the Profile section in settings and fill in the API password field. This will be the password required to log in from your clients.
To synchronize the Read You app with your server, go to Settings -> Accounts -> Add Account -> FreshRSS. When adding the URL, make sure to append the following suffix: /api/greader.php. For more details, you can refer to this guide.
11. Managing Your Cooking Recipes with Tandoor
Tandoor is a self-hosted, free, open-source recipe manager. It allows you to create recipes, meal plans, and shopping lists, save them on your server, and make them accessible to your entire network.
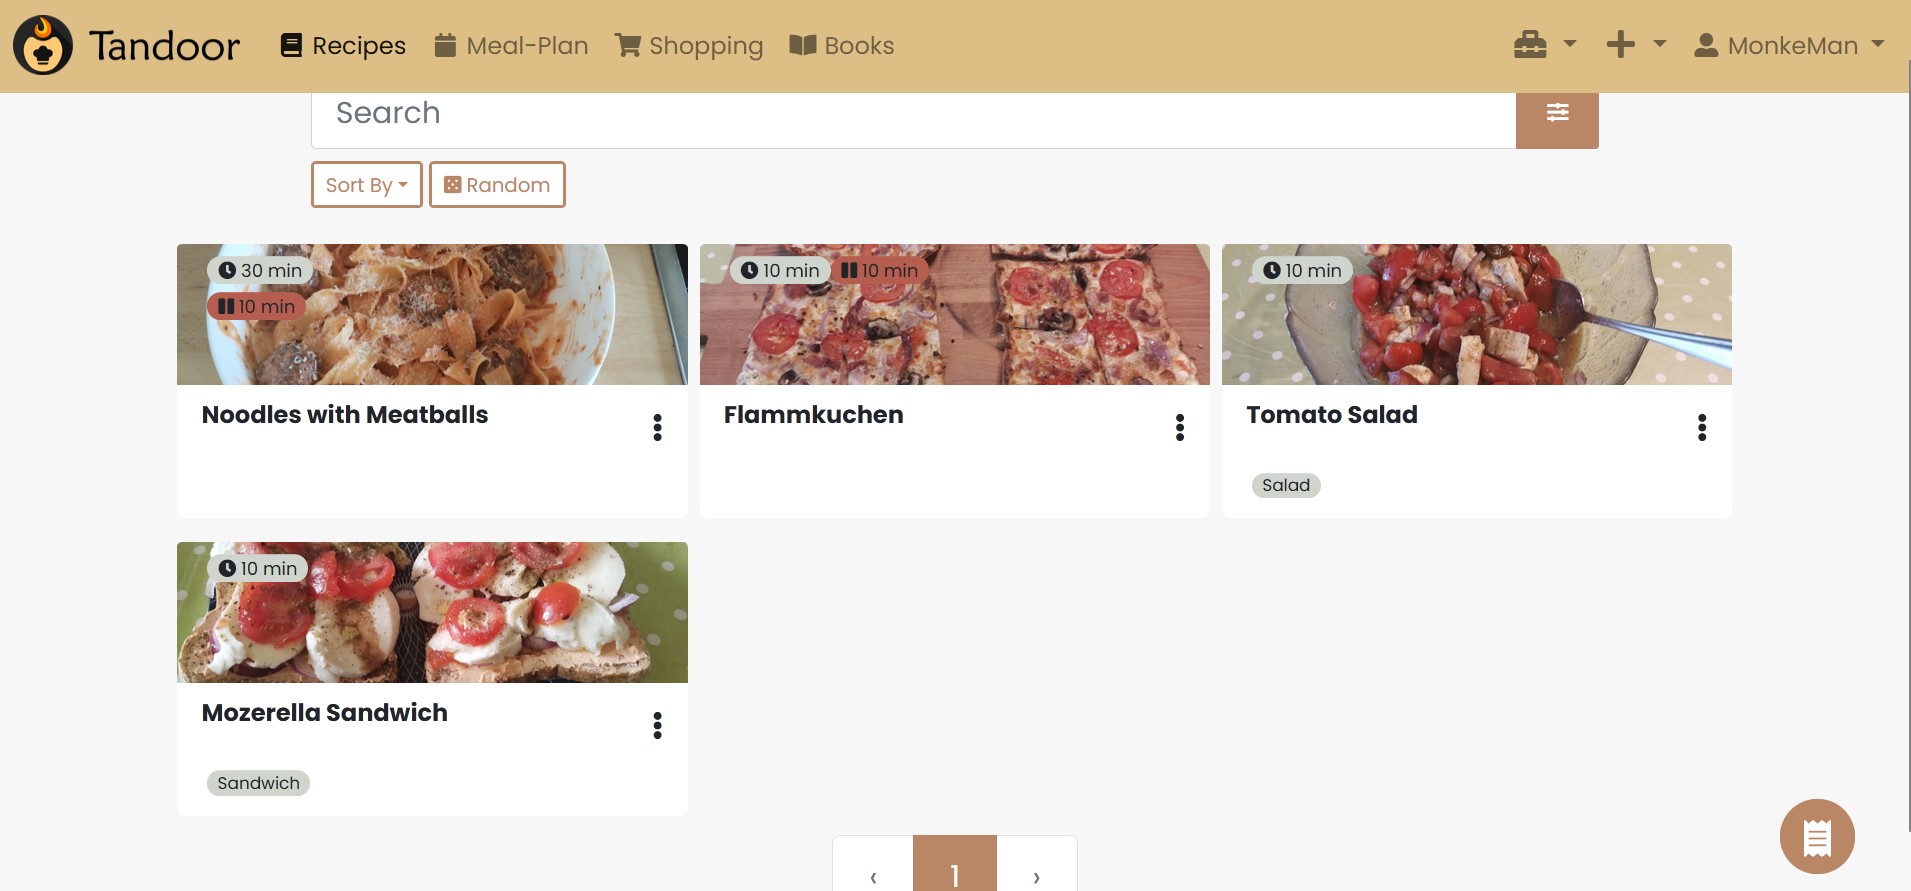
The service is easy to install, thanks to the tteck script. After installation, all you need to do is create a user and a workspace, and then you can start creating recipes.
By default, Tandoor doesn’t come with any ingredients preloaded. You can manually create ingredients for each recipe, or alternatively, you can import pre-existing ingredients. To do this, go to Space Settings -> Open Data Importer, choose the language (en for English), select the items you want, and press Import.
12. Service Dashboard with Homarr
By now, we have a good number of services running. Even though they’re behind a reverse proxy with easily remembered names, as the number of services grows, it might become difficult to remember how to access each one.
This is where Homarr comes in. Homarr is a modern dashboard that centralizes all your services in one place, making it easy to access everything. It’s easily configurable through its web interface and offers many widget integrations with different apps.
There are plenty of other dashboard services out there, such as Dashy, Glance, Homepage, and many more. The exact dashboard you choose is largely a matter of personal preference, as they all function similarly. I chose Homarr because it had a tteck script available, making installation easier.
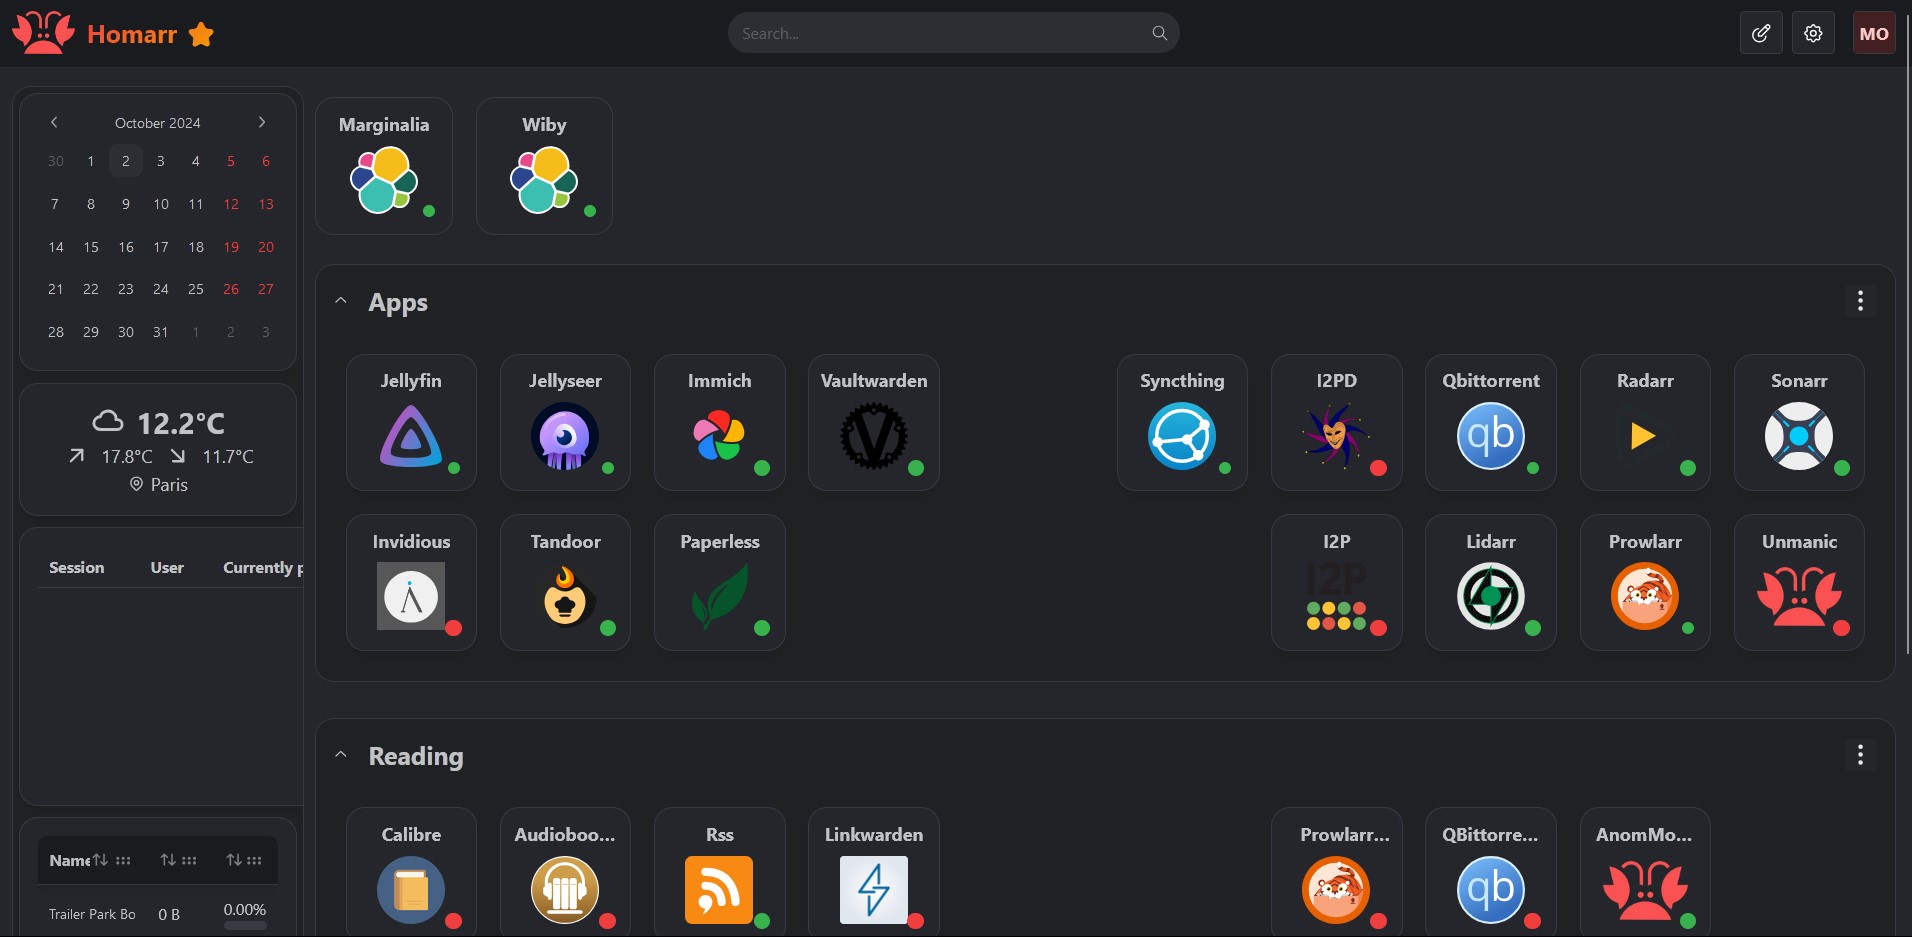
To add a service to Homarr, click on the Edit Mode button in the top-right corner. Once in edit mode, you can add new tiles by clicking the button in the top-right corner again. These tiles can be a service, a widget, or a category, which can be used to group services together.
13. Torrenting All the Media You Want with the Arr-Stack
Torrenting is the act of downloading and uploading files through the BitTorrent network. Instead of downloading from a central server, users download and upload files to each other in a process called peer-to-peer (P2P) file sharing. Each torrent has a .torrent file associated with it, which contains metadata about the files and folders being shared, as well as a list of trackers that help participants find each other.
Torrent Trackers are a special type of server that assist in the communication between peers. They keep track of where file copies reside on peer machines, which ones are available, and help coordinate the transmission and reassembly of the files being shared.
The arr-stack is a suite of software used to manage and automate the torrenting of media, such as movies, TV shows, music, and books. The exact composition of the arr-stack can vary, but my setup includes the following:
- Torrent Client: This is responsible for the actual torrenting process. Popular options include Transmission and qBittorrent.
- VPN: A VPN is crucial to hide your torrenting activity, especially if torrenting is illegal in your country. I use AirVPN, which supports port forwarding—an important feature for torrenting.
- Media Management Tools: These tools help organize and automate media downloading.
- Jellyseerr: A tool for managing media requests, allowing users to request new movies or TV shows for the library.
- Gluetun: A VPN client running inside a Docker container, supporting multiple VPN providers.
I won’t go into too much detail since there are already many excellent guides on the topic, such as:
- Self-host an automated Jellyfin media streaming Stack
- Plex and the *ARR stack
- Docker Compose Arr Stack
As a basic overview, Jellyseerr provides a Netflix-like interface where users can request media (movies or TV shows). These requests are forwarded to Radarr for movies and to Sonarr for TV shows. These tools, in turn, forward the requests to Prowlarr (or Jackett), which searches for torrents and sends them to the torrent client (in my case, qBittorrent, though Transmission is another option). Once the torrent is downloaded, the media becomes available in Jellyfin for consumption.
Everything runs inside a Docker container with Gluetun, which tunnels all network activity from qBittorrent through the VPN. If downloading .torrent files is illegal in your country, you should also route the network activity of Prowlarr, Sonarr, and Radarr through the VPN.

13.1 Installation: Torrenting Stack
The first step is to set up a virtual machine (VM) for the arr-stack. I chose Debian 12 as the operating system, which you can download here. Like we did with the NAS and OpenMediaVault setup, first, download the ISO file and upload it to your Proxmox server.
Once the ISO is uploaded, we can create the VM. Here are the settings that worked well for me:
- 8GB RAM
- 32GB Disk Space (on the SSD, i.e., the local ZFS dataset)
- 2 Processors
Since the local ZFS dataset doesn’t have enough space to store all the movies, we want to save the torrented media on our data ZFS dataset instead. To do this, follow these steps:
Enter the shell of the newly created VM and install cifs-utils to enable the VM to connect to shared folders on your NAS via SAMBA. Run:
1apt install cifs-utilsOn OpenMediaVault, create a new shared folder called
media_rootand share it via SAMBA.On your VM, create a corresponding folder to mount this shared folder:
1cd /mnt/ && mkdir media_rootNow, add an entry to your fstab file to automatically mount the newly created SAMBA directory on your VM. Open the
fstabfile with:1nano /etc/fstabAdd the following entry to the file:
1//<your_nas_ip>/media_root /mnt/media_root cifs _netdev,x-systemd.automount,noatime,uid=1000,gid=1000,dir_mode=0770,file_mode=0770,credentials=/etc/smbcredentialsCreate a new credentials file in the
etcdirectory, in this we will save in plaintext the username and password used to connect to the SMB share:1nano /etc/smbcredentialsThe file shoud be in the following format:
1username=xxxx
2password=xxxx
After creating the credential file, restart your VM:
1rebootOnce your VM is restarted, the
media_rootfolder should be mounted. I recommend setting up your folders by following the Trash folder structure guide.A final note is that the arr-stack depends on OpenMediaVault (OMV) already running, as it uses the Samba drives from OMV. Therefore, you should change the reboot order: set arr-stack to order 2 and OMV to order 1. It’s advisable to add a slight delay to allow OMV some time to set up before other services that depend on it start. You can do this by setting UP to, for example, 60, which means all VMs that come after it will start 60 seconds after OpenMediaVault.
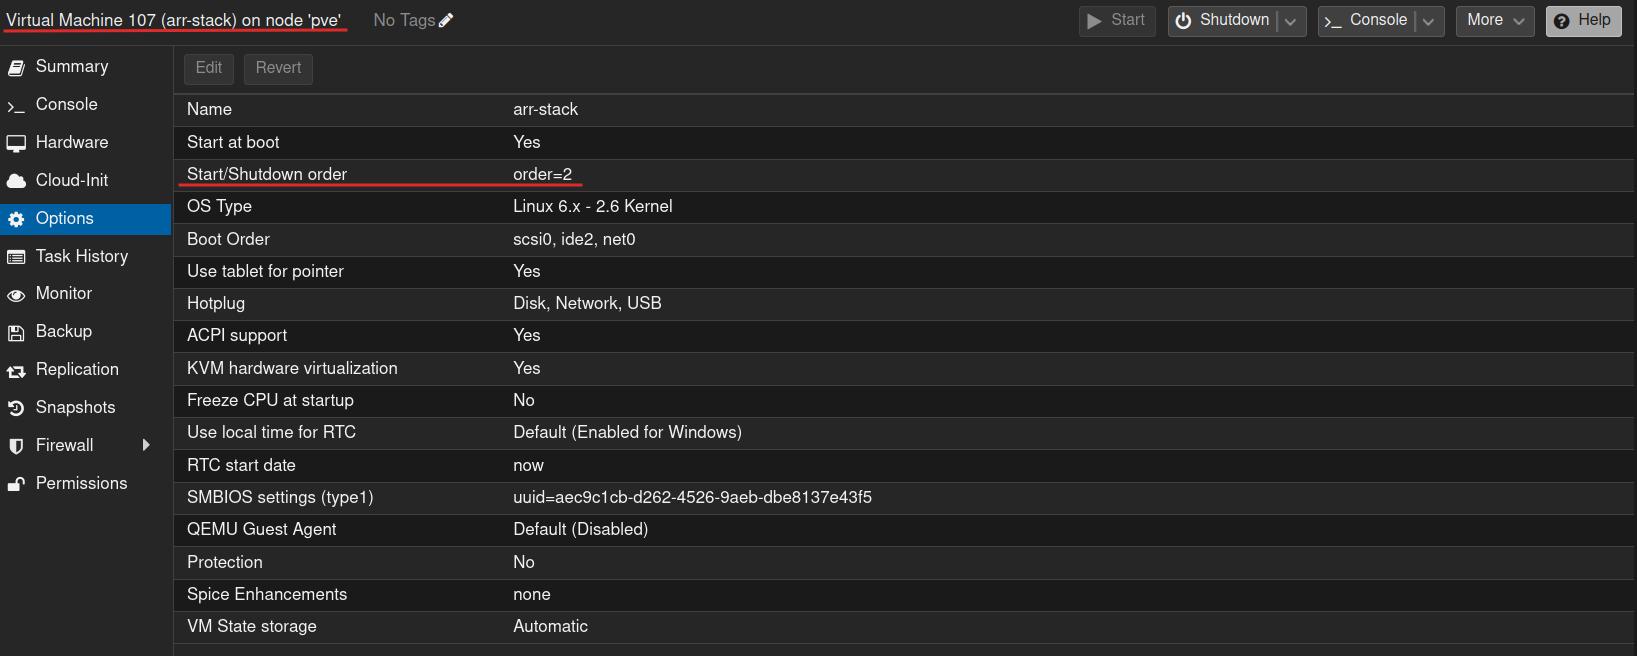
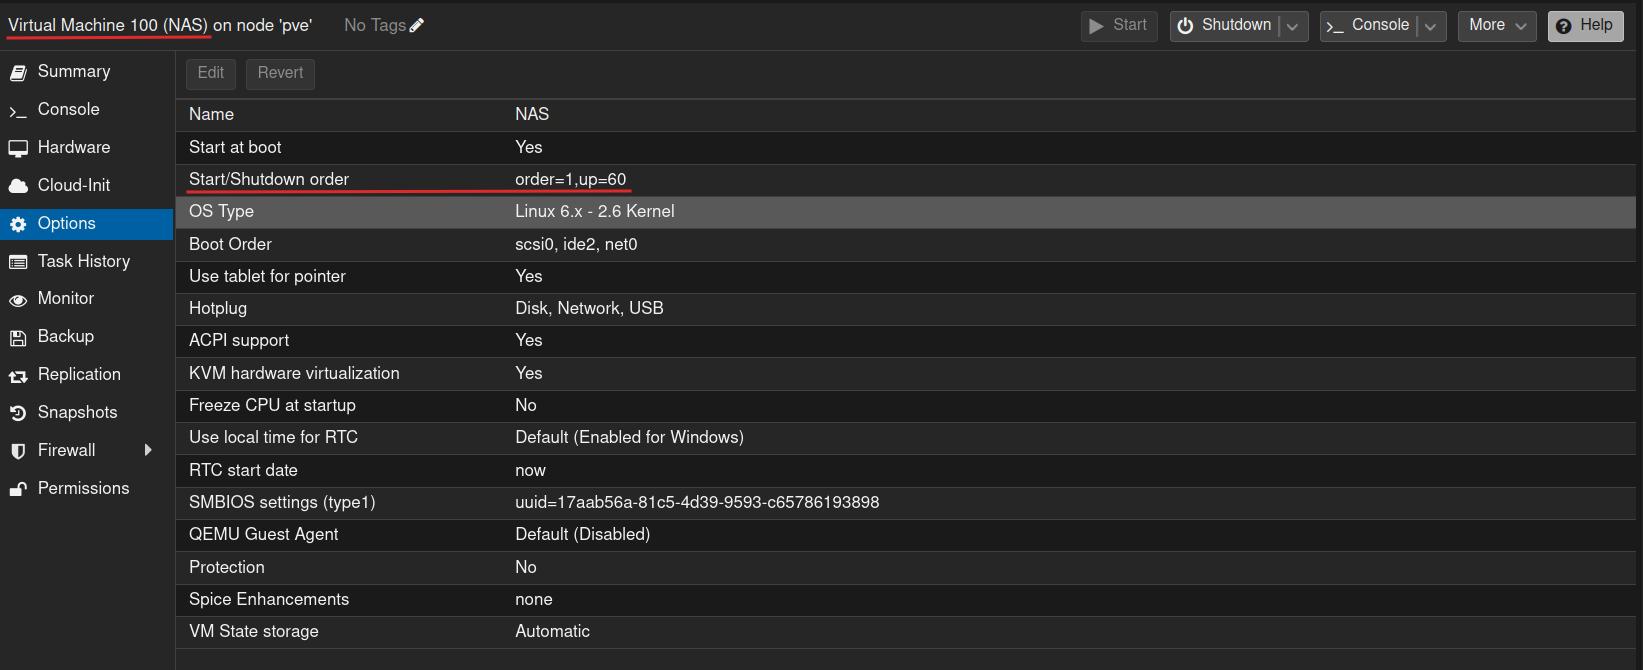
Now, you’re ready to create a Docker Compose file for the arr-stack. Make sure to adjust the VPN settings in the Gluetun service to match your specific VPN provider.
Arr Stack Docker Compose
  1services:
  2  gluetun:
  3    image: qmcgaw/gluetun
  4    container_name: gluetun
  5    cap_add:
  6      - NET_ADMIN
  7    devices:
  8      - /dev/net/tun:/dev/net/tun
  9    ports:
 10      - 8888:8888/tcp # HTTP proxy
 11      - 8388:8388/tcp # Shadowsocks
 12      - 8388:8388/udp # Shadowsocks
 13      - 8085:8085 # qbittorrent
 14      - 6885:6881 # qbittorrent
 15      - 6885:6881/udp # qbittorrent
 16      - 7878:7878 # radarr
 17      - 8989:8989 # sonarr
 18      - 6767:6767 # bazarr
 19      - 8686:8686 # lidarr
 20    volumes:
 21      - ./gluetun:/gluetun
 22    environment:
 23      # See https://github.com/qdm12/gluetun-wiki/tree/main/setup#setup
 24      - VPN_SERVICE_PROVIDER=
 25      - VPN_TYPE=openvpn
 26      - OPENVPN_USER=
 27      - OPENVPN_PASSWORD=
 28      - SERVER_COUNTRIES=Netherlands
 29      # Timezone for accurate log times
 30      - TZ=Europe/Berlin
 31      # Server list updater
 32      # See https://github.com/qdm12/gluetun-wiki/blob/main/setup/servers.md#update-the-vpn-servers-list
 33      - UPDATER_PERIOD=24h
 34
 35    qbittorrent:
 36        image: lscr.io/linuxserver/qbittorrent:latest
 37        container_name: qbittorrent
 38        env_file: arr-stack.env
 39        network_mode: "service:gluetun"
 40        environment:
 41          - WEBUI_PORT=8085
 42        volumes:
 43          - ./qbittorrent/config:/config
 44          - /mnt/media_root/torrents/:/data/torrents/
 45        restart: unless-stopped
 46
 47    radarr:
 48        image: lscr.io/linuxserver/radarr:latest
 49        container_name: radarr
 50        env_file: arr-stack.env
 51        network_mode: "service:gluetun"
 52        volumes:
 53          - ./radarr/config:/config
 54          - /mnt/media_root:/media_root/
 55        restart: unless-stopped
 56
 57    sonarr:
 58        image: lscr.io/linuxserver/sonarr:latest
 59        container_name: sonarr
 60        env_file: arr-stack.env
 61        network_mode: "service:gluetun"
 62        volumes:
 63          - ./sonarr/config:/config
 64          - /mnt/media_root:/media_root/
 65        restart: unless-stopped
 66
 67    lidarr:
 68        image: lscr.io/linuxserver/lidarr:latest
 69        container_name: lidarr
 70        env_file: arr-stack.env
 71        network_mode: "service:gluetun"
 72        volumes:
 73          - ./lidarr/config:/config
 74          - /mnt/media_root:/media_root/
 75        restart: unless-stopped
 76
 77    bazarr:
 78        image: lscr.io/linuxserver/bazarr:latest
 79        container_name: bazarr
 80        env_file: arr-stack.env
 81        volumes:
 82          - ./bazarr/config:/config
 83          - /mnt/media_root:/media_root/
 84        restart: unless-stopped
 85
 86
 87  prowlarr:
 88    image: lscr.io/linuxserver/prowlarr:latest
 89    container_name: prowlarr
 90    env_file: arr-stack.env
 91    ports:
 92      - 9696:9696 # prowlarr
 93    volumes:
 94      - ./prowlarr/config:/config
 95      - /mnt/media_root/torrents/:/data/torrents/
 96    restart: unless-stopped
 97
 98
 99flaresolverr:
100    image: ghcr.io/flaresolverr/flaresolverr:latest
101    container_name: flaresolverr
102    ports:
103      - 8191:8191 # flaresolverr
104    environment:
105      - LOG_LEVEL=info
106    restart: unless-stopped
In addition to the docker-compose.yaml file, you will also need a .env file, which defines some environment-specific settings. Make sure to create this .env file in the same directory as your docker-compose.yaml file.
1# this file is used to set environment variables for all the linuxserver images
2TZ=Europe/Berlin
3
4# set to your own user id and group
5# this is required for filesytem management
6# use: `$ id $(whoami)` in terminal to find out
7PUID=1000
8PGID=1000
It’s important to note that using the user with ID 1000 for the arr-stack setup, which corresponds to the root user (with administrative privileges), carries certain security implications.
You can now create the Docker container for the arr-stack by running:
1docker compose up -f arr-stack-compose.yaml up -d
13.2 Common Issues
Docker Daemon Socket Permission Error: If you encounter the error
permission denied while trying to connect to the docker daemon socket, you can check the permissions of the Docker socket with the command:1ls -l /var/run/docker.sockIf the permissions appear broken, you can fix them with:
1sudo chmod 666 /var/run/docker.sockThis command gives all users read and write permissions to the Docker socket, allowing non-root users to access Docker commands.
File Permissions in
media_root: You need to ensure that your user has access to all directories inside themedia_rootshared folder. This can be done with the following commands:1sudo chown -R $USER:$USER /data 2sudo chmod -R a=,a+rX,u+w,g+w /datachownsets the ownership of/datato your current user.chmodsets appropriate permissions, allowing you to read, write, and execute as necessary.
qBittorrent WebUI Authorization Error: When trying to connect to qBittorrent, you might get an error like
app is unauthorized. If you encounter this issue, refer to this forum article for guidance. Following its steps should resolve the authorization problem.

13.3 Quality Control
Maybe you have already requested some movies using Radarr and have noticed that the files you are downloading are rather large—exceeding your requirements, especially if your storage is limited, like mine.
The first thing you can do when requesting media is to change the quality profile. This will determine the quality of the media you download.
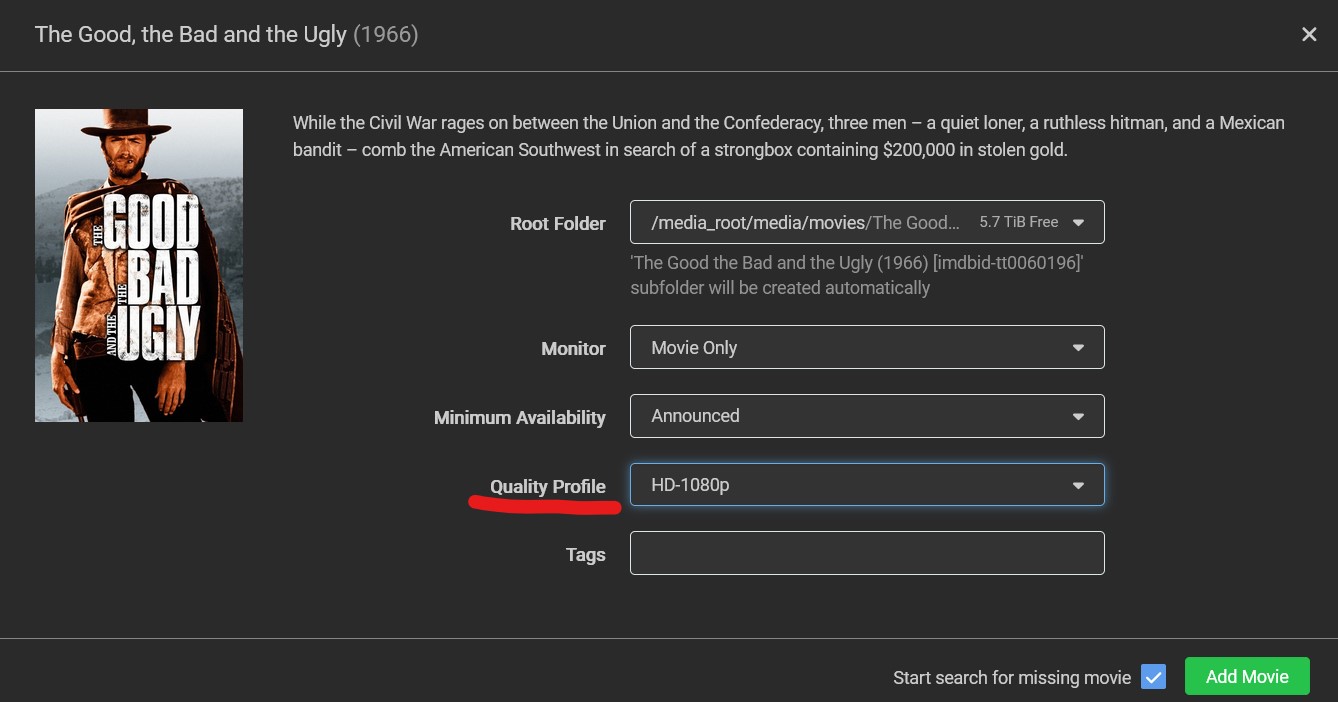
But maybe even after you’ve done this, the file is still too large. For this purpose, you can change what the quality profile means. To do this, navigate to Settings -> Quality -> Quality Definition.
Here you will find quality labels that a media file can have. You can use the slider to set the minimum and maximum size for each file. For example, if the media size is too big, you can decrease the slider.

For a more extensive elaboration on this topic, refer to the Trash Guide.
14. Netflix like Media-Managment with Jellyfin
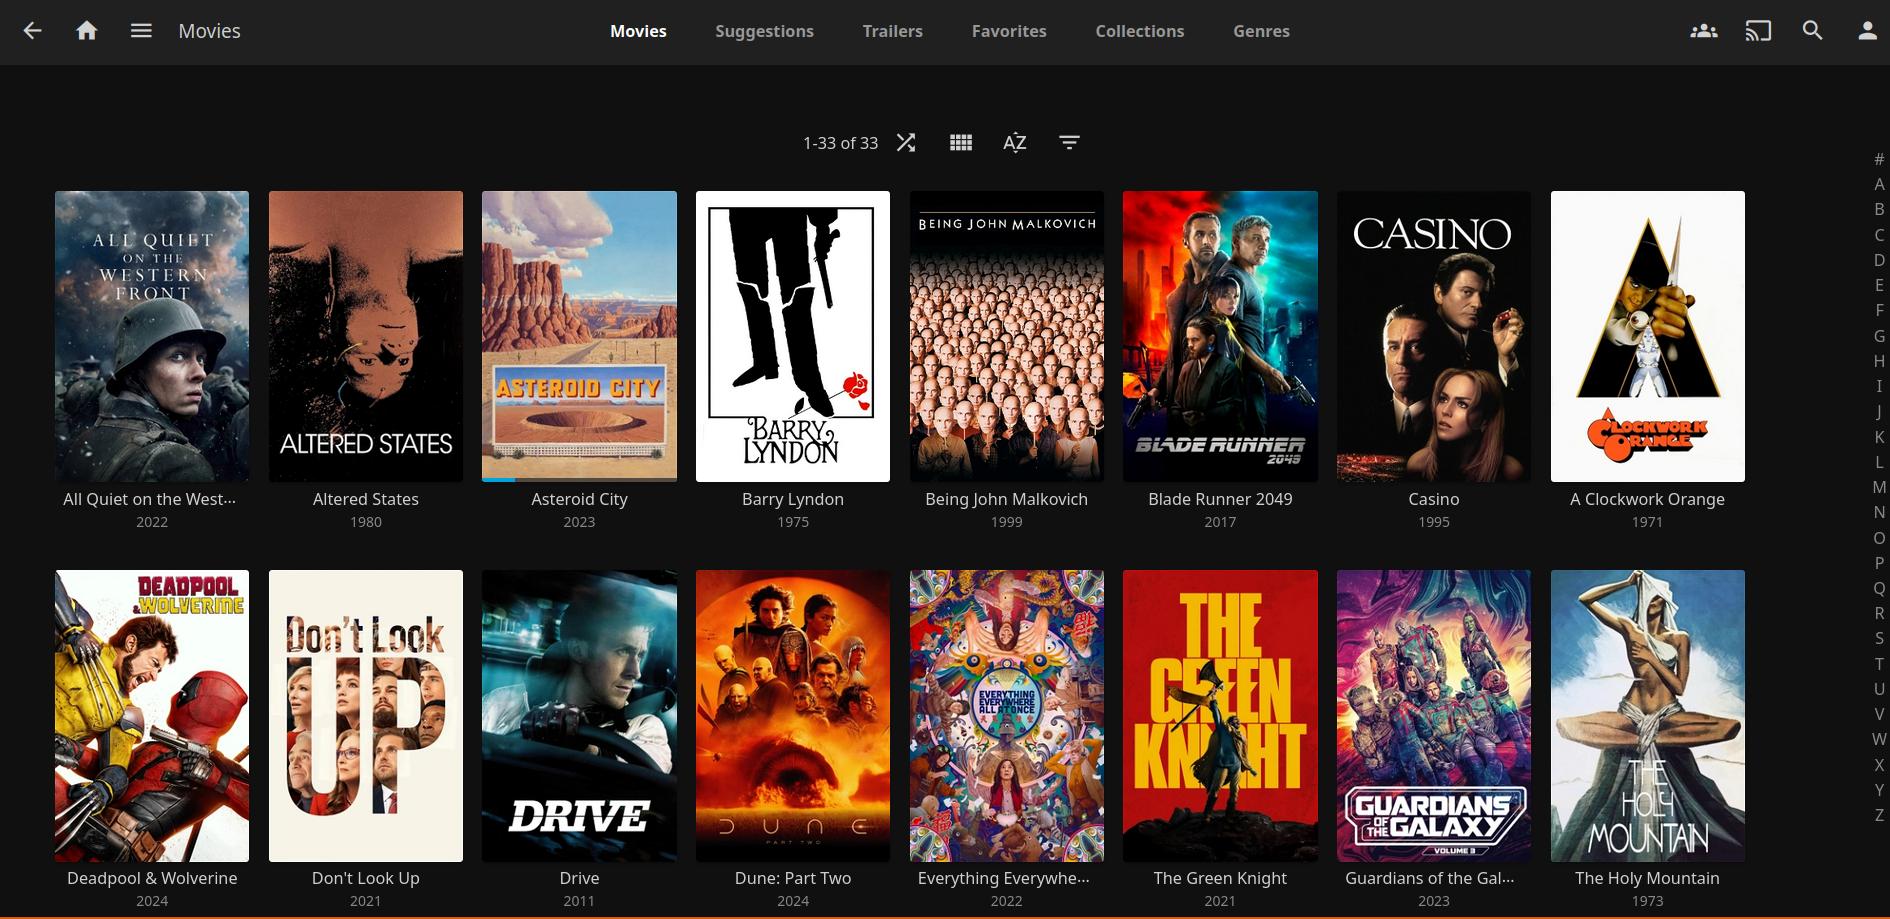
Jellyfin is a free, open-source media server that allows you to manage and stream your media collection, much like Netflix. It organizes and displays all your downloaded media in a user-friendly interface, keeping track of what you’ve watched, your progress, and additional information like cast details, IMDb scores, and more.
Jellyfin integrates smoothly with the arr-stack, which is responsible for the acquisition of media, whereas Jellyfin’s role is to manage and play back the already downloaded content. This way, your entire media management workflow is streamlined: from downloading media through the arr-stack to consuming it through Jellyfin.

14.1 Jellyfin: Installation
Just like with previously installed software like Tandoor or Homarr, we can use a Tteck script to easily install Jellyfin. However, setting up Jellyfin is a bit more complicated than in these two previous cases.
The first thing to note is that an unprivileged container should work, but you may encounter issues with hardware encoding. Personally, I opted for a privileged container because it simplifies the setup process for hardware acceleration and allows for direct mounting of Samba devices.
If you prefer to use an unprivileged container, it is still possible to mount the Samba drive on the host machine (pve) and utilize LXC bind mounts to make it available in Jellyfin. I will demonstrate this technique for other software later in this article. Alternatively, you can check out this forum post for more information.
To set up hardware encoding in Jellyfin, you can follow the official guide. Remember, for this to work, IOMMU must be supported by your CPU and motherboard, and it needs to be enabled.
14.1.1 Enabling IOMMU
To enable IOMMU, we need to edit our boot configuration file:
1nano /etc/default/grub
Change the following line. This only works for Intel graphics cards; if your graphics card is from another manufacturer, you will need to research how to enable IOMMU for that specific card:
1GRUB_CMDLINE_LINUX_DEFAULT="quiet intel_iommu=on"
After this, we can update our GRUB configuration by running:
1update-grub
Next, edit the modules file:
1nano /etc/modules
Add the following modules:
1vfio
2vfio_iommu_type1
3vfio_pci
4vfio_virqfd
After making these changes, reboot the server and run the following command to verify if IOMMU is successfully enabled:
1dmesg | grep -d DMAR -e IOMMU
14.1.2 GPU Configuration
Type the following command into your shell to find your GPU’s address:
1lspci -nnv | grep VGA
Here is an example output:
10:02.0 VGA compatible controller [0300]: Intel Corporation CoffeeLake-S GT2 [UHD Graphics 630] [8086:3e92] (prog-if 00 [VGA controller])
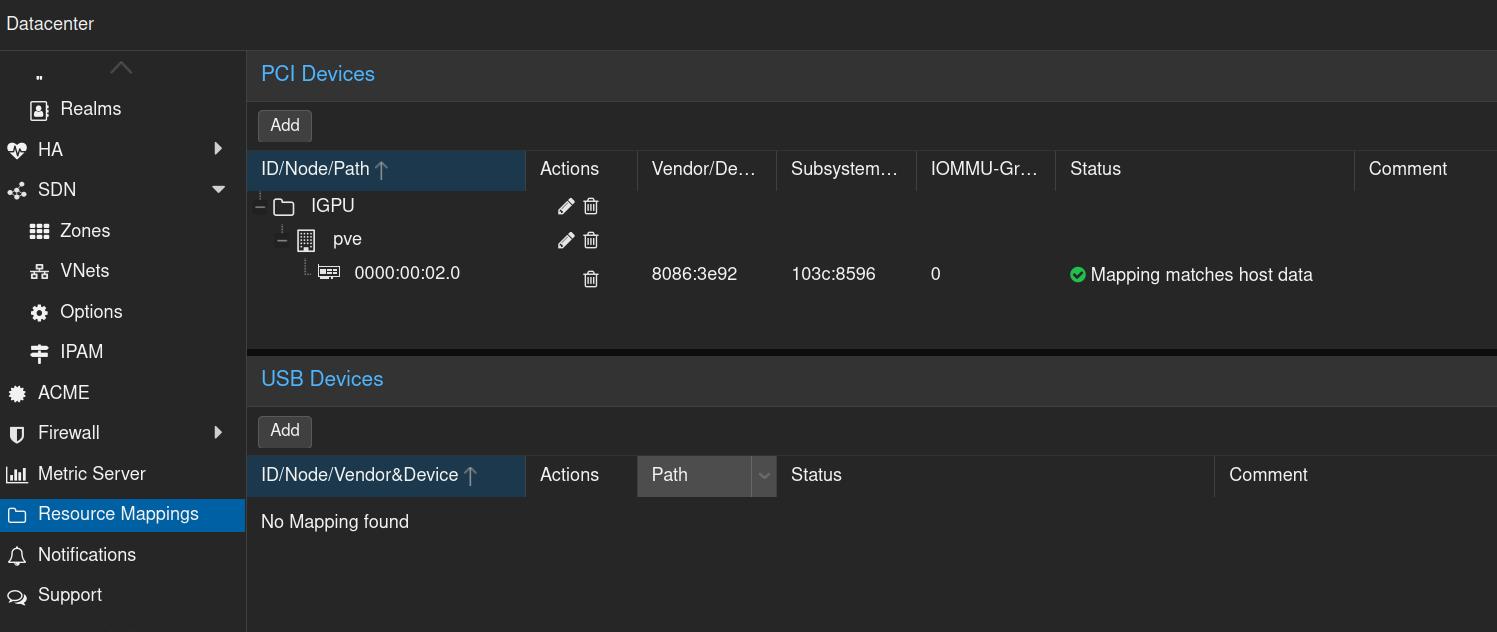
Next, in Proxmox, navigate to Datacenter -> Resource Mapping -> Add and add your GPU. It should look similar to this:
14.1.3 Setting Permissions
If you’re using an unprivileged Jellyfin container, you’ll need to edit the LXC configuration file to give the container access to your graphics card for hardware-accelerated video playback. This can be done by adding the following lines to the LXC configuration file:
1lxc.mount.entry: /dev/dri dev/dri none bind,optional,create=dir
2lxc.mount.entry: /dev/dri/renderD128 dev/dri/renderD128 none bind,optional,create=file
We need to ensure that our user has permission to access the graphics card. Enter the following commands in the host shell:
1chmod -R 777 /dev/dri
Then, in the LXC container shell, run:
1sudo usermod -aG render jellyfin
2sudo usermod -aG video jellyfin
These permissions will reset upon a reboot, so we need to make them persistent. To do this, edit the crontab file with:
1crontab -e
Then, add the following entry:
1@reboot sleep 20 && chmod -R 777 /dev/dri
We add a delay because the graphics drivers may not be initialized yet.
For more information, check out this forum post on the Proxmox forum.
14.1.4 Testing Hardware Encoding
To ensure hardware encoding is working, run a movie that requires transcoding and execute the following command in the shell:
1intel_gpu_top
(Note: You need to install intel-gpu-tools first and need to have a movie on your Jellyfin instance.) You should see some utilization of your graphics card.
Another test to confirm hardware encoding is to run:
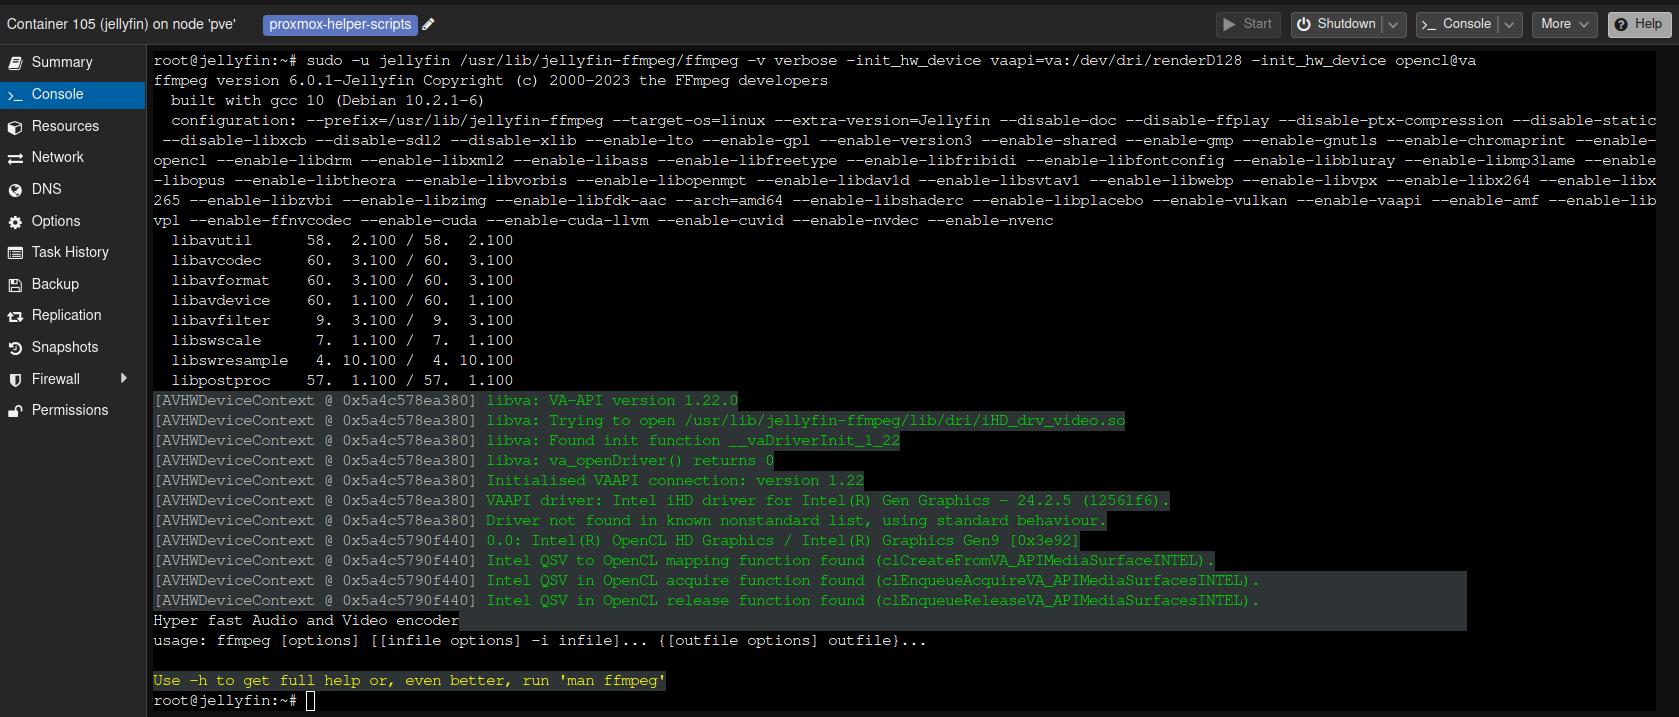
1sudo -u jellyfin /usr/lib/jellyfin-ffmpeg/ffmpeg -v verbose -init_hw_device vaapi=va:/dev/dri/renderD128 -init_hw_device opencl@va
After running the previous command, you should receive an output that looks similar to this:
14.1.5 Giving Jellyfin Access to the NAS
Since our data is on the data ZFS dataset, we need to connect this ZFS dataset with our newly created Jellyfin LXC container.
Just like with the ARR-stack, Jellyfin should start after the NAS-VM.
First, install
cifs-utils:1apt install cifs-utilsNormally, you should be able to define the mount point of your SMB share in the host shell under
/etc/pve/lxc/your_lxc_container_id.conf. However, if this doesn’t work, you can usecrontab. Open it with:1crontab -eThen add the following line:
1@reboot sleep 5 && mount -t cifs //<your_nas_ip>/media_root /mnt/media_root -o ro,_netdev,x-systemd.automount,noatime,dir_mode=0770,file_mode=0770,credentials=/etc/smbcredentials(The
rooption means read-only; Jellyfin shouldn’t need write access to our media.)The mounted directory will be owned by root, so we need to give Jellyfin permission to access it:
1usermod -aG root jellyfin(Be careful; this has security implications, as you are essentially giving Jellyfin root access.)
You can test if Jellyfin has access by running the following command:
1sudo -u jellyfin ls /mnt/media_root
14.2 Jellyfin: Final Note
When creating your media library, you should enable the NFO option, which will save metadata locally. This is necessary because we didn’t grant Jellyfin write access to the media_root directory.
15. Synchronize Files Across Multiple Devices with Syncthing
I already talked about Syncthing in a prior post, which I recommend checking out for more information.
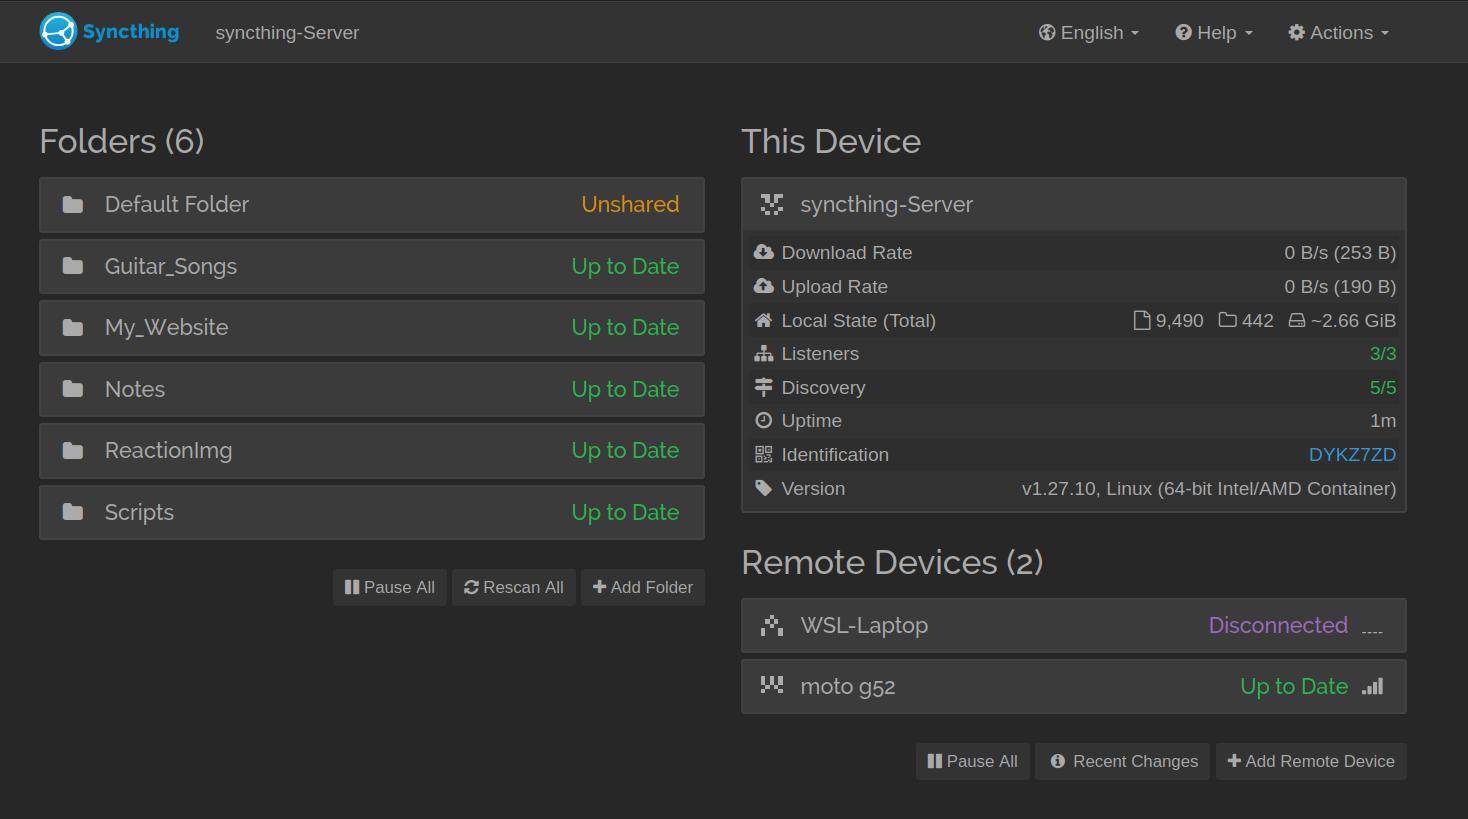
To recap, Syncthing is a synchronization service that allows you to sync files across multiple devices. I personally use it to synchronize my written notes across all my devices.
15.1 Syncthing: Installation
As luck would have it, there is a TTeck script that we can use for the installation process.
After this, we need to change one last thing. We created the local SSD ZFS dataset and the data HDD ZFS dataset to separate where we save our software and their associated configuration files (on the local dataset) from where we save the actual data (on the data dataset), e.g., movies in the case of the Arr-Stack.
We want to do the same with Syncthing, where we save our data on an SMB share of OMV, while the software itself is stored on the local dataset. To achieve this, during the installation process, choose to use the local dataset for installation.
Once the installation is complete, we can add our SMB share to the LXC container. To do that, we will use LXC bind mounts.
Open the OpenMediaVault web interface and create a new shared folder, which I’ll call
syncthing. Navigate toStorage -> Shared Folder -> Create. After creating it, you’ll need to share the folder: go toServices -> SMB -> Shares -> Create.Next, create a new user with read-write permission to access this shared folder:
Users -> Users -> Create. To grant the user access to the new share, go toStorage -> Shared Folders -> Select the correct folder -> Permissions.With OMV configured, create a
syncthingfolder (or whatever you named your shared folder) in both the host system and the LXC container, under the/mntdirectory.Now, we need to mount the folder to our local machine (
PVE). To do this, edit thefstabfile usingnano /etc/fstabon the host machine and add the following entry:1//<your_nas_ip>/syncthing /mnt/lxc_shares/syncthing cifs _netdev,x-systemd.automount,noatime,nobrl,uid=100000,gid=110000,dir_mode=0770,file_mode=0770,credentials=/etc/smbcredentials_syncthing 0 0In this example, I mounted the folder inside the
lxc_sharedirectory. If you chose a different directory, adjust the path accordingly.Inside the
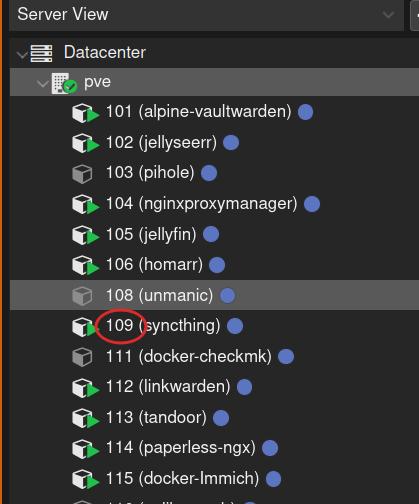
/etcdirectory on your host machine, create ansmbcredentialsfile and add the username and password, just like we did with the Arr-Stack setup.Find the ID of your LXC container. You can check this in the Proxmox sidebar where it will be displayed next to the container’s name.
Now, edit the LXC configuration file by running:
1nano /etc/pve/lxc/<your_syncthing_id>.confAdd the following entry:
1mp0: /mnt/lxc_shares/syncthing,mp=/mnt/syncthingThis will allow the SMB drive from the host machine to be accessed inside the Syncthing LXC container.
Reboot the LXC container, and you should now be able to access the mounted
syncthingfolder inside the LXC container.Lastly, since this LXC container depends on OMV, don’t forget to change the boot priority of this container to 2.
You should now be able to add your sync folder and syncrhonize them across devices.
16. Document Management with Paperless-NGX
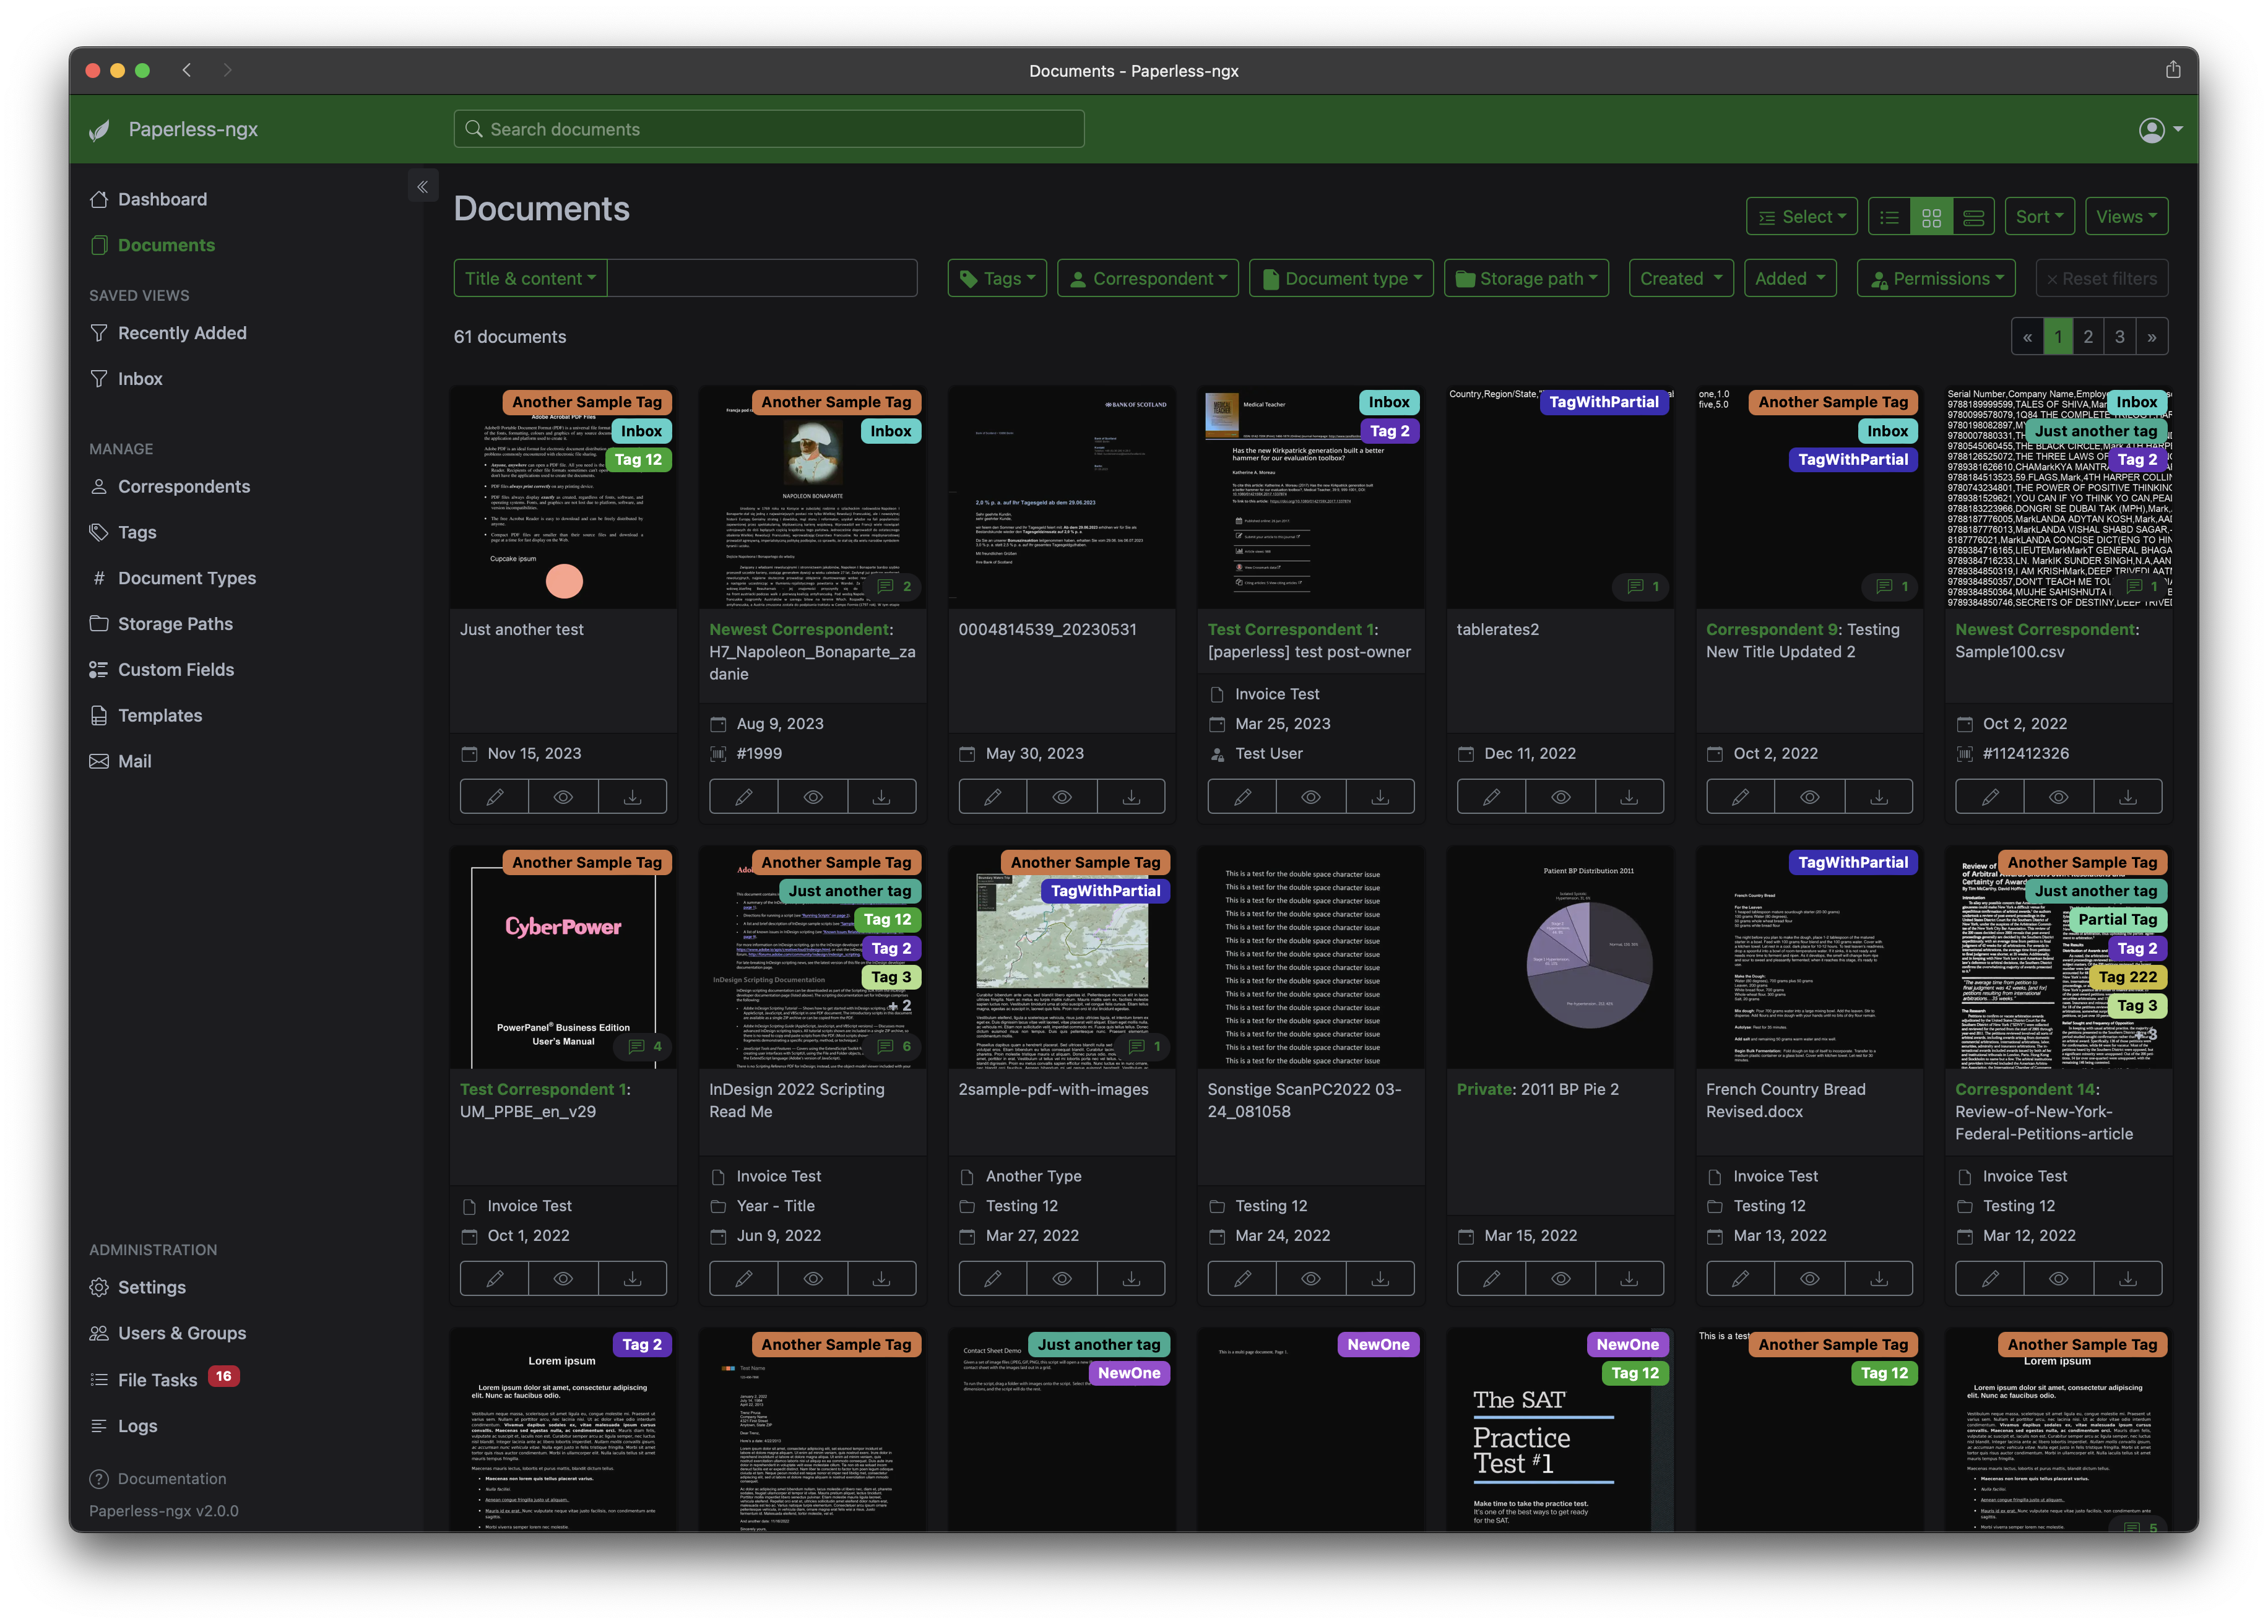
Are your shelves overflowing with paper documents like car insurance, health insurance forms, or bank statements? Do you find yourself spending too much time rummaging through stacks of folders, hopelessly searching for that one important document? Worse yet, are you tired of manually copying details from physical papers to your digital files?
Introducing Paperless-Ngx, the open-source solution designed to simplify your document management. Say goodbye to the clutter of physical paperwork and the headache of searching through piles of folders.
With Paperless-Ngx, you can automatically import documents from various sources, converting them into neatly organized, searchable PDFs that are stored securely on your own server—completely free from third-party access. No more data being transmitted elsewhere!
Our powerful OCR (Optical Character Recognition) feature ensures that even scanned images are transformed into fully searchable text, allowing you to find exactly what you need, when you need it. Supporting over 100 languages, Paperless-Ngx ensures global functionality, so you’ll never be left searching aimlessly again.
Ready to regain control over your documents? Download Paperless-Ngx today.Completely free and see how easy it is to take back your space and sanity.
16.1 Paperless-Ngx: Installation
Installation is very easy thanks to the TTeck script.
If, after installation, you encounter the error: “CSRF verification failed”, it could be due to your reverse proxy. To fix this, go to /opt/paperless/paperless.conf and set PAPERLESS_URL to your reverse proxy URL.
As with previous software, we want to save our files on the data ZFS dataset. To do this, create a new shared folder in OMV, add a new user with permission to access it, and then add the SMB share to the fstab of the host machine. Afterward, edit the LXC config file to bind the SMB share from the host machine to the LXC container.
And as always, don’t forget to change the boot order of Paperless-NGX to 2.
If you need additional information about any of these tips, check out the prior section on Syncthing.
As an additional tip, there is a Paperless app available on Android for browsing your documents.
17. Accessing Our Services from Outside Our Local Network with WG-Easy
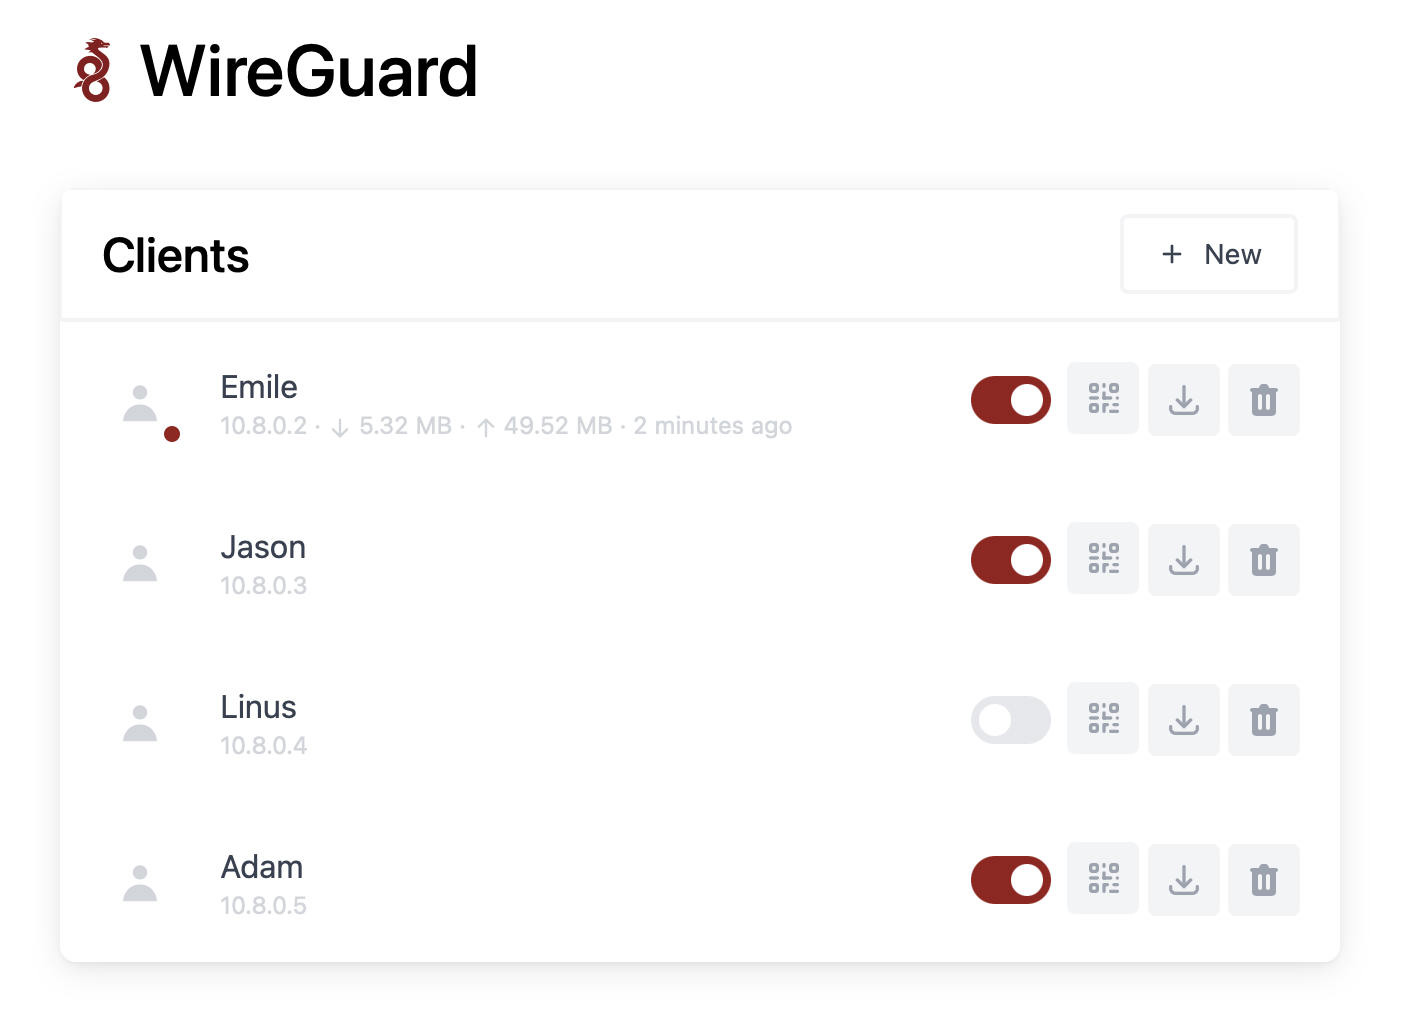
We have installed many services, such as Tandoor, Syncthing, and Paperless-NGX, but so far, we can only access them within our local network. However, there may be times when we want to access these services from outside our local network without exposing them directly to the internet, which could leave us vulnerable to cyber attacks.
To address this, we can host our own VPN with WG-Easy, which tunnels all our network activity when we’re outside our local network. I also considered using Tailscale, which has a nicer and easier interface. However, their free plan only allows a limited number of users. If you’re okay with this limitation, I highly recommend Tailscale.
17.1 Wg-easy: Installation
There is no direct TTeck script for WG-Easy, but like we did with FreshRSS, we can use the TTeck Docker script. You only need to install Docker Compose when prompted by the script; the other software is not required.
After the installation is complete, we can rename the hostname of the container to clarify what service this container is for. To do this, go to New LXC Container -> DNS -> Hostname. We also do not need two processors, which is the default setting of the script; you can change that by going to New LXC Container -> Resources -> Cores.
The first thing we need to do is create a new domain. This time, unlike before, this domain needs to point to our external IP address. This is necessary so that we can always use the same domain to connect to our VPN instead of using the IP address.
Just like last time, I used DuckDNS again, but this time I left the default IP address that was already written in it. Sometimes your IP can change; for example, this can happen if you have a dynamic IP. Because of this, we need to regularly update the IP address that the DuckDNS domain points to. For this, we can use a Linux cron script from their website. Just follow the instructions on their page and install it on the host machine (PVE).
Now, we can use the following Docker Compose script:
 1volumes:
 2  etc_wireguard:
 3
 4services:
 5  wg-easy:
 6    environment:
 7      # Change Language:
 8      # (Supports: en, ua, ru, tr, no, pl, fr, de, ca, es, ko, vi, nl, is, pt, chs, cht, it, th, hi)
 9      - LANG=en
10      # ⚠️ Required:
11      # Change this to your host's public address
12      - WG_HOST=
13      - PASSWORD_HASH=
14
15    image: ghcr.io/wg-easy/wg-easy
16    container_name: wg-easy
17    volumes:
18      - etc_wireguard:/etc/wireguard
19    ports:
20      - "51820:51820/udp"
21      - "51821:51821/tcp"
22    restart: unless-stopped
23    cap_add:
24      - NET_ADMIN
25      - SYS_MODULE
26      # - NET_RAW # ⚠️ Uncomment if using Podman
27    sysctls:
28      - net.ipv4.ip_forward=1
29      - net.ipv4.conf.all.src_valid_mark=1
There are two important parameters you need to change: WG_HOST, which should equal the new domain you created, and PASSWORD_HASH. For this, use the following guide to generate the password hash.
After that, you can start the software with docker compose up -f <name> -d. It is important when using Nginx Proxy Manager to still use the standard domain, not the new domain, because the standard domain is for internal use.
The last thing you need to do is forward port 51820 of your docker-wgeasy container, not of the host machine.
For more information refer to my prior article on this subject.
18. Book Managment with Calibre-Web Automated and Audiobookshelvf
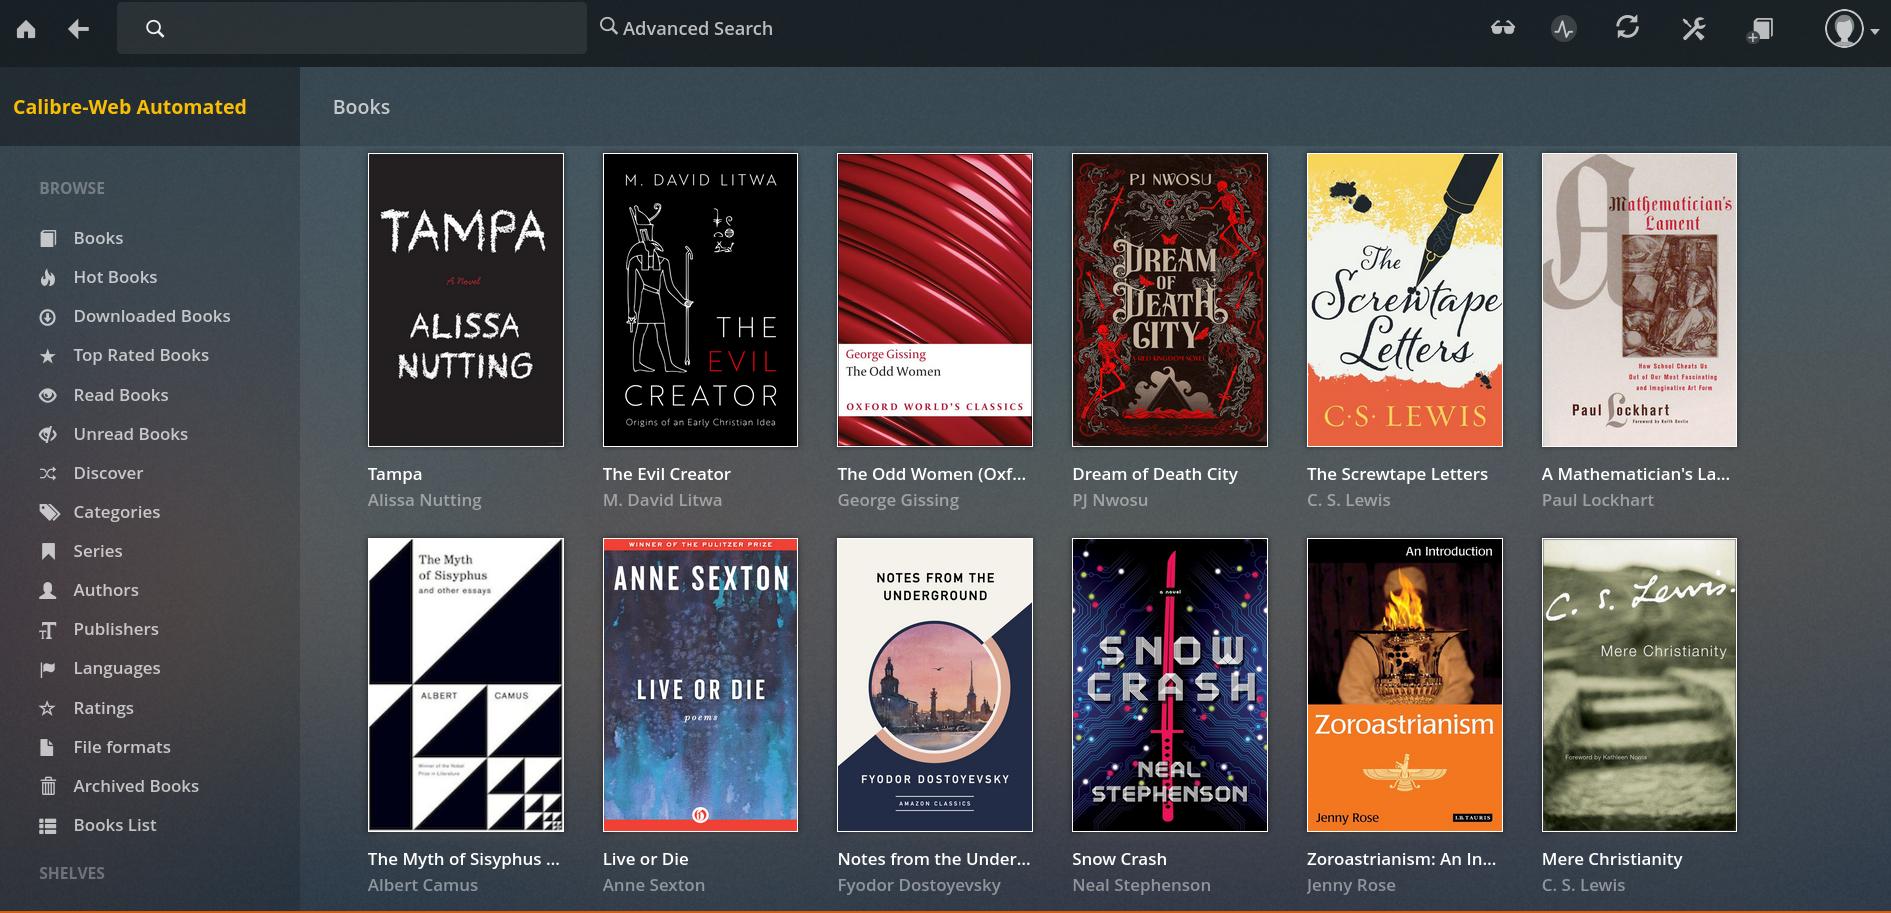
Calibre-Web Automated, which is based on Calibre and Calibre-Web, is a book management software that allows you to read books, rate them, view their metadata, create book lists, send books to an e-reader, and enjoy many other features.
Audiobookshelf, similar to Calibre, is an audiobook management software that offers a range of features. It allows you to organize your audiobook collection, stream audiobooks to different devices, track your listening progress, and customize metadata. Additionally, it supports multiple users, making it perfect for shared libraries.

In addition to both of these software, I will use Readarr, Prowlarr, gluetune, and qBittorrent to create a setup similar to my *Arr-Stack. This will allow me to automatically torrent e-books and audiobooks, streamlining the process just like I do with other media.
18.1 Calibre-Web Automated and Audiobookshelf: Installation
Just like with WG-Easy, there isn’t a direct TTeck script available for this. Instead, we’ll use the TTeck Docker script and install the software via Docker.
If you want to store your books on the data ZFS dataset, you can follow the same process we used for Syncthing. If you go this route, as always, remember to change the boot order to 2. Personally, I created two shared folders—one for books and another for audiobooks.
When initializing Calibre, the software requires an empty library that it can populate in order to function properly, so make sure you have that ready. You can read more about this in my old blog post.
You can use the following Docker Compose setup:Book *Arr-Stack
  1services:
  2   gluetun:
  3    image: qmcgaw/gluetun
  4    container_name: gluetun
  5    cap_add:
  6      - NET_ADMIN
  7    devices:
  8      - /dev/net/tun:/dev/net/tun
  9    ports:
 10      - 8888:8888/tcp # HTTP proxy
 11      - 8388:8388/tcp # Shadowsocks
 12      - 8388:8388/udp # Shadowsocks
 13      - 8080:8080 # qbittorrent
 14      - 41957:41957 # qbittorrent
 15      - 41957:41957/udp # qbittorrent
 16    volumes:
 17      - ./gluetun:/gluetun
 18    environment:
 19      # See https://github.com/qdm12/gluetun-wiki/tree/main/setup#setup
 20      - VPN_SERVICE_PROVIDER=
 21      - VPN_TYPE=
 22      - SERVER_NAMES=
 23      # Timezone for accurate log times
 24      - TZ=Europe/Berlin
 25      # Server list updater
 26      # See https://github.com/qdm12/gluetun-wiki/blob/main/setup/servers.md#update-the-vpn-servers-list
 27      - UPDATER_PERIOD=24h
 28
 29  calibre-web-automated:
 30    image: crocodilestick/calibre-web-automated:latest
 31    container_name: calibre-web-automated
 32    environment:
 33      - PUID=0
 34      - PGID=0
 35      - TZ=UTC
 36      - DOCKER_MODS=linuxserver/mods:universal-calibre
 37    volumes:
 38      - ./calibre/config:/config
 39      - ./calibre/book-ingest:/cwa-book-ingest
 40      - /mnt/calibre/libary:/calibre-library
 41    ports:
 42      - 8084:8083 # Change the first number to change the port you want to access the Web UI, not the second
 43    restart: unless-stopped
 44
 45  qbittorrent:
 46    image: lscr.io/linuxserver/qbittorrent:4.6.6
 47    network_mode: "service:gluetun"
 48    container_name: qbittorrent
 49    environment:
 50      - PUID=0
 51      - PGID=0
 52      - TZ=Etc/UTC
 53      - WEBUI_PORT=8080
 54      - TORRENTING_PORT=41957
 55    volumes:
 56      - /mnt/audiobookshelf/audiobooks:/audiobooks
 57      - ./calibre/book-ingest:/cwa-book-ingest
 58      - ./qbittorrent/scripts:/scripts
 59      - ./qbittorrent/appdata:/config
 60      - ./qbittorrent/downloads:/downloads #optional
 61    restart: unless-stopped
 62
 63  audiobookshelf:
 64    image: ghcr.io/advplyr/audiobookshelf:latest
 65    # ABS runs on port 13378 by default. If you want to change
 66    # the port, only change the external port, not the internal port
 67    ports:
 68      - 13378:80
 69    volumes:
 70      # These volumes are needed to keep your library persistent
 71      # and allow media to be accessed by the ABS server.
 72      # The path to the left of the colon is the path on your computer,
 73      # and the path to the right of the colon is where the data is
 74      # available to ABS in Docker.
 75      # You can change these media directories or add as many as you want
 76      - /mnt/audiobookshelf/audiobooks:/audiobooks
 77      - /mnt/audiobookshelf/podcasts:/podcasts
 78      # The metadata directory can be stored anywhere on your computer
 79      - ./audiobookshelf/metadata:/metadata
 80      # The config directory needs to be on the same physical machine
 81      # you are running ABS on
 82      - ./audiobookshelf/config:/config
 83    restart: unless-stopped
 84    # You can use the following environment variable to run the ABS
 85    # docker container as a specific user. You will need to change
 86    # the UID and GID to the correct values for your user.
 87    environment:
 88      - user=0:0
 89
 90  prowlarr:
 91    image: lscr.io/linuxserver/prowlarr:latest
 92    container_name: prowlarr
 93    environment:
 94      - PUID=0
 95      - PGID=0
 96      - TZ=Etc/UTC
 97    volumes:
 98      - ./prowlarr/data:/config
 99    ports:
100      - 9696:9696
101    restart: unless-stopped
Make sure to configure the VPN settings for Gluetun or remove Gluetun from the Docker Compose file. Additionally, double-check the volumes to ensure they match your setup if you’re not using the same configuration as mine.
I set the version of qBittorrent to 4.6.6 because I was using MyAnonamouse, a private tracker that, at the time, didn’t allow higher qBittorrent versions. I highly recommend myanommouse, it’s not very hard to get into and offers a wide range of books. If you don’t plan on joining MyAnonamouse, you can replace image: lscr.io/linuxserver/qbittorrent:4.6.6 with image: lscr.io/linuxserver/qbittorrent:latest in the Docker Compose file.
I set PUID and GID to 0, which essentially gives the container root-level access. While this simplifies permissions management, it also has significant security implications, as it could potentially expose your system to vulnerabilities or unauthorized access. If security is a priority, consider using a non-root user by setting the appropriate PUID and GID values for better isolation and protection.
For post-installation steps, follow the official Calibre-Web Automated guide. You should change the default username and set the location of your database to ensure proper functionality.
For qBittorrent, the default username is admin, and you’ll find the password inside the Docker logs. After logging in, make sure to change the default credentials. I also recommend setting a speed limit to prevent bandwidth issues.
In Prowlarr, you need to add Readarr as a connection. You can do this by navigating to Settings -> Apps -> Readarr. Additionally, add qBittorrent as your download client. After this, you’ll want to add some book trackers in Proxmox, which will automatically sync to Readarr.
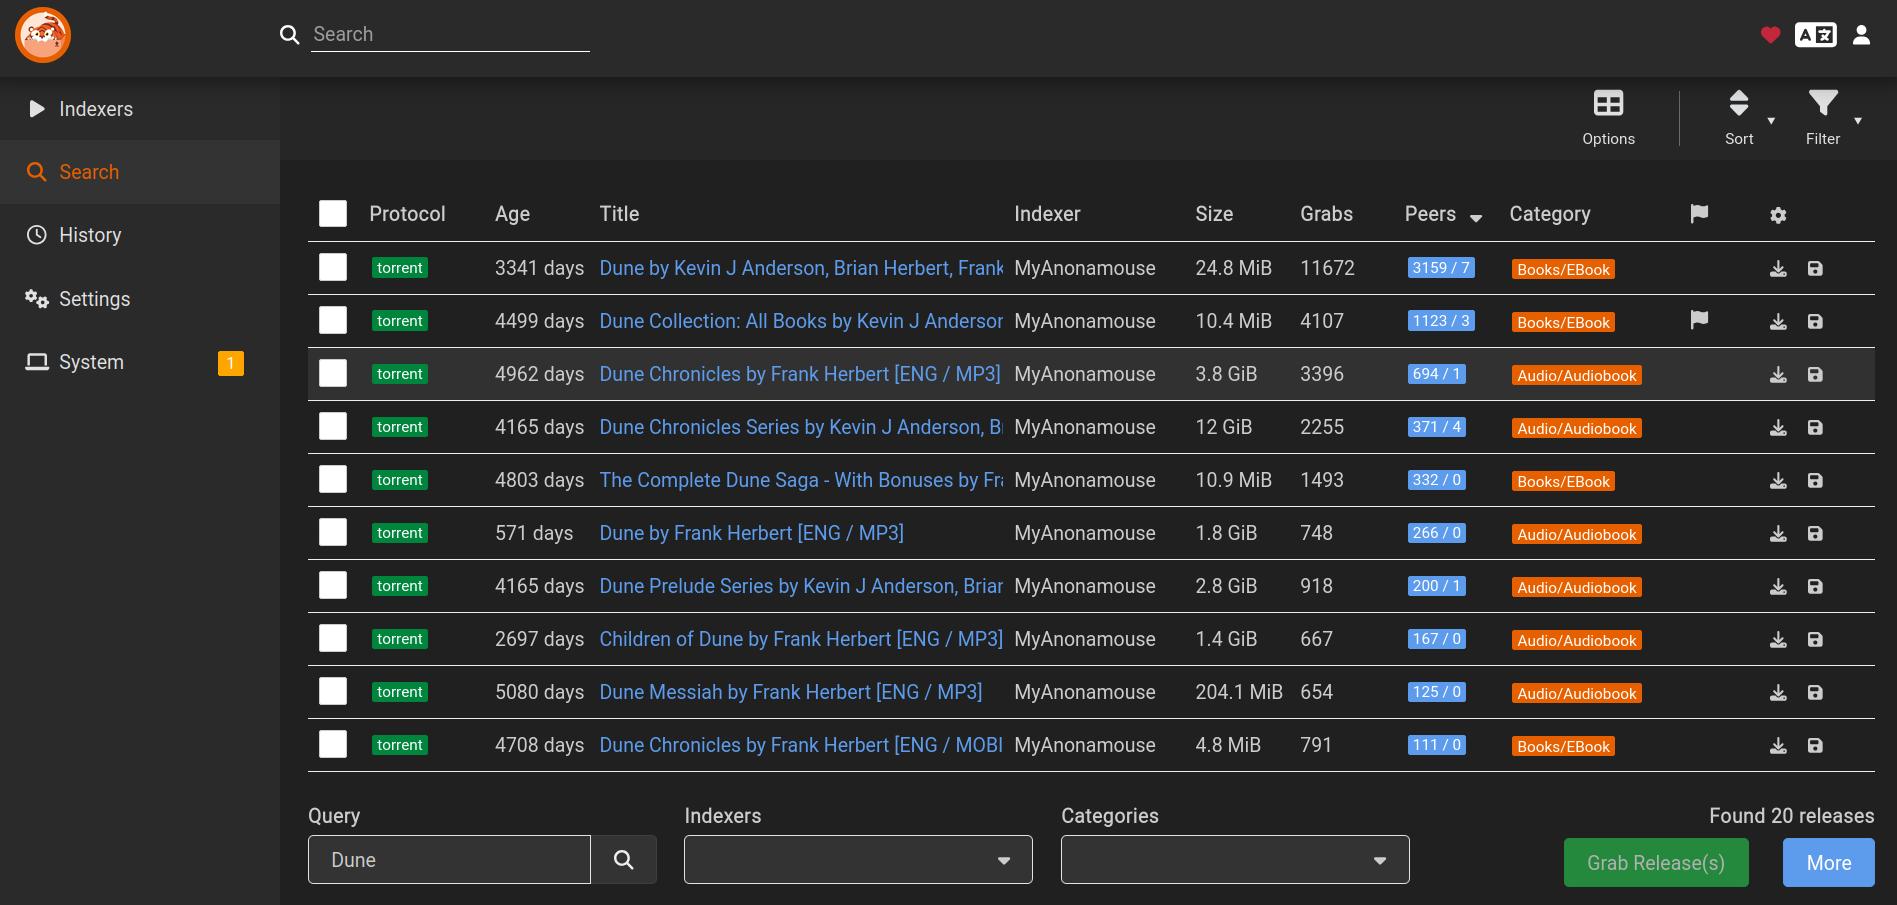
When setting up a reverse proxy for these services, ensure you enable WebSocket support for Audiobookshelf.
The last step is to ensure that books and audiobooks are downloaded to the correct folders. To do this, go to Prowlarr and add two categories: audiobookshelf and books. Navigate to Settings -> Download Clients -> qBittorrent -> Mapped Categories and configure them accordingly.
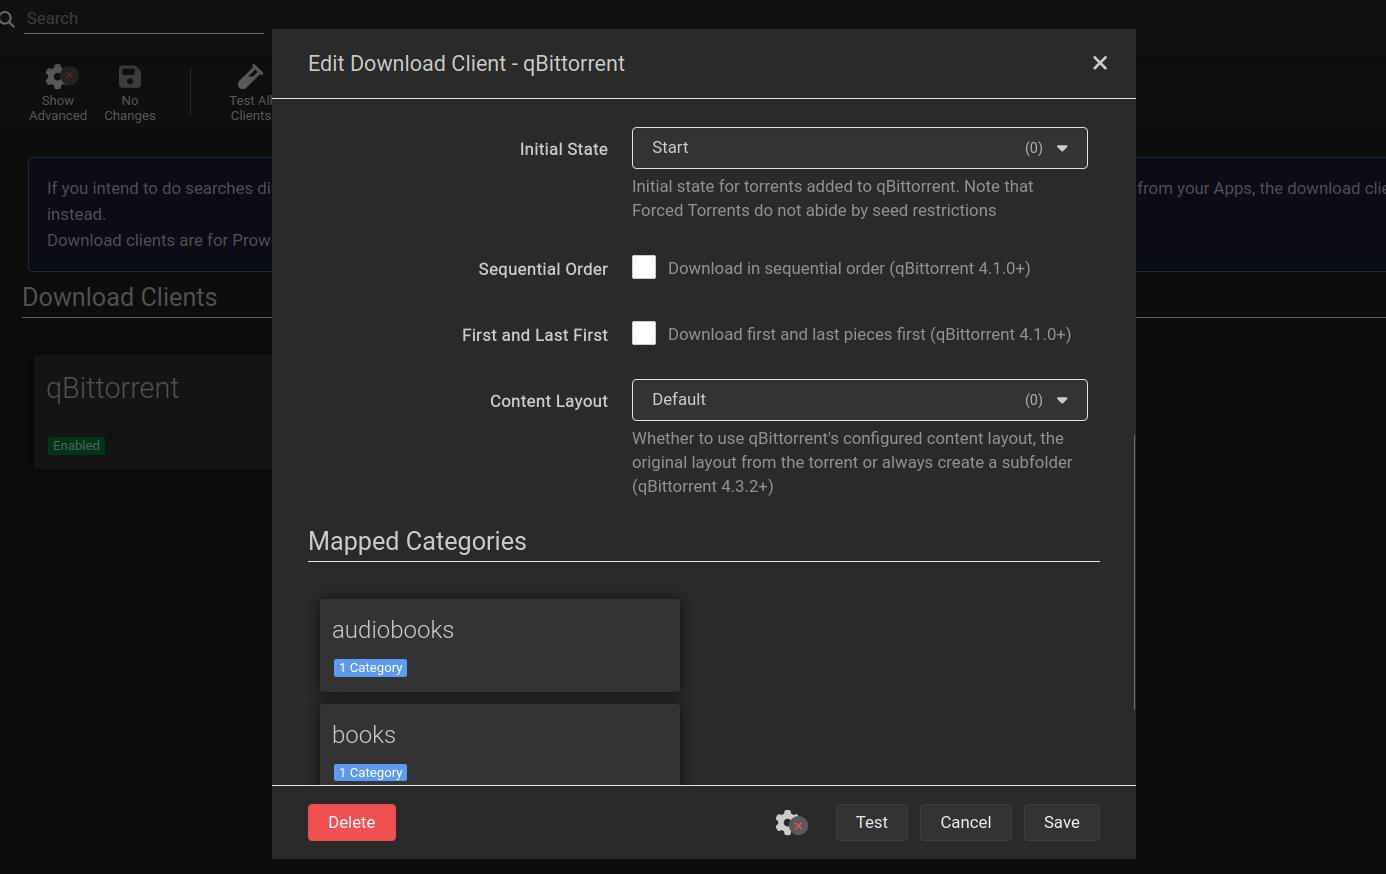
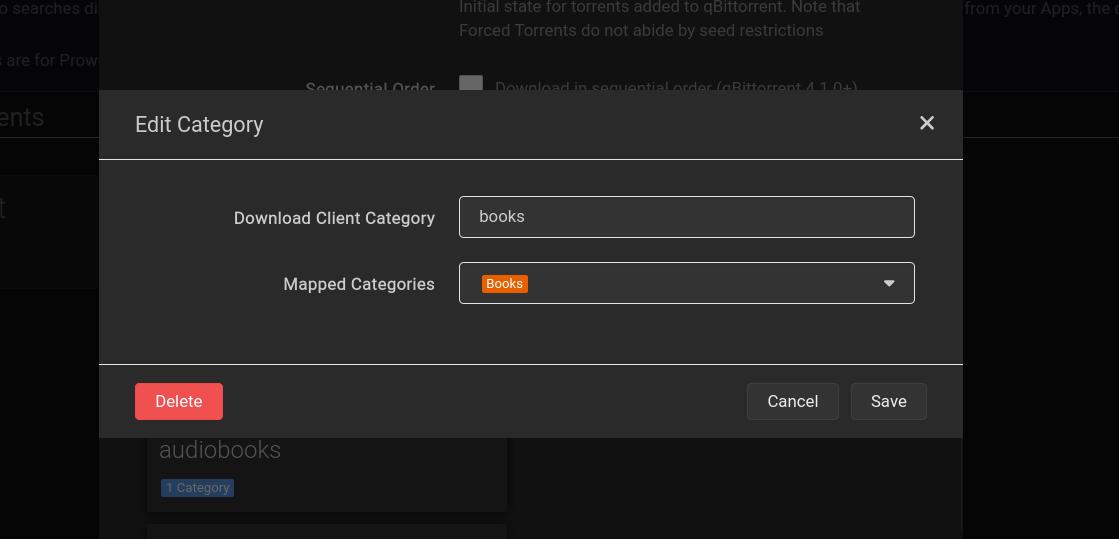
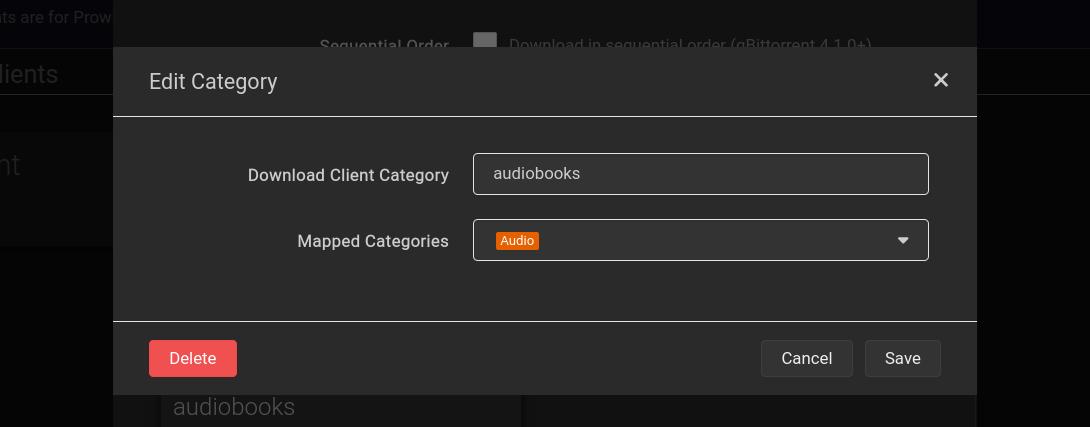
Once completed, you should see these categories on the sidebar in qBittorrent. For the audiobook category, set the download folder to /audiobooks, and for books, choose /downloads. Books saved in the cwa-ingest folder will be imported and deleted automatically, which means they can’t be seeded.
To ensure books are moved to the correct folder after downloading, go to qBittorrent’s settings and add an external program to run when downloads are finished: cp -r "%F" "/cwa-book-ingest". This will automatically copy the book to Calibre while still allowing you to seed it in qBittorrent.
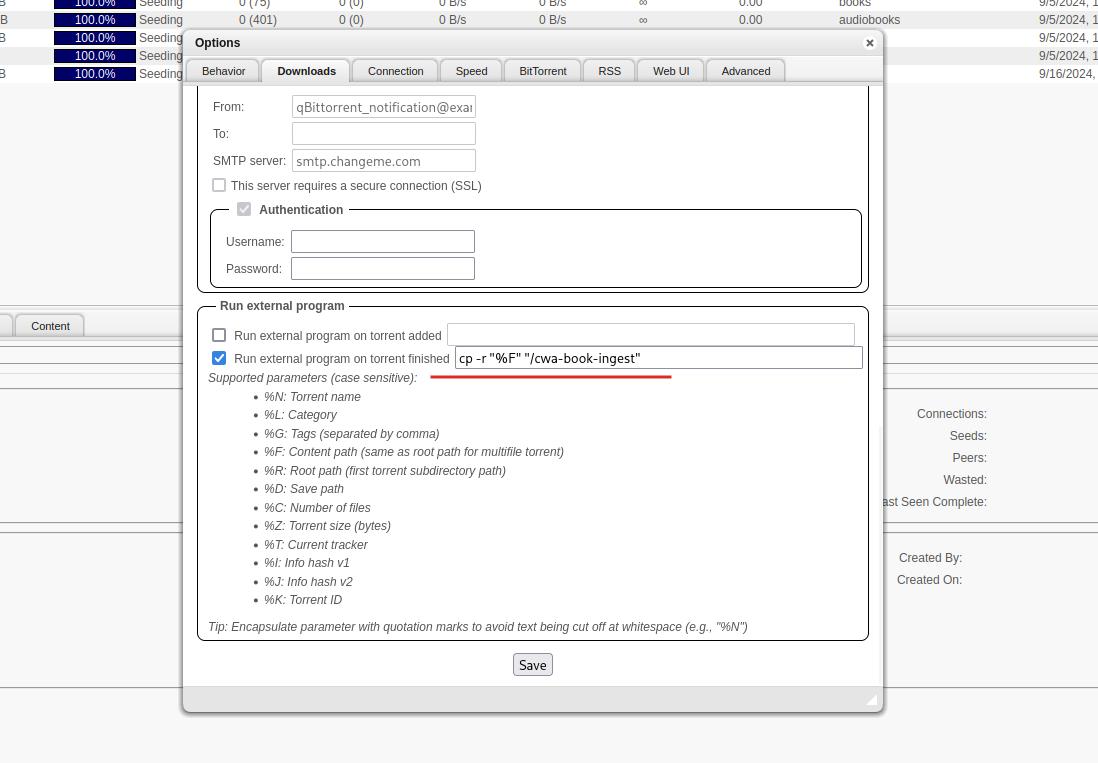
Now, whenever you search for a book on Prowlarr, it should automatically download to the correct folder and show up in both Audiobookshelf and Calibre-Web.
19. Immich
Immich is an open-source image management software designed for self-hosting on local servers. It provides a user experience similar to Google Photos, offering features such as automatic photo backup, organization, sharing, and search capabilities. Immich supports a range of functionalities like facial recognition, location tagging, and album creation, a versatile tool for managing personal photos without relying on cloud-based services.

19.1 Immich: Installation
Similar to Calibre, there isn’t a dedicated TTeck script available for Immich. Instead, we’ll use the TTeck Docker script and install the software via Docker.
If you have any questions during the process, you can refer to the official Immich Docker Compose guide, which also provides the necessary Docker Compose file.
19.1.1 Data Storage Configuration
When running Immich, it generates additional data, such as thumbnails or facial recognition data. If you’d like, you can separate the storage location for this data from your actual photos. For more details on how to do this, refer to this discussion. Personally, I store the generated data on my local SSD ZFS dataset and my photos on the data ZFS dataset.
If you plan to go this route, you’ll need to create a new shared folder in OMV for your Immich photos, mount it on your host machine, and use LXC binds to make it available in your container.
19.1.2 Hardware Acceleration
If you want to use features like facial recognition, I highly recommend enabling hardware acceleration, similar to how we did it for Jellyfin.
If you’re using an unprivileged Immich container, the first step is to edit the LXC configuration file to grant the container access to your graphics card for hardware acceleration. Add the following lines to the LXC configuration file:
1lxc.mount.entry: /dev/dri dev/dri none bind,optional,create=dir
2lxc.mount.entry: /dev/dri/renderD128 dev/dri/renderD128 none bind,optional,create=file
Next, you’ll need to give the user permission to access the graphics card by setting permissions in crontab with @reboot sleep 20 && chmod -R 777 /dev/dri. This step is necessary because the permissions reset after a container reboot.
Additionally, you will need to execute the following command in the LXC container shell:
1sudo usermod -aG render immich
2sudo usermod -aG video immich
This will give the immich user the necessary permissions to access the graphics card.
19.1.3 External Library Configuration
If you want to include an external library (e.g., old family photos that aren’t on your smartphone), you can follow this guide. I personally use the following folder structure:
1photos/
2├── ExternalLibraries/
3│   ├── holidays_2020
4│   ├── holidays_2021
5│   └── holidays_2019
6└── Immich/
19.1.4 Configuring the .env and Docker Compose Files
In addition to the Docker Compose file from the official Immich guide I linked earlier, you’ll also need a .env file to set certain parameters, such as storage locations. If you plan to separate your photos from immich’s generated data, you can use the following .env file:
1LIBRARY_LOCATION=/mnt/photos/Immich/
2THUMBS_LOCATION=./thumbs/
3UPLOAD_LOCATION=./upload/
4PROFILE_LOCATION=./profile/
5VIDEO_LOCATION=~./encoded-video/
You’ll also need to modify the volumes section of the Docker Compose file as follows:
1${LIBRARY_LOCATION}:/usr/src/app/upload/library
2${UPLOAD_LOCATION}:/usr/src/app/upload/upload
3${THUMBS_LOCATION}:/usr/src/app/upload/thumbs
4${PROFILE_LOCATION}:/usr/src/app/upload/profile
5${VIDEO_LOCATION}:/usr/src/app/upload/encoded-video
6/mnt/photos/ExternalLibraries:/mnt/ExternalLibraries:ro
7/etc/localtime:/etc/localtime:ro
19.1.5 Migrating from Google Photos
To migrate from Google Photos, you can either use the Immich mobile app or follow this guide.
20. Backups
We’ve hosted various software applications, and this took considerable time and effort. The last thing we want is to lose all of this progress due to disk failures, so it’s essential to set up a proper backup system.
You might think that using a RAID system, which mirrors every disk, provides backup protection. However, RAID is not a backup.

Here’s a comment that explains this well:
If your home server were stolen, a backup would be used to restore your data elsewhere.
If your home server were in a house fire, a backup would be used to restore your data.
If both hard drives failed before the rebuild finished, a backup would restore your data.
If you accidentally opened a file that encrypted your data, a backup would restore your data.
If your home server was dropped during a move, a backup would restore your data.
If you were editing a video and overwrote the original, a backup would recover the original file.
If a hacker got in and destroyed your data, you’d need the backup.
If a family member messed things up, you’d need the backup.
20.1 What Data Should You Backup?
Not all data needs to be backed up, only the original data that is important to you. This is crucial because backing up everything can require a lot of storage space—and that can be expensive.
The best practice for backups is the 3-2-1 rule, which suggests you should have:
- 3 copies of your data,
- 2 different types of storage media, and
- 1 offsite copy.
This is the ideal goal, but in practice, it may not always be feasible due to costs.
20.2 Important Data and My Previous Backup Strategy
The first step is to identify which data is important for you to back up. For me, this includes:
- My Proxmox configuration files.
- My personal notes (including this website).
- My personal images and family photos.
- My Linux configuration files.
Once you’ve identified the critical data, think about your backup strategy.
- My Linux configuration files are already stored on two different devices, with one being offsite (on my computer and in a GitHub repository).
- My personal notes are relatively secure as I sync them between my laptop, desktop, and server, resulting in 3 copies on different devices.
- My personal image collection is less secure. My personal images are on my phone and server, while my family photos have two copies: one on my server and one with my dad.
That leaves my Proxmox configuration, which currently has no backup. Since I tinker with my homelab often, things can go wrong, and having a backup would allow me to roll back to prior versions.
20.3 My Backup Plan
Initially, I planned to use Proxmox Backup Server on my Raspberry Pi 3B, as its server role was defunct after a homelab upgrade. Unfortunately, Proxmox Backup Server isn’t built for the ARM processor in the Raspberry Pi, but there’s an alternative version called PiBS available on GitHub, which works with ARM. Proxmox Backup Server is great because it integrates directly with Proxmox. I even found a nice guide for setting it up (it’s in German, though).
Sadly, while flashing the SD card for the Raspberry Pi 3B, it broke (which is why you should use an SSD), and I didn’t have the funds to fix it.
20.4 The Alternative Plan
Instead, I decided to use two external 1TB hard drives I already had for backup storage. Since data loss from a single drive failure would be catastrophic, I set them up in a ZFS mirror, which minimizes the risk of data loss.
The plan was to connect these drives to my server and have it automatically back up the Proxmox configuration at a set time each day. While this setup isn’t ideal (as the backup drives aren’t offsite), it’s better than nothing.
20.5 Backup Retention Strategy
Given the limited storage (only 1TB), I couldn’t back up everything daily, as it would quickly exceed the available space. This is where backup retention comes in. Backup retention allows you to define how long backups are kept on a daily, weekly, monthly, and yearly basis. After some experimentation, I settled on the following parameters:
- keep-daily: 7 (daily backups for the past week),
- keep-weekly: 3 (weekly backups for the past 3 weeks, resulting in 4 weekly backups with daily backups included),
- keep-monthly: 6 (monthly backups for half a year),
- keep-yearly: 5 (1 backup per year for the last 5 years).
You can explore the effects of this strategy using the backup retention simulator, which I highly recommend.
This setup has worked well so far. After a month of running, my server’s backup storage is about half full.

20.6 Implementing My Backup Strategy
To implement my backup strategy, follow these steps:
Prepare Your Disks: If the disks already contain important data, ensure you save it elsewhere before proceeding. Then, connect the disks to your server.
Wipe the Disks: In Proxmox, navigate to
pve -> Disks, select the two newly connected disks, and press the Wipe button. This will erase any existing data on the disks.Create ZFS Mirror: Go to
pve -> Disks -> ZFS -> Create ZFS. Select your two newly connected disks and set the RAID level tomirror. For compression, I recommend usingzstd. If you’re curious about the trade-offs between different compression algorithms, this blog post offers a good overview. In summary,lz4is faster but compresses less, whilezstdcompresses more effectively but is slower and uses more CPU resources.Add Backup Directory: Next, navigate to
Datacenter -> Storage -> Add -> Directory. For the content type, chooseVZdump. Select a name for the directory and add it.Set Up Backup Schedule: Go to
Datacenter -> Backup -> Add, and add the newly created directory. Set the node to your host machine, and choose the schedule for when you want to back up your devices. I have mine set to back up every day at00:00. For the backup mode, I useSnapshot. You can read more about the different backup modes here. I also recommend enabling email notifications, so you’ll get alerts when a backup completes, helping you spot any errors early. For retention, choose the settings that suit your needs.Exclude NAS Storage from Backup: To exclude your NAS storage from backups, navigate to your OpenMediaVault virtual machine, go to the Hardware section, select the disks, and click Remove from Backup.
Test the Backup: A backup is not a real backup if you haven’t tested it. To do so, navigate to
Datacenter -> Backupand manually create a backup. While the job is running, check the job details to ensure the NAS disks are properly excluded.Verify the Backup: Once the backup is finished, scroll down the left sidebar in Proxmox to your backup storage. You should now see the newly created backup.
Restore and Test: To verify that everything is working, pick a random container, shut it down, and go to the backup tab to restore it. Afterward, check that the restored container is functioning correctly.
Congratulations!
You now have a working backup strategy!

21. Server Power Optimization
If you, like me, live in a European country, power consumption is probably a concern due to the high cost of electricity.

As such, it’s essential to optimize the power consumption of your server. I used the Shelly Plug S to measure my power usage. This power monitor plugs into your wall socket and measures the consumption of any connected device. It’s quite affordable at around 20 bucks and accurate enough for my use case.
21.1 Power-Saving Optimizations
A helpful thread on the Home Assistant Forum discusses optimizing server power usage. One of the most impactful changes, aside from removing unused electronics, is using the power-saving scaling governor for the CPU. You can activate this by running the following command:
1echo "powersave" | tee /sys/devices/system/cpu/cpu*/cpufreq/scaling_governor
21.2 Measuring Power Consumption
When the server is idle and not performing any tasks, it consumes approximately 20 watts of power (with the powersave scaling governor). With minor workloads like torrenting, the consumption goes up to 30 watts. Under full load, the power usage increases even more.
We can use any of the many electricity calculators online to estimate the cost of running the server. For example, using the following parameters:
- Power consumption: 30 watts
- Operating time: 24 hours per day
- Electricity price: €0.40 per kWh (as of April 29th, Germany)
This results in an annual energy cost of approximately €105. By reducing the server’s operating time from 24 hours to 18 hours a day, the total cost drops to around €80 per year.
21.3 Scheduled Server Shutdowns
Another simple way to save power is by not leaving your server on all the time. I, for example, turn off my server at 01:00 and then turn it on again when needed.
21.4 Automating Server Shutdown
To automatically turn off your server at a specific time, you can schedule a cron job. First, open crontab for editing by running crontab -e, and add the following line to schedule a shutdown at 01:00:
10 1 * * * /usr/sbin/shutdown -h now
If you’re unfamiliar with cron syntax, you can use Crontab Guru for explanations and testing.
21.5 Automatically Turning Your Server Back On
Now that your server can shut down automatically, you’ll want a convenient way to turn it back on without physically pressing the power button. For this, you can use Wake-on-LAN, which sends a special network packet to turn on your server remotely.
21.5.1 Setting Up Wake-on-LAN
To enable Wake-on-LAN, follow these steps:
- Go to
pve -> Networkand find the name of your network device. - Run the command
ethtool <device_name>(e.g.,ethtool enp6s0) to check the device’s status. If you seewake on: d, it means Wake-on-LAN is disabled. - You may need to enable it in your BIOS settings.
21.5.2 Sending the Wake-on-LAN Packet
To send the wake-up packet, I use my smartphone with the WakeOnLan app.
The configuration of WakeOnLan app should look similar to this: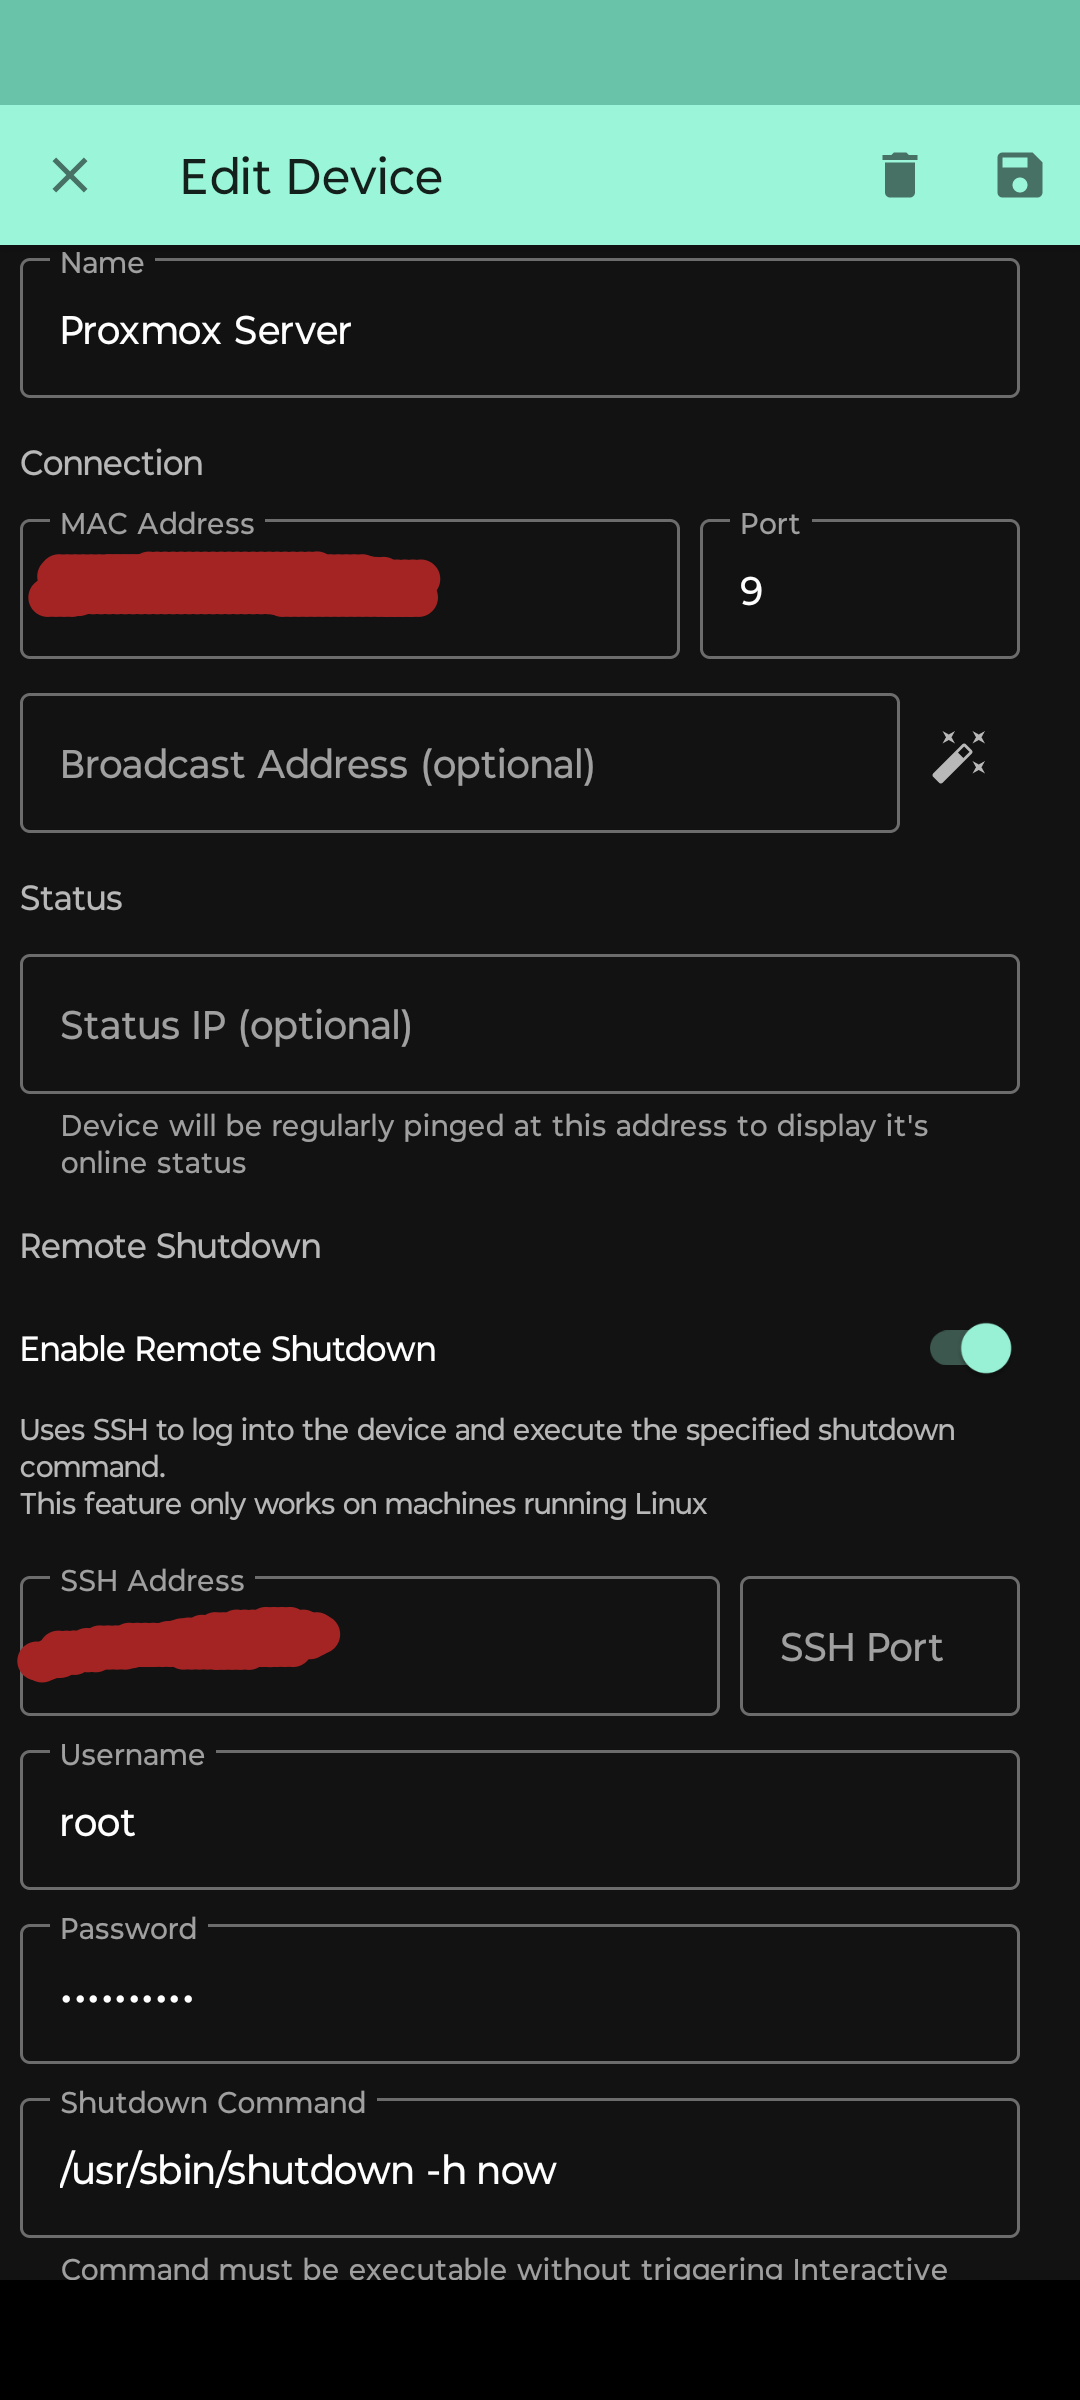
You can get your server’s MAC address, by running the following command after installing net-tools (with apt-get install net-tools):
1ifconfig -a
Alternatively, you can use the command ip link and look for the device labeled as ether. The MAC address will be listed next to it.

22. Notification with Gotify
One important consideration for maintaining a secure and well-monitored Proxmox environment is setting up a notification system. This becomes especially crucial in scenarios where immediate attention is required—such as a disk failure or a backup job that didn’t complete successfully. Early alerts can help you act quickly, minimizing downtime and reducing the risk of data loss.
Proxmox supports several notification methods out of the box, including email. However, I opted to use Gotify, an open-source push notification server that enables real-time alerts directly to your smartphone or other devices. It’s lightweight, easy to set up, and perfect for receiving instant updates from your Proxmox server. For example, if a scheduled backup fails in the middle of the night, Gotify can send a push notification straight to your phone, ensuring you’re aware of the issue without delay.
Deploy Gotify in an LXC Container: Use the community script available at Proxmox VE Community Scripts to install Gotify easily in an LXC container. The default settings usually work well, but you can customize them if needed.
Access the Gotify Web UI: Once the container is created, the Proxmox console will display its IP address. Open a browser and go to that IP—Gotify runs on port 80 by default. You can log in using the default credentials:
- Username:
admin - Password:
admin
Make sure to change your password immediately after logging in for security reasons.
- Username:
Configure NGINX Reverse Proxy (Optional but Recommended): For better accessibility and security, especially if you plan to access Gotify remotely, it’s advisable to set up an NGINX reverse proxy. Be sure to enable WebSocket support, as Gotify uses WebSockets to push notifications in real-time.
Enable Autostart for the LXC Container: In the Proxmox web UI, navigate to the options of the Gotify container and enable Autostart, so Gotify launches automatically after a host reboot.
Add Gotify as a Notification Target in Proxmox: Go to:
1Datacenter -> Notifications -> Add -> GotifyHere, you’ll need to enter the Gotify server URL and an access token. To generate a token:
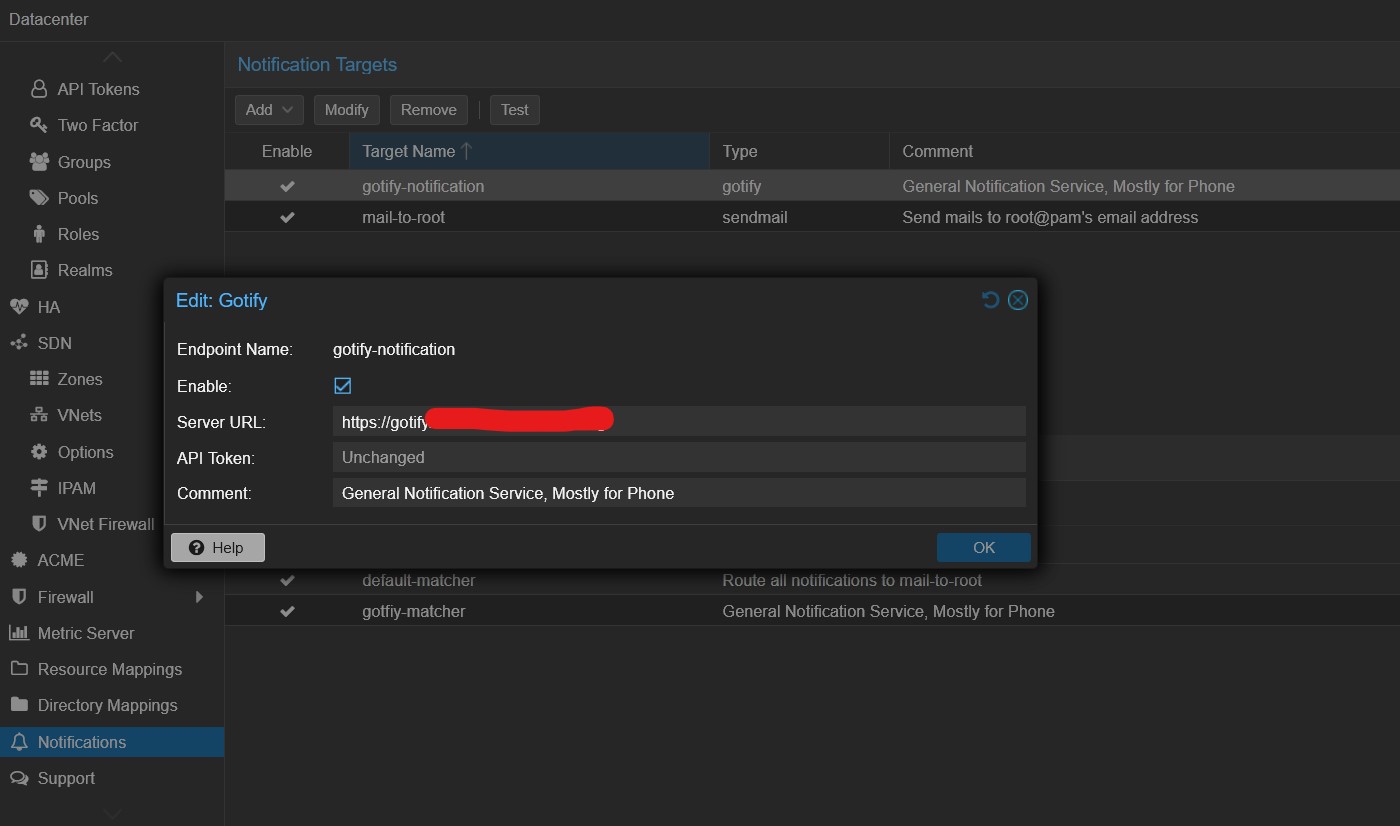
- In the Gotify web UI, create a new application.
- Copy the access token.
- Paste it into the corresponding field in Proxmox.

With this Proxmox can now send system notifications to Gotify, but we are not finished yet, we now need to tell Gotify that it should send the message that it received to your phone.
Connect Your Mobile Device: To receive push notifications on your phone:
- Download the Gotify app from the Google Play Store (or F-Droid).
- Open the app and enter your Gotify server URL along with your login credentials.
- After logging in, your phone should appear as a connected client in the Gotify web interface.
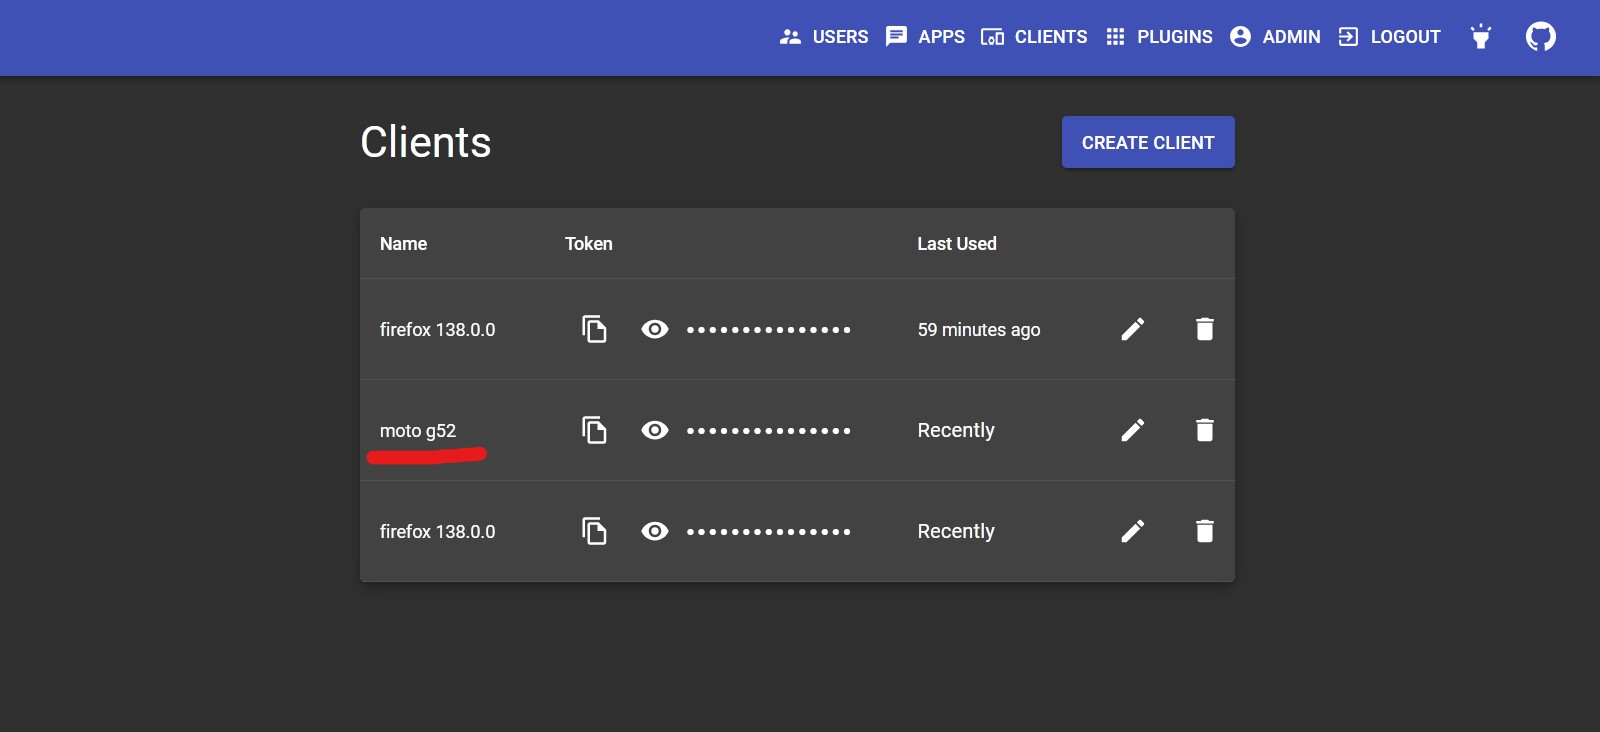
Send a Test Notification: To verify everything is working:
- In Proxmox, go to
Datacenter -> Notifications. - Select your Gotify endpoint and click the Test button.
- You should receive the notification both in the Gotify web UI and on your phone.
- In Proxmox, go to
Set Up Notification Filters (Optional)_ To control what types of messages you receive:
- In Proxmox, go to
Datacenter -> Notifications. - Scroll to the bottom and click Add under Notification Matchers.
- Give your matcher a name.
- Under the Targets to Notify tab, select your Gotify endpoint.
- In the Match Rules tab, choose which types of notifications (e.g., backup failures, hardware issues) you want to be alerted about.
- In Proxmox, go to
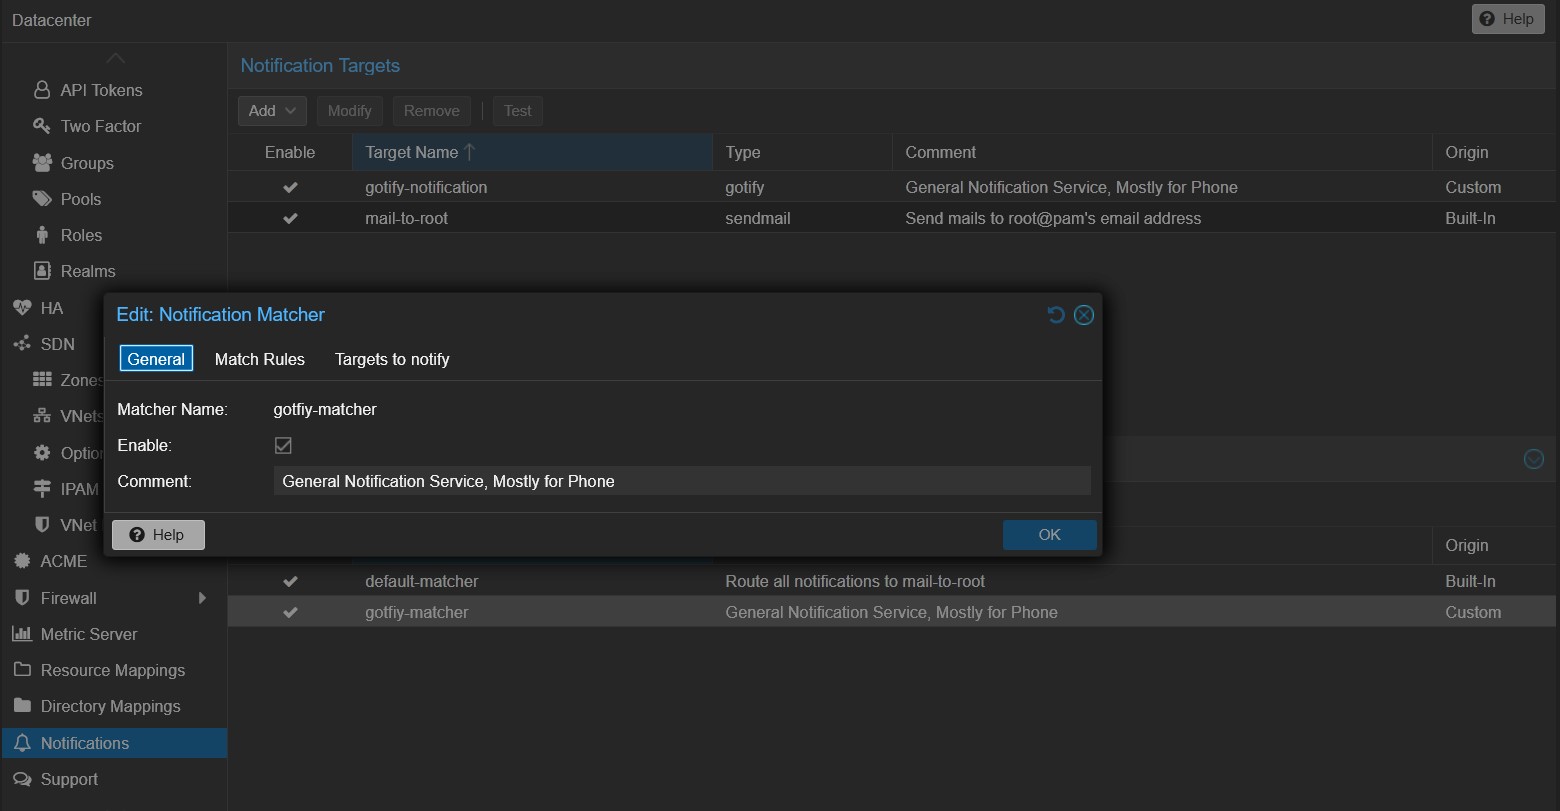
Bonus Tip: Disable the “Connected” Notification on Android. The Gotify Android app may display a persistent “Connected” notification. To remove it:
- Go to your Android system settings.
- Navigate to Apps -> Gotify -> Notifications.
- Disable the Foreground Service Notification.
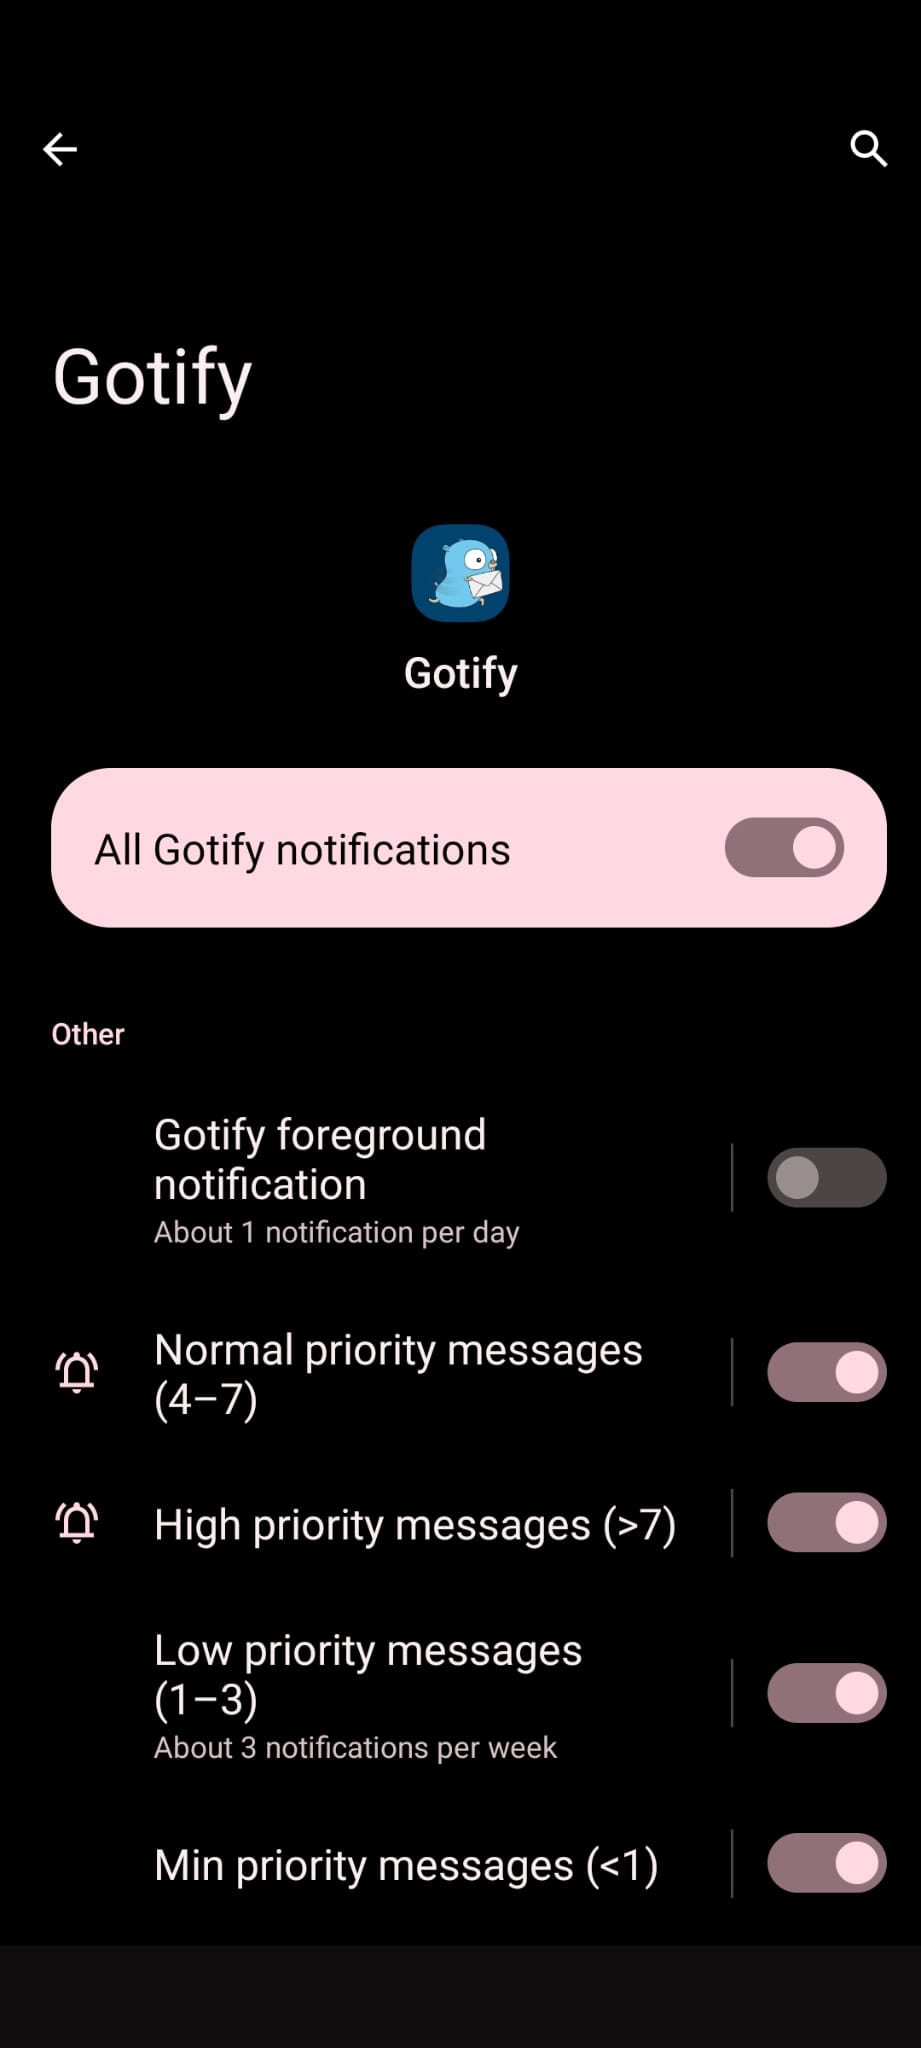
Bonus Bonus Tipp: There is also a cross platform tray application out there that you can install for your laptop or desktop PC, to receive notification from your gotfiy service.
23. The End
That’s it, we’re done. No more services to install, no more configurations left to configure, no more users and permissions to set, and especially no more documentation to write.
Not really, there’s always something that can be done. But for now, I am free!
This was the longest piece of continuous text I’ve ever written, and it took me way too long to finish it. But I’m happy I did. I think I learned a lot and hopefully, you dear reader, learned something too.
At last, enjoy these last server-themed movie posters.


