How did I created my website?
December 19, 2023 | 2,796 words | 14min read
This post is outdated, I do not use the theme specified in this post anymore.
This post primarily serves as documentation for my website. Additionally, if someone finds something useful here, they are welcome to use it. The entire source code, including blog posts and their digital signatures, can be found on GitHub.
I created my website using three main components:
- Server Host: I utilize Github-Pages for hosting. I choose GitHub Pages, because they are free and it’s really easy to upload files to it.
- Website Framework: The website is built using Hugo, a static website generator. Hugo can generate a website from markdown files, making it really easy to add new content to the website.
- Website-Theme: I choose the PaperMod theme for my Website. Hugo offers all kinds of different themes one can use, I choose PaperMod since its simple and I like its look.
One important disclaimer for those considering GitHub Pages: the repository must be public. If you prefer to use GitHub Pages with a private repository, you will need either GitHub Pro or Enterprise.
Installing Hugo
For a detailed guide on how to install Hugo, I recommend visiting the official Hugo website. If you have at any point difficulties installing Hugo, refer to that website for assistance.
On Debian and Debian-based Operating System, such as Ubuntu, you can install Hugo using the apt package manager. Open a terminal and type the following:
1sudo apt install hugo`
To verify the installed version of Hugo, you can use the following command:
1hugo version
Keep in mind Debian, has a very slow release cycle. In my case, the installed version was not up-to-date, so I chose to uninstall it:
1sudo apt remove hugo
Instead, I installed the latest Hugo version, by downloading the package directly from GitHub.
For Windows users, Hugo can be installed using a package manager like choco, scoop or winget. For instance, to install Hugo via chocolate execute the following command:
1choco install hugo-extended
Creating a Project
To start your Hugo project, you can refer to the Hugo quickstart guide for guidance.
We begin by establishing the folder structure for your Hugo project. Open a terminal in the desired folder for your project and create a new Hugo project with the following command:
1hugo new site <website_folder_name> --format yaml
I recommend including the --format yaml argument when creating the project.
This ensures that the project configuration file is generated using a YAML format, which in my opinion, is more readable. However if you omit the --format yaml argument, the configuration file will be generated in the .toml format.
Installing the Theme
Themes play a crucial role in determining the front-end design, overall appearance, and functionality of your website. They provide a collection of site layouts that make it easy to build a website. Numerous Hugo themes can be found on GitHub.
For my website, I choose the PaperMod theme which features a clean modern design:
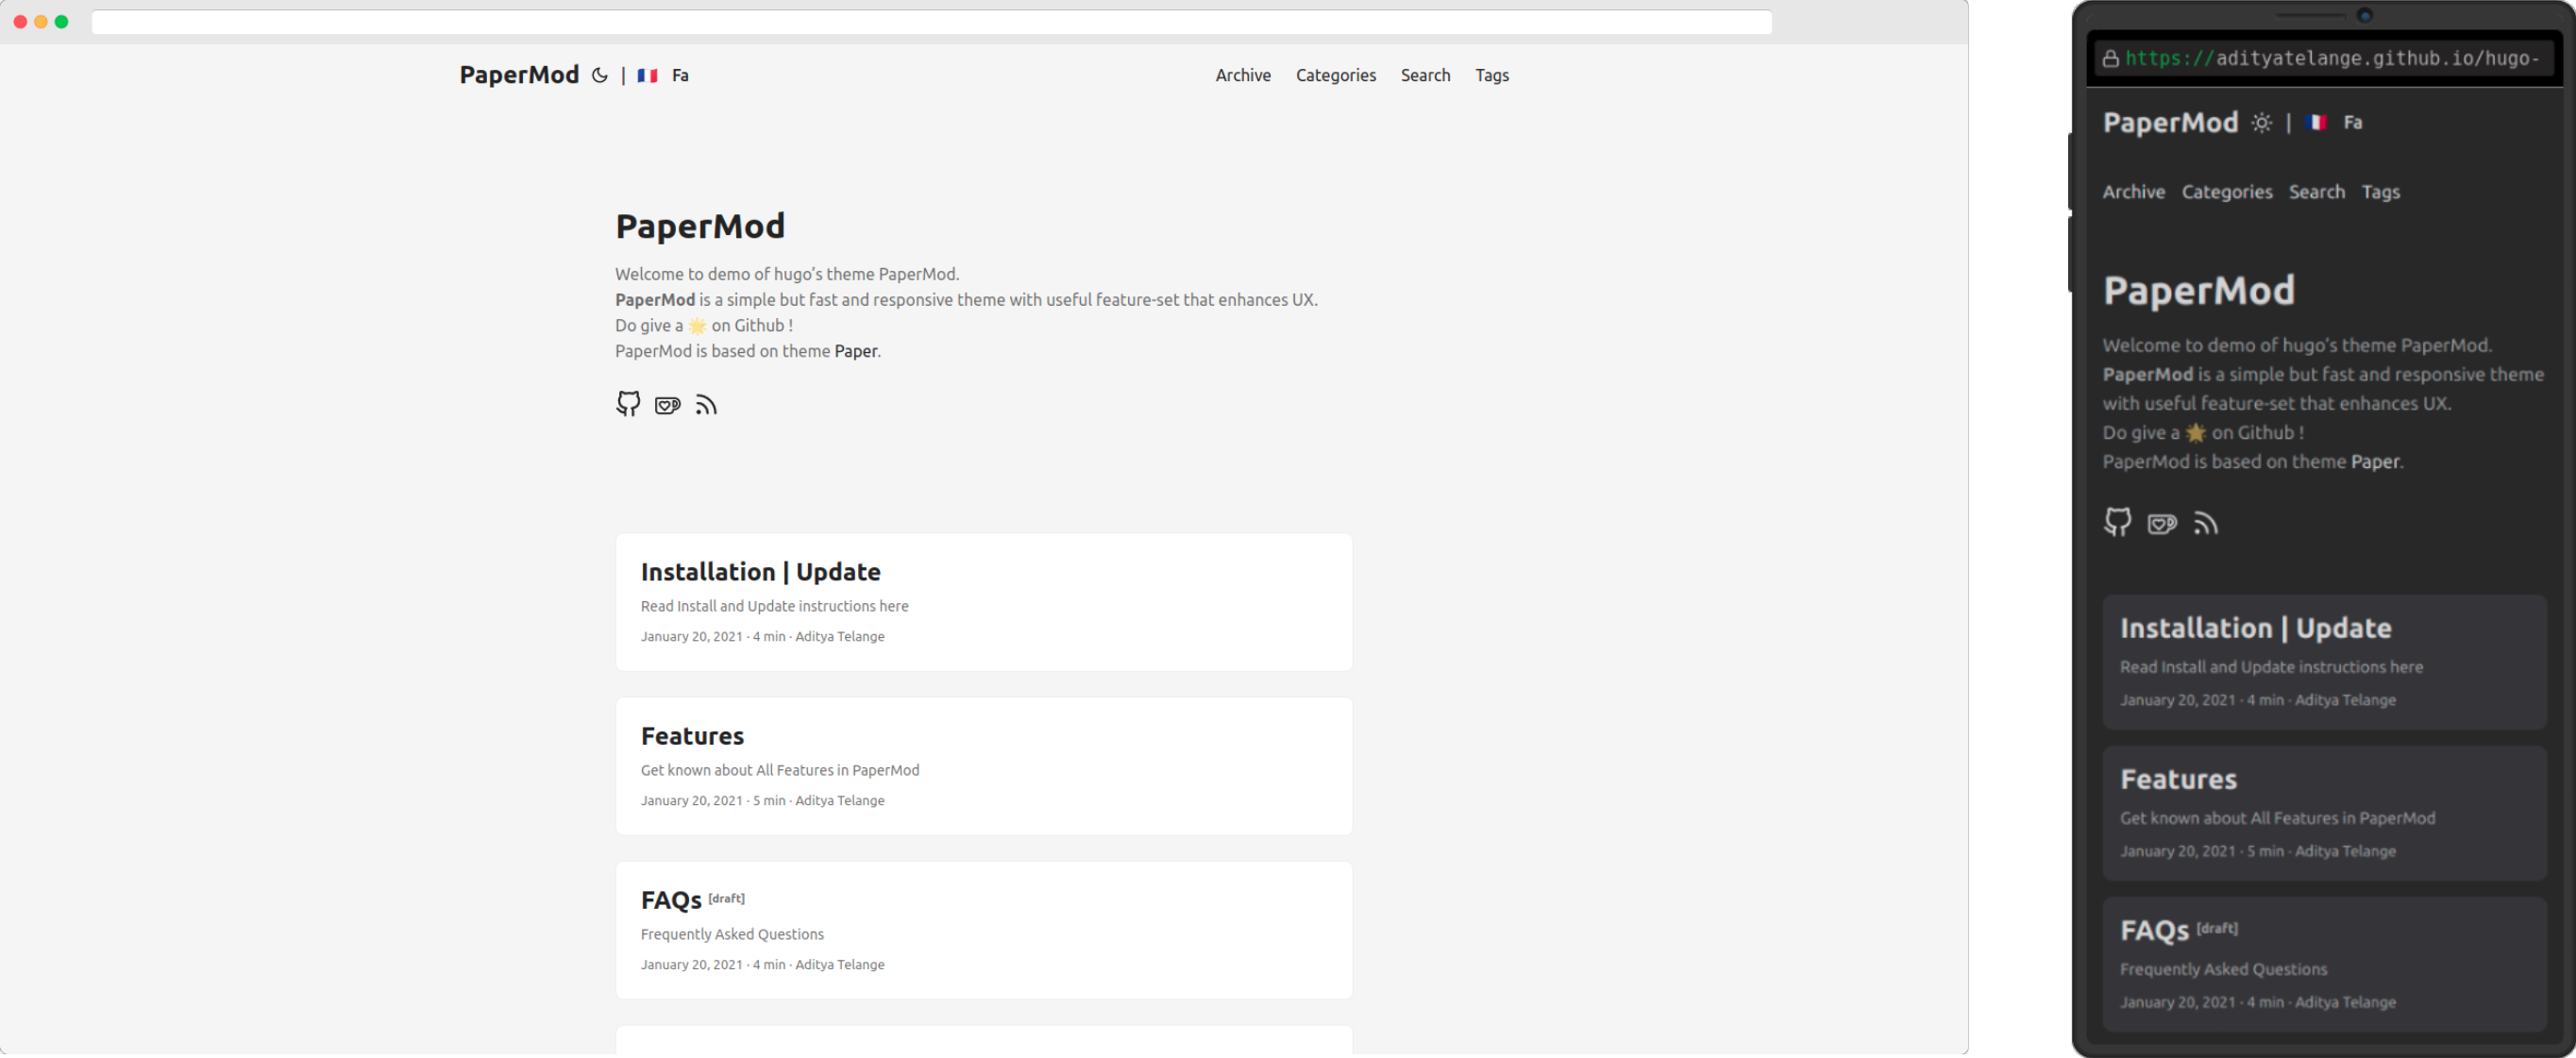
To install the PaperMod theme and ensure compatibility with GitHub Pages, use the second installation method, which involves using git sub modules:
1git submodule add --depth=1 https://github.com/adityatelange/hugo-PaperMod.git themes/PaperMod
2git submodule update --init --recursive
If in the future you need to re clone your repository, remember to execute the second command again, s the submodule might not be included in the cloning process.
To update the theme, use the following command:
1git submodule update --remote --merge
After installing the theme, you need to inform Hugo that you want to use the PaperMod theme. To do that, you need to edit the hugo.yaml file and add the following line:
1theme: "PaperMod"
The Project Structure
After creating your project structure and installing a theme of your choice, your project structure should resemble the following:
 1├───archetypes
 2├───assets
 3├───content
 4├───data
 5├───i18n
 6├───layouts
 7├───public
 8├───static
 9├───themes
10└───hugo.yml
Key components of this structure include:
content: This folder is used to store the content of your website. In here you save your markdown files, which will be used to generate the site.public: Hugo saves the built websites in this folder. It contains the final output of your website that can be deployed.static: This folder is used to store static data such as images or videos for your pages.themes: Here, the installed theme is saved. If you want to customize the appearance or behavior of the theme, you would make modifications in this folder.hugo.yml: This file is the general configuration file for your website. You can adjust various settings, such as the title of your website or the author information.
For more thorough explanation, refer to the Hugo website guide on directory structure.
Configure Settings
General Settings
To tailor the behavior and appearance of your website, edit the hugo.yml file within the project structure. All changes mentioned in this section will be made in that file unless specified otherwise. If you chose a different format during installation, the file name could be either hugo.toml or hugo.json.
The first modification addresses privacy settings to align with GDPR guidelines:
 1privacy:
 2  disqus:
 3    disable: true
 4  googleAnalytics:
 5    disable: true
 6  instagram:
 7    disable: true
 8  twitter:
 9    disable: true
10  vimeo:
11    disable: true
12  youtube:
13    disable: true
For enhanced website security, I use the following HTTP headers configurations:
1server:
2  headers:
3  - for: /**
4    values:
5      Content-Security-Policy: script-src localhost:1313
6      Referrer-Policy: strict-origin-when-cross-origin
7      X-Content-Type-Options: nosniff
8      X-Frame-Options: DENY
9      X-XSS-Protection: 1; mode=block
For a more in depth guide on what these different configurations mean you can check out the awesome cheat-sheet from owsap on this topic. Another useful tool in combination with that is the following website: security-header which allows you to check if the HTTP headers of your website are really correctly configured.
Params Settings
The following section is about the params section of the configuration file. If the params section doesn’t exist, create it in the configuration file. Refer to my complete hugo.yml file for more details.
Here are some other neat settings I found, some of them are from Hugo others are from my theme:
howReadingTime: true: Provides an estimate of how long it would take to read each post.ShowCodeCopyButtons: true: Allows copying of code from code blocks with a button press.ShowWordCount: true: Displays the number of words at the top of each post.ShowRssButtonInSectionTermList: true: Adds an RSS icon to the archive page.
Refer to the PapersMod variables for additional settings.
Menu
Finally, I adjusted the website menu by modifying the menu section. The example below illustrates the menu:

To archive a menu like shown above, the first thing you need to do is add the following to the hugo.yaml:
 1menu:
 2  main:
 3    - identifier: home
 4      name: Home
 5      url: /posts/
 6      weight: 10
 7    - identifier: about
 8      name: About
 9      url: /about
10      weight: 20
11    - identifier: tags
12      name: Posts by Tags
13      url: /tags/
14      weight: 30
15    - identifier: archive
16      name: Archive
17      url: archives
18      weight: 40
The identifier is a unique name for every item in the menu, the url describes the location the link in the menu leads to, keep in mind the URLs starts implicit already in the content folder.
The weight describes the physical location of the menu, with it you can order the menus into a custom order.
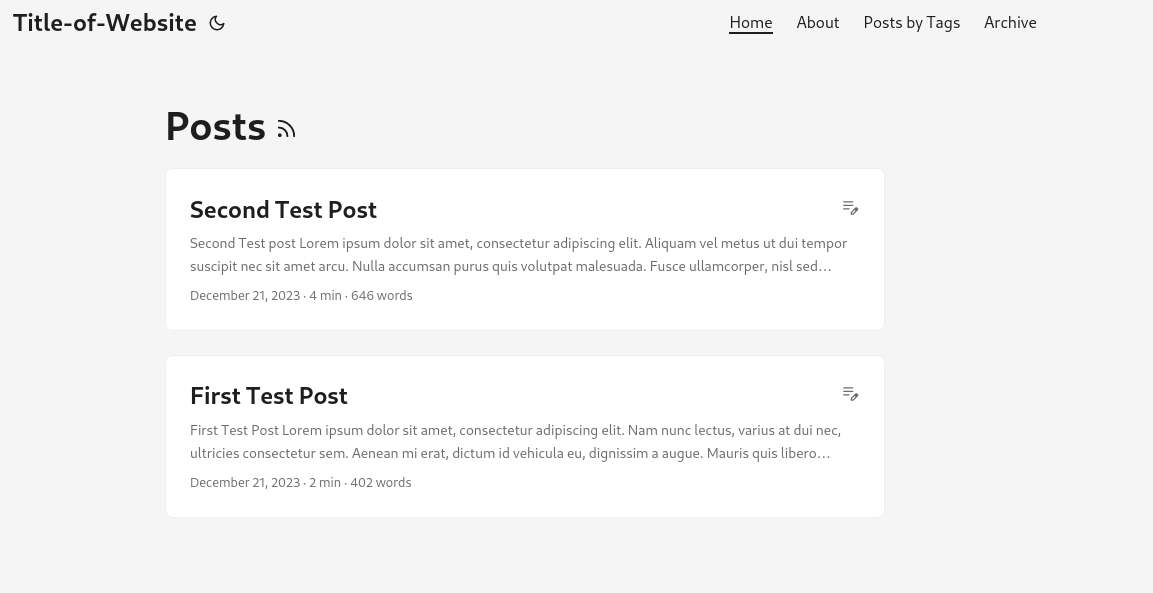
The home button leads back to the homepage, which shows an overview of my recent blog posts:
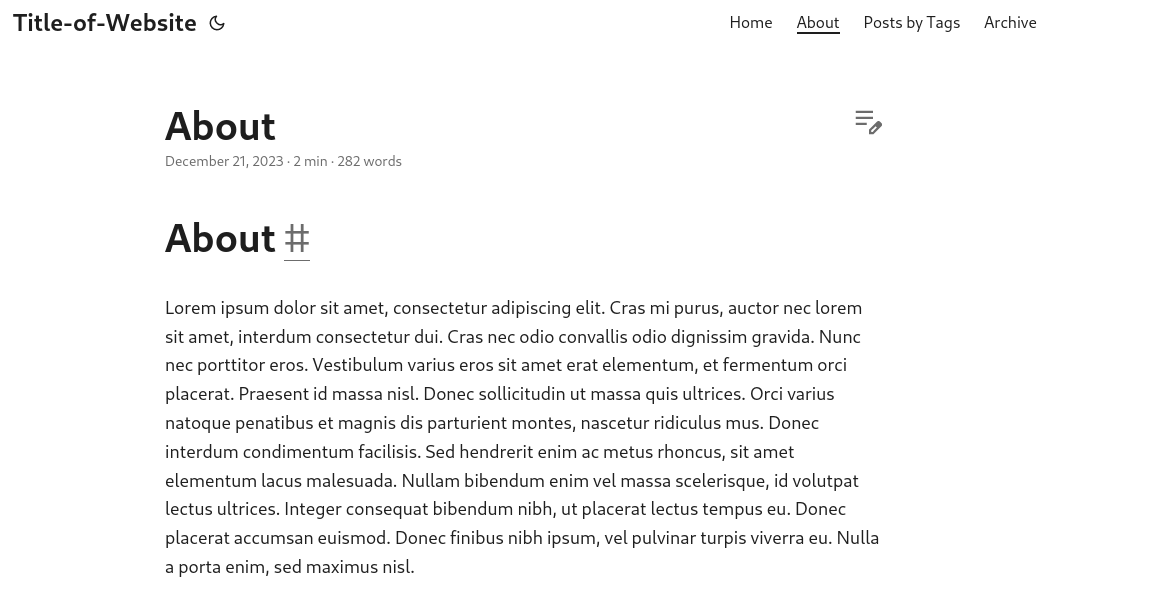
The About button leads to a site, which describes what the website is about, this page is also not visible in the archive or on the homepage:
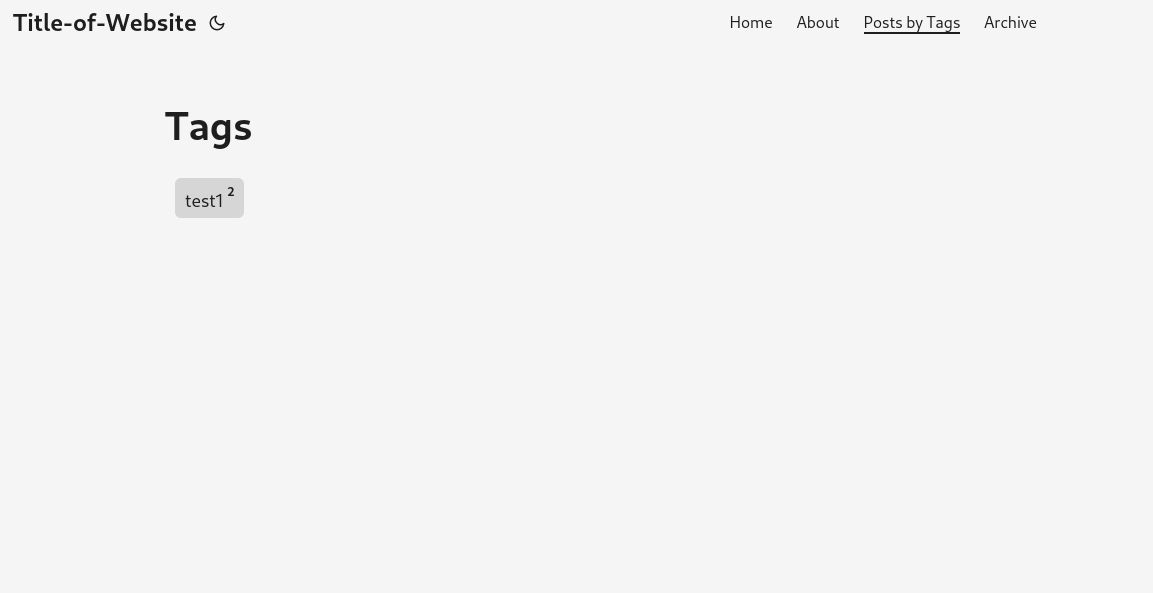
The tags button leads to a site, where one can search for posts by tags:
The Archive button leads to a site, which depicts all posted posts by time they were posted, you can see here an example:
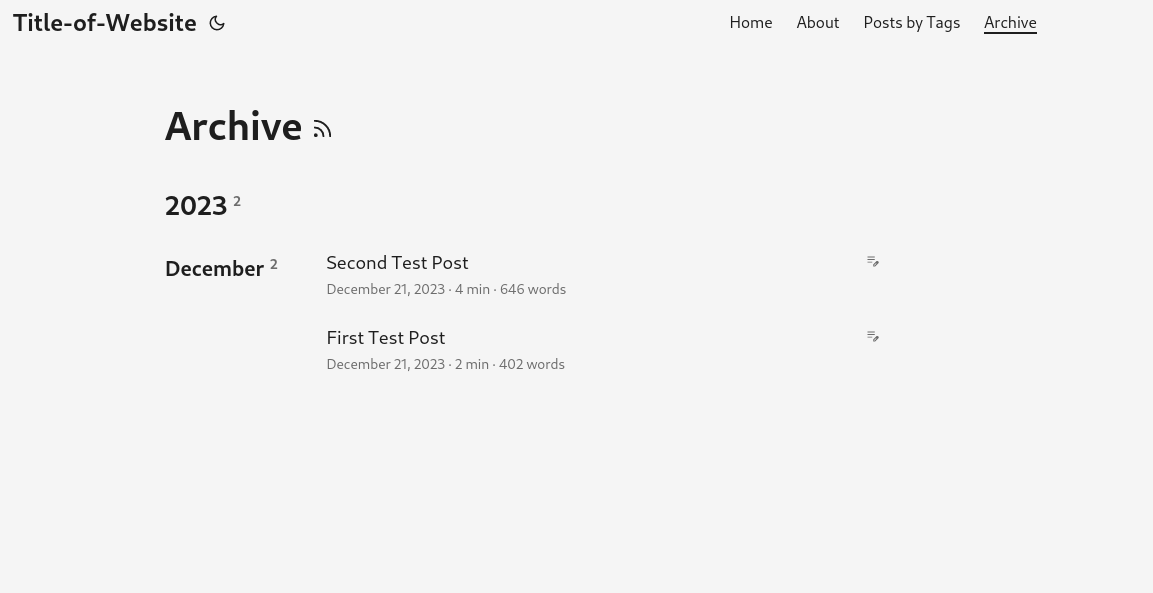
For the archive site to work properly, you need to create a archives.md file in the content folder, with the following lines in it:
1+++
2title = "Archive"
3layout = "archives"
4url = "/archives/"
5summary = "archives"
6+++
Everything between the pluses is called front matter and is used to embed meta information about the file.
Summary
In summary my complete hugo.yml file is the following:Click here to show it
 1baseURL: ''
 2title: Title-of-Website
 3languageCode: en-us
 4theme: "PaperMod"
 5
 6privacy:
 7  disqus:
 8    disable: true
 9  googleAnalytics:
10    disable: true
11  instagram:
12    disable: true
13  twitter:
14    disable: true
15  vimeo:
16    disable: true
17  youtube:
18    disable: true
19
20server:
21  headers:
22  - for: /**
23    values:
24      Content-Security-Policy: script-src localhost:1313
25      Referrer-Policy: strict-origin-when-cross-origin
26      X-Content-Type-Options: nosniff
27      X-Frame-Options: DENY
28      X-XSS-Protection: 1; mode=block
29
30params:
31  name: MonkeMan
32  email: WiseServiceScholar@protonmail.com
33  ShowRssButtonInSectionTermList: true
34  description: The Personel Blog of MonkeMan
35  keyword: ["blog"]
36  ShowReadingTime: true
37  ShowShareButtons: false
38  ShowWordCount: true
39  ShowCodeCopyButtons: true
40
41menu:
42  main:
43    - identifier: home
44      name: Home
45      url: /posts/
46      weight: 10
47    - identifier: about
48      name: About
49      url: /about
50      weight: 20
51    - identifier: tags
52      name: Posts by Tags
53      url: /tags/
54      weight: 30
55    - identifier: archive
56      name: Archive
57      url: archives
58      weight: 40
59
Adding Content to Your Website
Adding content to your website involves creating new pages, blog posts, or sections. As demonstrated in the previous section, you can include these in the menu by updating the hugo.yml file.
To add an About page to the menu, execute the following command:
1hugo new about.md
Remember to be in the project folder when running this command. The file will be created in the content directory. Edit the about.md file to add content to the About page. For example:
1+++
2title = 'About'
3date = 2023-12-21T20:00:07+01:00
4draft = true
5hiddenInHomelist = true
6+++
7# About
8
9I am a very cool guy!
To create a new blog post visible on the homepage and in the archive, use the command:
1hugo new posts/new-cool-post.md
This will create a markdown file new-cool-post.md, in the content/posts folder.
To make blog posts discoverable by tags, you can include tags in the front matter of the post. Like this:
1+++
2tags = ["my-first-cool-tag", "my-second-cool-tag"]
3+++
To add an image to a page, place the image in the static folder and reference it in the markdown file:
1
In the frontmatter of your markdown file you can change a bunch of setting on how the post will appear. Some useful settings include:
tags, If you want that your blog post are discoverable by tagshiddenInHomelist, If you want to hide some blog postdrafts, set this to false for deployment, hugo doesn’t build draft files to html sites.
Refer to PaperMod Variables for more front matter settings.
When ready to build your site, run:
1hugo serve
To include drafts in the build, add the --buildDrafts option.
Hugo will spin up a webserver hosting your website, you can access it through localhost:1313.
Shortcodes
Shortcodes in Hugo are like custom tags that you can use to extend the functionality of your content. They allow you to embed dynamic elements or execute custom logic within your markdown files.
Details Shortcode
In my case, I wanted a shortcode named details to generate foldable markdown boxes. Like this:
I wanted a shortcode which would allow me to use foldable markdown box:
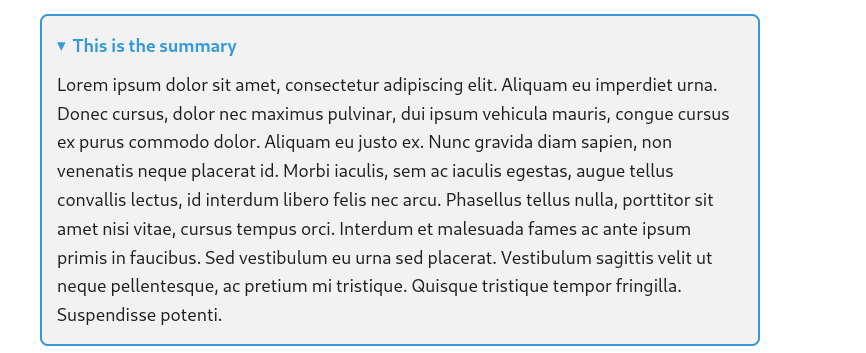
Here’s a brief explanation of how it works:
- Shortcodes are stored in the
/layouts/shortcodes/directory. The shortcode file,details.html, contains HTML and Hugo templating code. - Shortcodes can take parameters to customize their behavior. In the details shortcode, we use a parameters:
$summaryfor the summary text. - To use the
detailsshortcode, you include it in your markdown content with\{\{< details ... >\}\}(without the backslashes).
The full `details.html` code
 1<style>
 2  /* Style for the details element */
 3  details {
 4    border: 2px solid #3498db; /* Change border color to a noticeable color, e.g., blue */
 5    border-radius: 8px;
 6    margin: 20px 0;
 7    padding: 15px;
 8    background-color: #f2f2f2; /* Add a light background color */
 9    overflow: hidden; /* Hide the content initially */
10    transition: max-height 0.5s ease-out; /* Add a transition effect */
11    max-height: 70px; /* Set a max-height value to determine the collapsed height */
12  }
13
14  /* Style for the summary element */
15  summary {
16    font-weight: bold;
17    cursor: pointer;
18    color: #3498db; /* Match the border color for consistency */
19  }
20
21  /* Style for the content inside the details element */
22  .collapsible-content {
23    margin-top: 10px;
24  }
25
26  /* Expand the details when it's open */
27  details[open] {
28    max-height: 500px; /* Set a higher value for the expanded height */
29  }
30</style>
31
32<details>
33  <summary>{{ (.Get 0) | markdownify }}</summary>
34  <div class="collapsible-content">
35    {{ .Inner | markdownify }}
36  </div>
37</details>
An usage example in a blog post(again without the backslashes):
1# This is my cool blog
2
3I have a lot to say, look at this:
4
5\{\{< details "This is the summary" >\}\}
6Collapsed text
7\{\{< /details >\}\}
8
9And here I have more to say.
Warning Shortcode
Another shortcode I added was the warnings shortcode this is basically a red box with title and some kind of content:The full `warning.html` code
 1<!-- layouts/shortcodes/warning.html -->
 2<style>
 3    .warning {
 4        background-color: #ffe4e1; /* Light pink background color */
 5        padding: 15px; /* Padding inside the box */
 6        border-radius: 5px; /* Rounded corners */
 7        margin-bottom: 15px; /* Margin at the bottom for spacing */
 8    }
 9
10    .warning-title {
11        font-size: 20px; /* Title font size */
12        margin-bottom: 10px; /* Margin below the title */
13        color: #8b0000; /* Dark red text color */
14        font-weight: bold; /* Bold text */
15    }
16</style>
17
18<div class="warning">
19    <div class="warning-title">{{ .Get 0 | markdownify | safeHTML }}</div>
20    <p>{{ .Inner}}</p>
21</div>
Images and Adding Captions
In Hugo, adding captions to images can be achieved using custom render hooks. Here’s a step-by-step guide:
- Edit the file(or create it) named
render-image.htmlin the /themes/PaperMod/layouts/_default/_markupdirectory. Add the following custom code:1{{ if .Title }} 2 <figure class="latex-figure"> 3 <img loading="lazy" src="{{ .Destination | safeURL }}" alt="{{ .Text }}"> 4 <figcaption> 5 <p>{{ .Title | markdownify }}</p> 6 </figcaption> 7 </figure> 8{{ else }} 9 <img loading="lazy" src="{{ .Destination | safeURL }}" alt="{{ .Text }}"> 10{{ end }} - Now, when you add an image in your markdown, you can include a caption using the
syntax. For example:To add a image source to your Image:11") - If needed you can adjust the CSS styling in the
render-image.htmlfile.
HTML Content and custom CSS
If you already have finished html files that you want to add to your blog, you can add them to your content folder liek your markdown files. In order for them to be dispalyed correctly you need to add a front-matter section:
1+++
2title = 'Title'
3date = 2023-12-22T00:32:40+01:00
4draft = true
If you want to add some custom CSS code to all your sites/posts, you can do this by creating a .css file in the folder assets/css/extended, all the CSS code in this file will be applied to all pages.
If you want to add some custom CSS code to a single site, you can do this by creating a custom .css file in your static folder, after which you need to edit the single.html in the themes/YOUR_THEME/layout/_default/ folder and add the following section to it:
1{{ with .Params.custom_css }}
2  {{- $customCSSPath := printf "%s.css" . }}
3  <link rel="stylesheet" href="{{ $customCSSPath | absURL }}">
4{{ end }}
The last thing you need to do it to edit the front matter of the html file to which you want to apply your custom css:
1+++
2title = 'title'
3date = 2023-12-22T00:32:40+01:00
4draft = true
5custom_css = "your_custom_cdd"
6+++
Comments
Adding comments or guest books to static sites, especially those hosted on platforms like GitHub Pages, can be challenging due to the lack of server-side processing like the lack of PHP or databases. I looked at some different options:
- Self-Made Code: Many traditional comment systems, like those using PHP, require server-side processing, which is not supported on GitHub Pages.
- External Hosting: Some third-party services offer comment systems that work with static sites. Examples of this are Disquis or Commento. But such sites have often times privacy concerns
As such I didn’t add any commenting feature to my website.
Conclusion
I hope this quick tutorial could help whomever read this through their journey of hosting a website. I will try to keep this post up to date with my changing website, but I might forget to.
References:
