A Basic Linux Rice
August 21, 2024 | 1,508 words | 8min read
Introduction
A few months ago, I switched from Debian to the Arch operating system. There were three major reasons for my switch:
Debian is often hailed as the most stable operating system out there. This stability comes from the extensive testing that new software or updates undergo before being released. However, this also has a disadvantage: the software on Debian is often outdated. For example, at the time of writing this post, the latest version of Neovim available on the current Debian release (Bookworm) is
0.7.2, while Neovim has already released version0.10.1.Debian comes with a lot of default software that you might not need. I wanted to try a minimal installation with the dynamic tiling window manager Hyprland, which, at that time, wasn’t supported by Debian.
Arch, being very minimal and bare-bones, is great for learning the ins and outs of Linux.
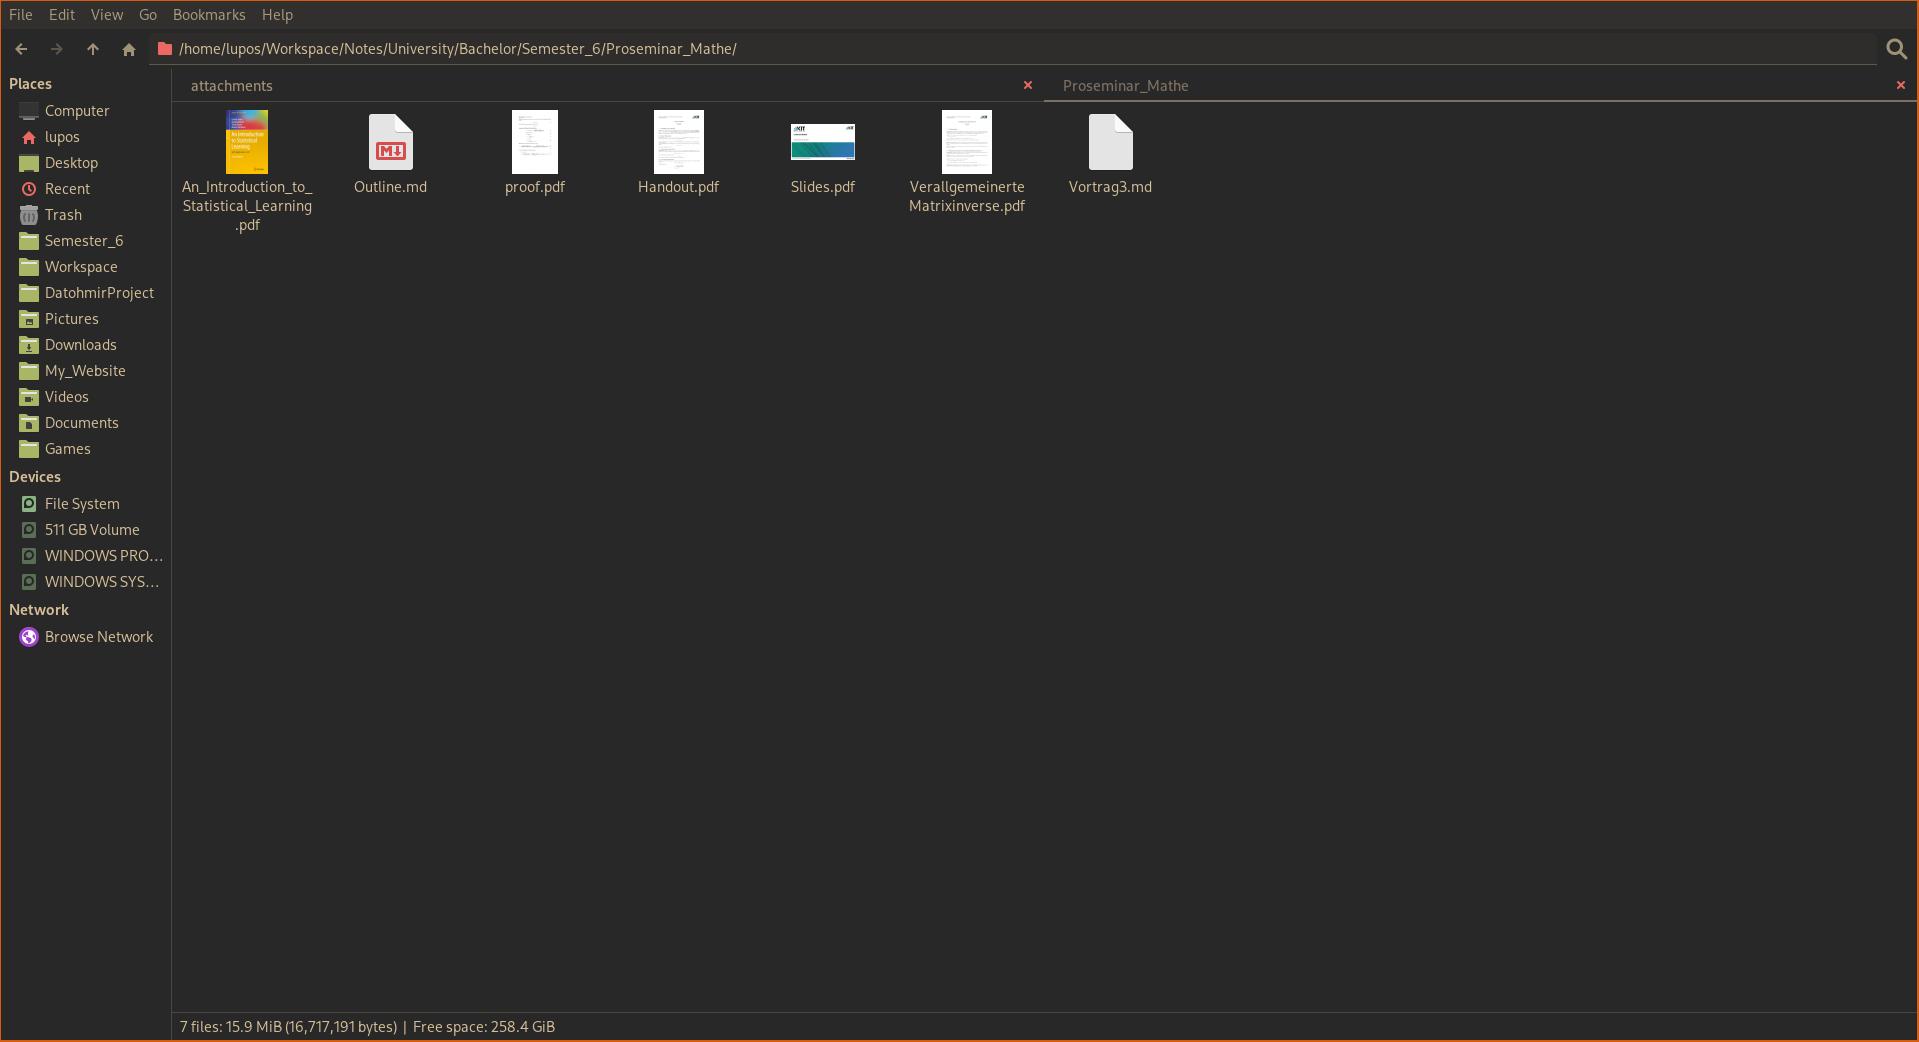
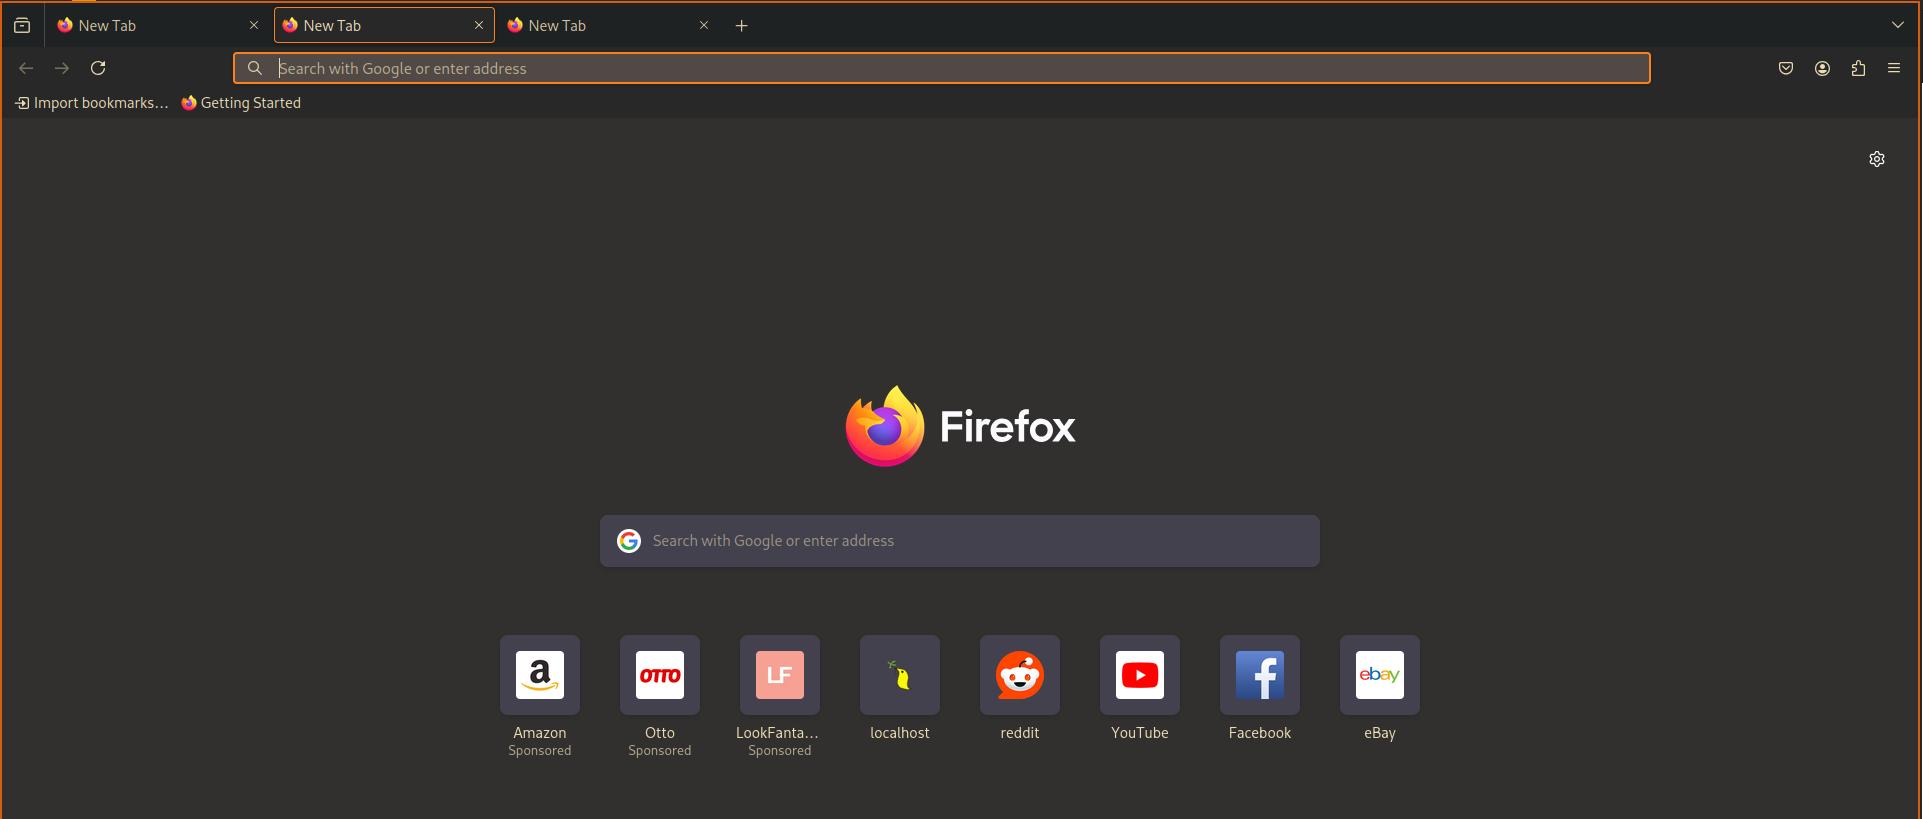
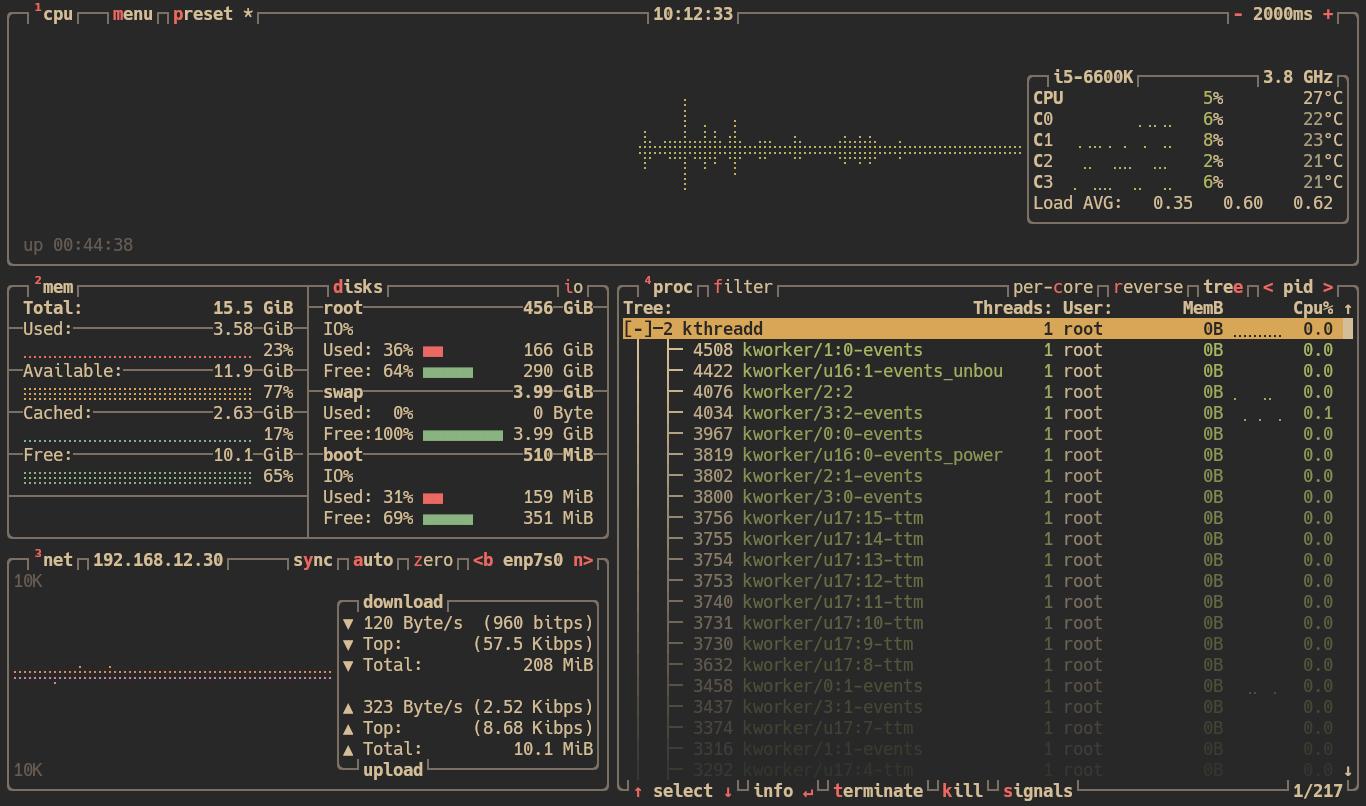
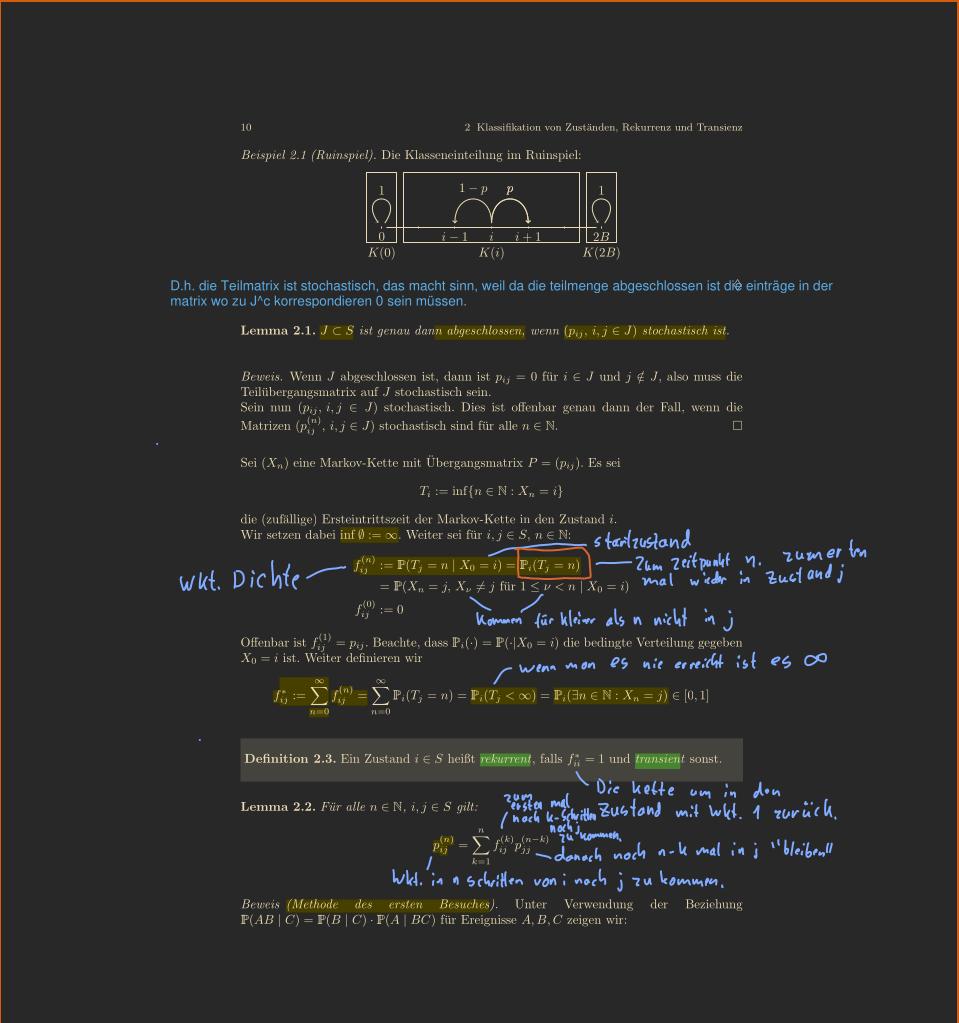
In the process of switching, I built my ‘own’ operating system step by step by installing and customizing various pieces of software. I gradually riced my setup to what you can see below:
What is Ricing?
Linux ricing describes the process of customizing one’s desktop environment to their liking. It involves modifying icons, color schemes, the taskbar, startup apps, screensaver, lock screens, and much more. The saying “your creativity is the only limit” is especially true when it comes to ricing your Linux environment. You can find many Linux rices online, with one popular gathering place being the unixporn subreddit.
My Rice
In this section, I want to go through how I customized linux to look like in the slideshow above. This is not meant as an elaborate complete guide on how to customize linux, but more as a form of documentation for myself and as a starting point of what you can do for others.
My entire rice is based on the gruvbox dark color palette, if at any point In the guide I use colors I got them from this repository.
Tiling Manager: i3
I3 is a dynamic tiling window manager for your Linux desktop environment.
I started with the i3 default config and modified it to suit my needs. Here, I’ll highlight some parts of my configuration that differ from the default. You should find the default config file under ~/.config/i3/config. If it’s not there, create the file and copy the default i3 configuration into it.
I set the font in the i3 config to one of the Nerd Fonts:
1font pango:Hack Nerd Font 10
For this to work, you first need to install the font. On Arch, you can do this with pacman -S <name_nerd_font>. You can find the names of the Nerd Fonts here.
I created some custom keybindings to launch apps that I often use:
 1
 2# start a terminal
 3bindsym $mod+t exec kitty
 4
 5# start internet browser
 6bindsym $mod+i exec firefox
 7
 8# open file manager
 9bindsym $mod+f exec thunar
10
11# kill focused window
12bindsym $mod+Shift+q kill
13
14# take screenshots
15bindsym Print exec "flameshot gui"
16
17# start dmenu (a program launcher)
18# bindsym $mod+m exec --no-startup-id dmenu_run # old
19bindsym $mod+m exec --no-startup-id rofi -show run
Since I use a dual-monitor setup, I define my two monitors:
 1set $monitor1 "HDMI-0"
 2set $monitor2 "DVI-D-2"
 3
 4workspace $ws1  output $monitor1
 5...
 6workspace $ws10 output $monitor2
 7
 8bindsym $mod+1 workspace number $ws1
 9...
10bindsym $mod+0 workspace number $ws10
If you’re unsure which exact port your monitor is using, you can use xrandr to find out.
Setting my Gruvbox color scheme:
1class                 border  backgr. text    indicator child_border
2client.focused          #d65d0e #d65d0e #fbf1c7 #d65d0e   #d65d0e
3client.focused_inactive #282828 #282828 #fbf1c7 #282828   #282828
4client.unfocused        #282828 #282828 #fbf1c7 #282828   #282828
5client.urgent           #2f343a #900000 #ffffff #900000   #900000
6client.placeholder      #000000 #0c0c0c #ffffff #000000   #0c0c0c
7
8client.background       #ffffff
Finally, I use the image viewer feh for my desktop background and Polybar for my taskbar:
1exec_always ~/.config/polybar/launch.sh &
2exec_always feh --bg-fill ~/Pictures/wallpaper/reverend_insanity.jpeg
You can restart i3 and apply your changes using the key combination SUPER + SHIFT + r (unless you’ve changed this keybinding in the i3 configuration file).
Taskbar: Polybar
Polybar is an easy-to-use status bar.


After installing Polybar, you should be able to find the configuration files under ~/.config/polybar/config.ini.
I first changed the colors to the Gruvbox theme:
 1background = #282828
 2background-alt = #282828
 3foreground = #ebdb2
 4alert = #cc241d
 5green = #98971a
 6yellow = #d79921
 7blue = #458588
 8purple = #b16286
 9aqua = #689d6a
10red = #fb4934
Then, I set all the modules that I want to have in my status bar:
1modules-left = xworkspaces xwindow
2modules-right = pulseaudio memory cpu date
I also changed the fonts:
1font-0 = "Hack Nerd Font:size=10;2"
2font-1 = "Hack Nerd Font:size=10;2"
Finally, I set the color for CPU, Memory, Volume, and Time to yellow:
1format-prefix-foreground = ${colors.yellow}
Terminal: Kitty
Kitty is a terminal emulator that uses the GPU to make it blazingly fast.

As with the previous two applications, you will find its configuration file in ~/.config/kitty/kitty.conf.
First, let’s set the font:
1font_family     Hack Nerd Font
2font_size 	    13.0
3bold_font       auto
4italic_font     auto
5bold_italic_font auto
Next, we’ll create keybindings that allow us to change the font size in the terminal using CTRL + PLUS and CTRL + MINUS:
1# increase font size
2map ctrl+plus   change_font_size all +1.0
3map ctrl+kp_add change_font_size all +1.0
4
5# decrease font size
6map ctrl+minus   change_font_size all -1.0
7map ctrl+kp_minus change_font_size all -1.0
Finally, let’s set the Gruvbox theme:
 1# Gruvbox theme
 2# Based on https://github.com/morhetz/gruvbox by morhetz <morhetz@gmail.com>
 3# Adapted to Kitty by wdomitrz <witekdomitrz@gmail.com>
 4
 5cursor                  #928374
 6cursor_text_color       background
 7
 8url_color               #83a598
 9
10visual_bell_color       #8ec07c
11bell_border_color       #8ec07c
12
13active_border_color     #d3869b
14inactive_border_color   #665c54
15
16foreground              #ebdbb2
17background              #282828
18selection_foreground    #928374
19selection_background    #ebdbb2
20
21active_tab_foreground   #fbf1c7
22active_tab_background   #665c54
23inactive_tab_foreground #a89984
24inactive_tab_background #3c3836
25
26# black (bg3/bg4)
27color0                  #665c54
28color8                  #7c6f64
29
30# red
31color1                  #cc241d
32color9                  #fb4934
33
34# green
35color2                  #98971a
36color10                 #b8bb26
37
38# yellow
39color3                  #d79921
40color11                 #fabd2f
41
42# blue
43color4                  #458588
44color12                 #83a598
45
46# purple
47color5                  #b16286
48color13                 #d3869b
49
50# aqua
51color6                  #689d6a
52color14                 #8ec07c
53
54# white (fg4/fg3)
55color7                  #a89984
56color15                 #bdae93
File Explorer: Thunar
Thunar is a file manager for the XFCE desktop environment.

The Gruvbox theme can be installed via pacman using sudo pacman -S gruvbox-material-gtk-theme-git and sudo pacman -S gruvbox-material-icon-theme-git. To switch to the Gruvbox theme, I use LXAppearance, which can be installed with sudo pacman -S lxappearance. Open LXAppearance and select “Gruvbox-material-Dark” under both the Widgets and Icon Theme sections.
If Thunar doesn’t change its appearance after this, it might be running as a daemon. Run thunar -q to quit the daemon and then reopen Thunar; the theme should now be applied.
Browser: Firefox

The Gruvbox theme can be installed on Firefox via an addon.
System Monitor: Btop
Btop is a resource monitor, which is a more feature-rich version of htop.

To change the theme in Btop, run btop, press ESC, choose Options, and then select gruvbox-ark-material as the color theme.
PDF Reader: Zathura
Zathura is a customizable, minimalistic PDF reader that supports Vim keybindings.

If you don’t have a config folder for Zathura, you’ll need to create one. Navigate to ~/.config/ and run mkdir Zathura. After this, you can install the Gruvbox theme by downloading it from GitHub. Unpack it and run:
1cd zathura-gruvbox
2cp zathura-gruvbox-dark ~/.config/zathura/zathurarc
Fun: CBonsai, Fortune, Pipes.Sh, CMatrix and Fastfetch
CBonsai is a program that grows a bonsai tree, and Fortune is a program that displays random silly phrases from a database. Pipes.sh animates pipes in your terminal. Cmatrix makes you look like a hacker. Last but not least, Fastfetch is the successor to Neofetch and displays information about your system.
You can combine CBonsai and Fortune to grow a bonsai while displaying a random message:
1cbonsai -S -t 0.5 -m "$(fortune)"
The programs can be installed with the following command:
- Fastfetch:
sudo pacman -S fastfetch - Fortune:
sudo pacman -S fortune-mod - CBonsai:
yay -S cbonsai - Pipes.Sh:
yay -S pipes.sh - Cmatrix:
yay -S cmatrix-git
If you’d like, you can autostart these programs to have a nice welcome screen. For example to autostart fastfetch and cbonsai, open your i3 config and add the following lines:
1exec --no-startup-id i3-msg 'workspace 1; exec kitty --hold fastfetch'
2exec --no-startup-id i3-msg 'workspace 1; exec kitty --hold cbonsai -S -t 0.5 -m "$(fortune)"'
Backup Dotfiles Using GitHub
Now that you have a lot of configuration files that you might want to back up, one effective method is to use a Git repository.
First, create a bare Git repository:
1git init --bare $HOME/dotfiles
Next, add the following lines to your shell configuration file (in this example, I’m using fish):
1alias config='/usr/bin/git --git-dir=$HOME/dotfiles/ --work-tree=$HOME'
In the future, you can update your Git repository with the following commands:
1config add ~/.config/nvim
2config commit -m "nvim changes"
3config push
To hide files that you’re not tracking, run this command:
1config config --local status.showUntrackedFiles no
To push your dotfiles to GitHub, you’ll need to create a GitHub repository and define a remote:
1config remote add origin REMOTE-URL
References:
