My Homelab Part 2: DietPi
January 19, 2024 | 745 words | 4min read
Like mentioned in my last blog post in the “Homelab” series, I choose DietPi as operating system for my server. In this post I want to give a short overview on the installation process and other miscellaneous aspects related to it.
Installation
Installation Guide
The installation process for DietPi may vary slightly from one computer to another, but the steps outlined below should be applicable to most setups. This guide is specifically tailored for Raspberry Pi, but it can be adapted for other systems.
Ensure that your server computer is connected to the internet via Ethernet before proceeding.
Download DietPi:
Visit the official website and download the DietPi image for your hardware.Create Bootable Media:
Use popsicle on Linux or rufus for windows to flash the image onto a USB stick or on a SD card when installing on a Raspberry Pi.Insert Bootable Media:
Insert the flashed SD card or USB stick into your server computer.Boot Your Server Computer:
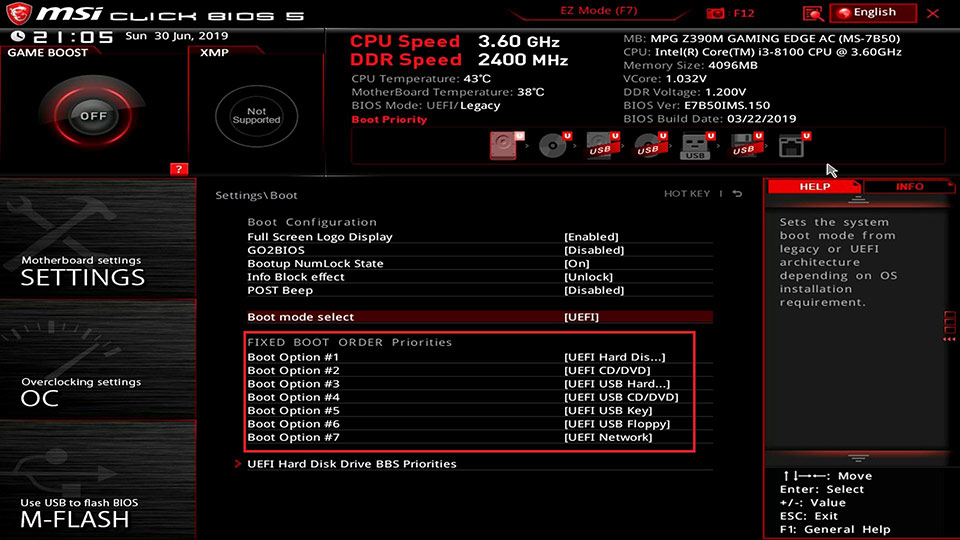
For Raspberry Pi, simply wait for it to fully start. For other computers, access the BIOS by pressing keys like “F1, F2, F10, F12, DEL, ESC” during startup. In the BIOS, locate the “Boot” option and select your USB stick as the first boot option.
- Configure DietPi via Network:
Since DietPi is a headless operating system, configure it via the network using SSH. Open a terminal and type ssh root@DietPi (replace “root” with your username and “DietPi” with the Hostname of your server if it differs). If SSH doesn’t work, use the IP address of your server computer instead (you can find it on your router’s website).

Enter the password when prompted (default is dietpi).
SSH(Secure Shell Protocol) is a network protocol for accessing services and computer over an unsecured network.
- Installation Process:
After connecting successfully, a series of installation processes will run in the terminal.
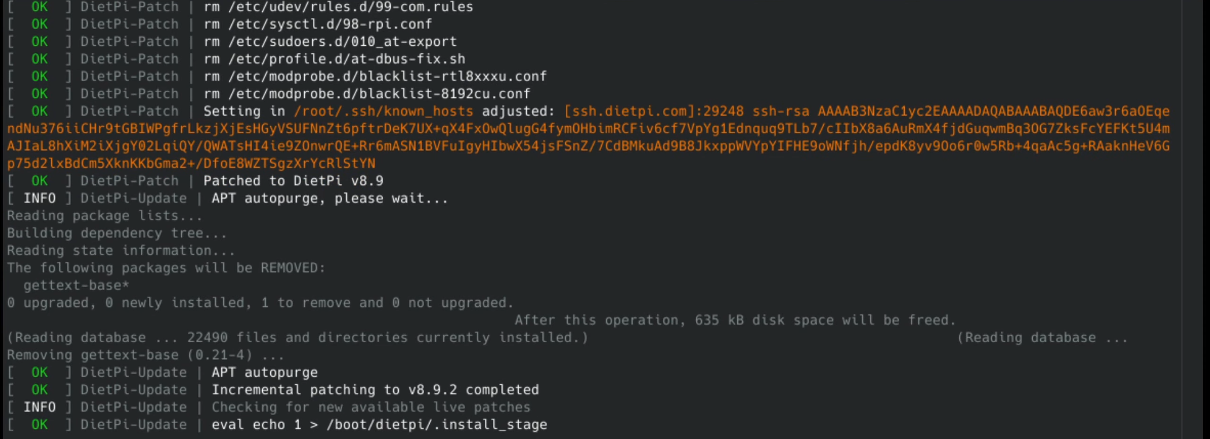
You may be asked about enabling the “DietPi Survey,” password change, and “serial/UART” settings. Follow the recommended options.
- Post-Installation Configuration:
After installation, you’ll be in the configuration window.
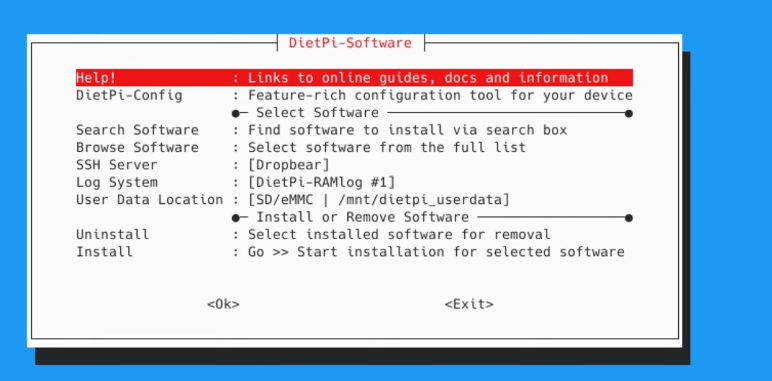
If you do not see this window you can type dietpi-software to enter it. Interesting settings are:
If you want to use scp to transfer files to your server, you need to change the SSH Server to OpenSSH.
Install Docker and Docker Compose if not already installed.
- Exit:
After configuring, exit the interface to see a screen similar to the one below in your terminal.
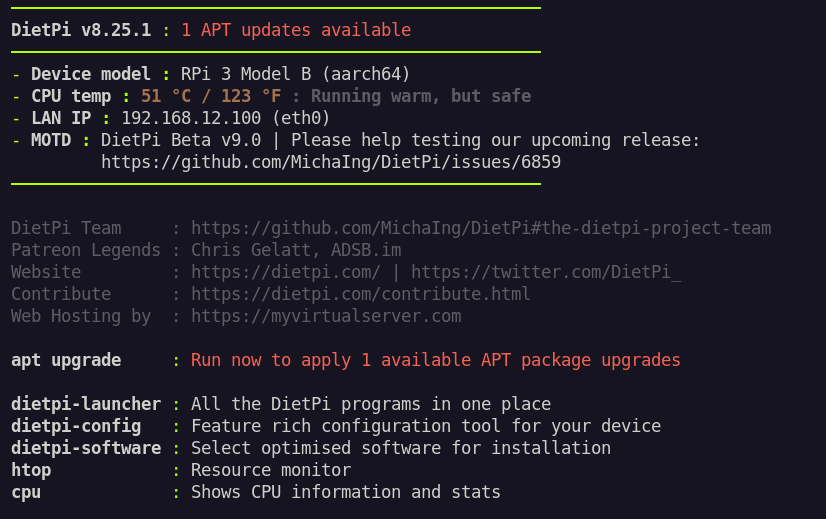
Congratulations! You have successfully installed DietPi headlessly on your server computer.
If you want to exit your ssh session you can press strg + d.
Useful Linux Commands
In general If you are not sure on how a Linux command works exactly, I would recommend looking into the man pages.
Here are some essential Linux commands that can help you perform various task’s on your system, these are especially important when maintaining your server via ssh:
- If you type
lsyou will see all the files in the current working directory. If you typels -lyou will in addition see the permissions and the owner of the files.

- To change the current working direction you can use the command
cd path/to/which/you/want/to/go. If you entercd ..you will move to the parent folder. - If you want to change the permission of a file you can use the command
chmod permission file_name, options for permission are:- “r” which stands for read
- “w” which stands for write
- “x” which stands for executable.
- To change the owner of a file you can use the command
chown user_name file_name. - To see the current working directory you can type
pwd:

- To edit/read/create files you can use the command
nano file_name:
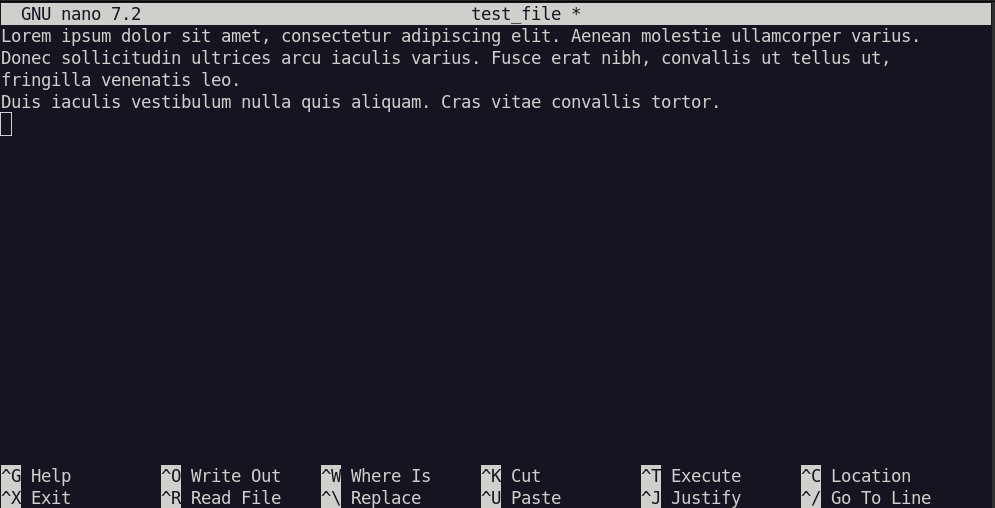
To save you written content you can press ctrl + o and then enter, to exit nano you can press ctrl + x.
- If you want to sent a file from your computer to the server computer you can use the following command:
scp /path/to/file/file_name root@dietpi:/path/saving/location.
Other useful commands are:
sudoto get admin privileges.rm file_nameto delete a file.mv file_name path/to/locationto move a file or directory.cp file_name path/to/locationto copy a file or directory.mkdir direcory_nameto create a directory../file_nameto execute a executable file.htopto see the current resource consumption by process.wget https://urlto download a file from the internet.
References:
