My Homelab Part 5: HomeAssistant with Zigbee2MQTT
January 19, 2024 | 1,542 words | 8min read
As I hinted in my initial post of this series, “My Homelab Part 0: Prologue,” my motivation for incorporating Home Assistant into my server revolves around dynamically scheduling the lights in my room. This functionality enables me to wake up gradually with softly illuminated surroundings and help me fall asleep with lights that gradually fade away. However, Home Assistant’s capabilities extend beyond light control.
Home Assistant is a free and open-source software designed for home automation. Functioning as the central control system for smart homes, it can be accessed either through an android app or a web-based interface.
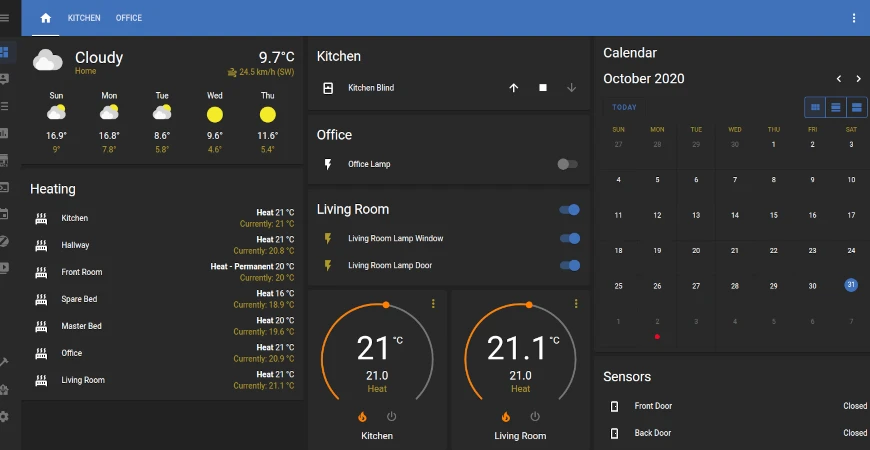
Smart homes integrate IoT devices, allowing them to connect to a central hub and exchange data. Examples of these devices include:
- Smart bulbs
- Sensors (e.g., smoke detectors, power detectors, air quality measure’s)
- Smart buttons and switches
- Home appliances (e.g., fridge, freezer, microwave, washing machine)
- Home thermostat
- Home energy monitors
These devices can be seamlessly connected to Home Assistant using various protocols such as Bluetooth, Zigbee, and Z-Wave.
However, not all smart devices directly interface with Home Assistant. Many IoT devices require proprietary bridges for direct communication. A viable solution to this challenge is Zigbee2MQTT.
Zigbee2MQTT is a free and open-source software that enables the utilization of Zigbee devices without the need for the vendor’s bridge or gateway. It accomplishes this by bridging events and empowering you to control Zigbee devices via MQTT.

Hardware Requirements
To connect my IoT devices to Home Assistant using the Zigbee protocol, I require an antenna capable of sending and receiving signals using this specific protocol. A comprehensive list of supported antennas can be found here. After some consideration, I opted for the “ITead Sonoff Zigbee 3.0 USB Dongle Plus V2 model ZBDongle-E” adapter due to its affordability and local availability.
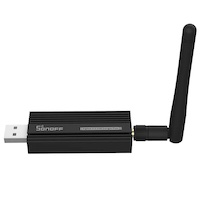
Additionally, it is recommended to use an extension cable (approximately 50cm in length) between the Zigbee adapter and the server, rather than directly connecting the adapter to the server. This precaution is taken to mitigate potential interference from the electronics on the server that could affect the radio signals transmitted by the antenna. It’s crucial to ensure that the USB extension cable is shielded to maintain optimal performance.
Installing Home Assistant and Zigbee2MQTT
For the installation of Home Assistant and Zigbee2MQTT, I employ Docker Compose for both services. Below are the respective compose files for Home Assistant and Zigbee2MQTT:
Home Assistant Compose File (HomeAssistant-compose.yml):
 1version: '3'
 2services:
 3  homeassistant:
 4    container_name: homeassistant
 5    image: "ghcr.io/home-assistant/home-assistant:stable"
 6    volumes:
 7      - /root/HomeAssistant/:/config
 8      - /etc/localtime:/etc/localtime:ro
 9      - /run/dbus:/run/dbus:ro
10    restart: unless-stopped
11    privileged: true
12    network_mode: host
Zigbee2MQTT Compose File (Zigbee2MQTT-compose.yml):
 1version: '3.8'
 2services:
 3  mqtt:
 4    image: eclipse-mosquitto:2.0
 5    restart: unless-stopped
 6    volumes:
 7      - "/root/MQTT/mosquitto-data:/mosquitto"
 8    ports:
 9      - "1883:1883"
10      - "9001:9001"
11    command: "mosquitto -c /mosquitto-no-auth.conf"
12
13  zigbee2mqtt:
14    container_name: zigbee2mqtt
15    restart: unless-stopped
16    image: koenkk/zigbee2mqtt
17    volumes:
18      - /root/MQTT/zigbee2mqtt-data:/app/data
19      - /root/MQTT/run/udev:/run/udev:ro
20    ports:
21      - 8888:8080
22    environment:
23      - TZ=Europe/Berlin
24    devices:
25      - /dev/ttyACM0:/dev/ttyACM0
Ensure that you customize the compose files according to your preferences, adjusting parameters such as timezone (TZ), ports, or volumes.
One critical aspect to check is the device variable in the Zigbee2MQTT compose file. After connecting your adapter to the server, the device name might differ, and you need to identify it. You can achieve this by running the following command on your server:
1dmesg
This will list all mounted devices on your server, scroll through the list to locate your USB adapter.
Once customized, install and run Home Assistant with the following command:
1docker compose -f HomeAssistant-compose.yml up -d
You should find the service at the following URL: http://Server_IP:Service_Port_Number after creating an account.
After you have create an account your portal should look similar(without the lights and automation’s) to this:
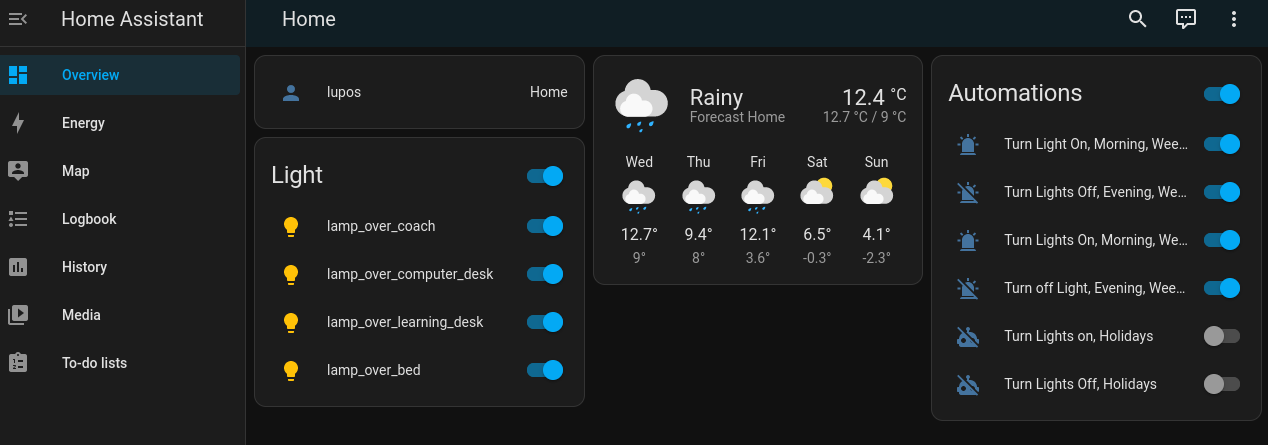
We now need to install Zigbee2MQTT, for that create your data folder at the position specified in your compose file, navigate inside it, and download the configuration file:
1mkdir zigbee2mqtt-data
2cd zigbee2mqtt-data
3wget https://raw.githubusercontent.com/Koenkk/zigbee2mqtt/master/data/configuration.yaml
Edit the configuration file using a text editor of your choice, for example, nano (as explained in “My Homelab Part 2: DietPi”).
Configure the configuration.yaml file based on the guidelines provided in the official guide.
For instance, if using the Sonoff Zigbee 3.0 USB Dongle Plus, adjust the following settings:
1serial:
2  adapter: ezsp
Correct the port name based on the information obtained earlier, and set homeassistant to true. Initially, set permit_join to true for device pairing and later consider changing it to false to prevent unwanted device connections.
After configuring, install and run the Zigbee2MQTT service:
1docker compose -f Zigbee2MQTT-compose.yml up -d
The web interface should resemble the following (without devices):
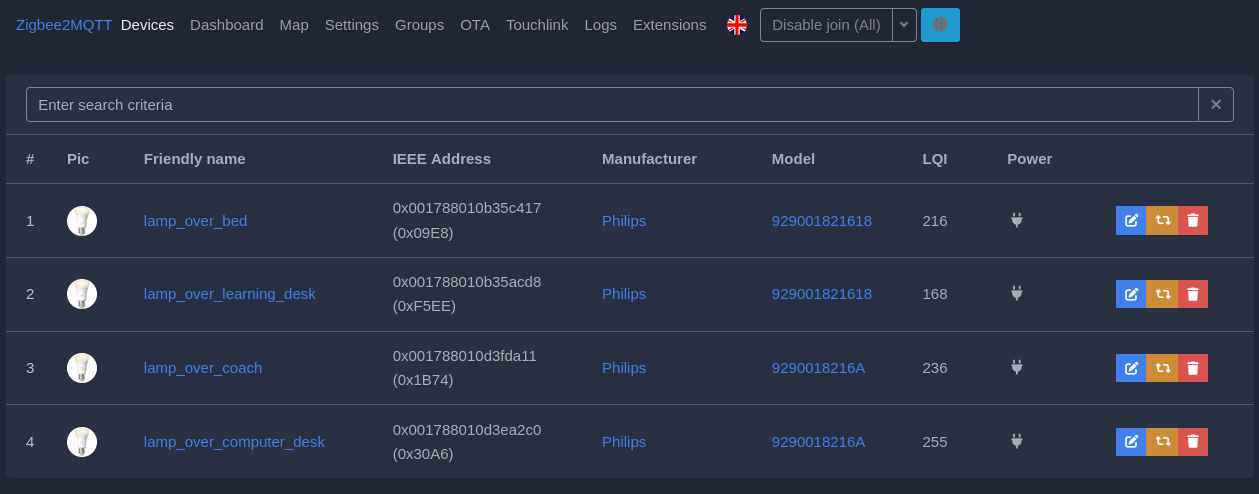
To display Zigbee2MQTT devices in Home Assistant, enable the MQTT integration by navigating to Settings -> Devices & Services -> Add Integration -> MQTT.
If no password is set for MQTT and the same port is used, the configuration should look like this:
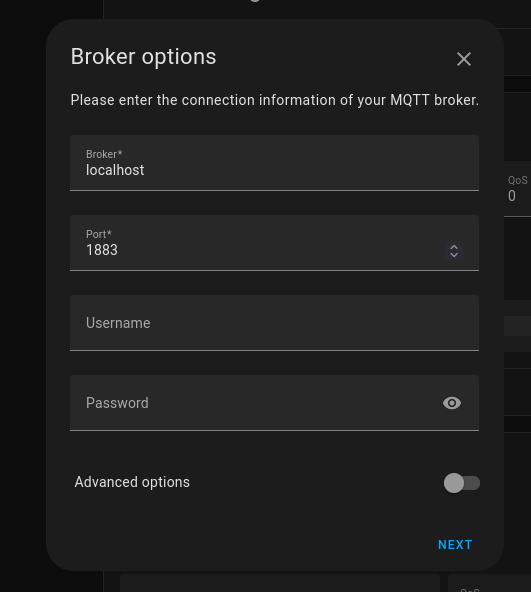
Following these steps, you should be able to see all your Zigbee2MQTT devices integrated into Home Assistant.
Automation’s in Home Assistant
Congratulations on successfully installing Home Assistant and Zigbee2MQTT, enabling you to control your smart devices. However, the true power of Home Assistant lies in its Automation capabilities, allowing you to define schedules and sequences of actions tailored to your preferences.
For instance, you can create automations to turn off the lights when you leave your house or raise window shutters in the morning – the possibilities are virtually limitless.
Creating an Automation
Let’s explore an example of a simple automation that turns on lights in the morning and off at night. To begin, navigate to Settings -> Automations & Scenes -> Automations -> Create Automations within the web interface.
You have the option to create automations using nodes in the web interface or by defining them in YAML. You can switch between these modes by clicking the icon in the top right corner.
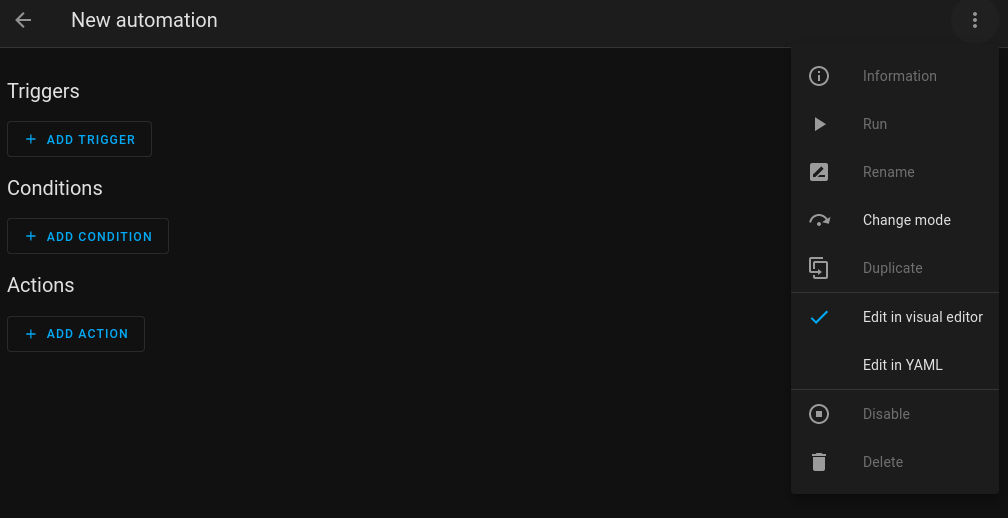
The first thing you asked it to select a trigger, a trigger defines when you automation should be executed this could be something as simple as a certain time or something much more complex.
Next up is a condition, this is a limitation on the trigger if the condition is not met the automation will not execute, you do not need to use a condition.
The last thing is a action, this defines what should happen after the trigger is triggered and the condition is met.
Here’s an example automation that gradually turns on lights in the morning:Click here to show it
 1alias: Turn Lights On, Morning, Weekdays
 2description: Turns the light on in the morning on weekdays to wake up
 3trigger:
 4  - platform: time
 5    at: "06:00:00"
 6condition:
 7  - condition: and
 8    conditions:
 9      - condition: time
10        weekday:
11          - mon
12          - tue
13          - wed
14          - thu
15          - fri
16action:
17  - service: light.turn_on
18    data:
19      transition: 900
20    target:
21      area_id: bedroom
22  - wait_for_trigger:
23      - platform: sun
24        event: sunrise
25        offset: "+90"
26    continue_on_timeout: false
27  - service: light.turn_off
28    target:
29      area_id: bedroom
30    data:
31      transition: 10
32mode: single
This automation triggers on weekdays at 6 a.m. with a gradual transition of lights over 900 seconds. After that, the lights turn off 90 minutes after sunrise.
Device Grouping
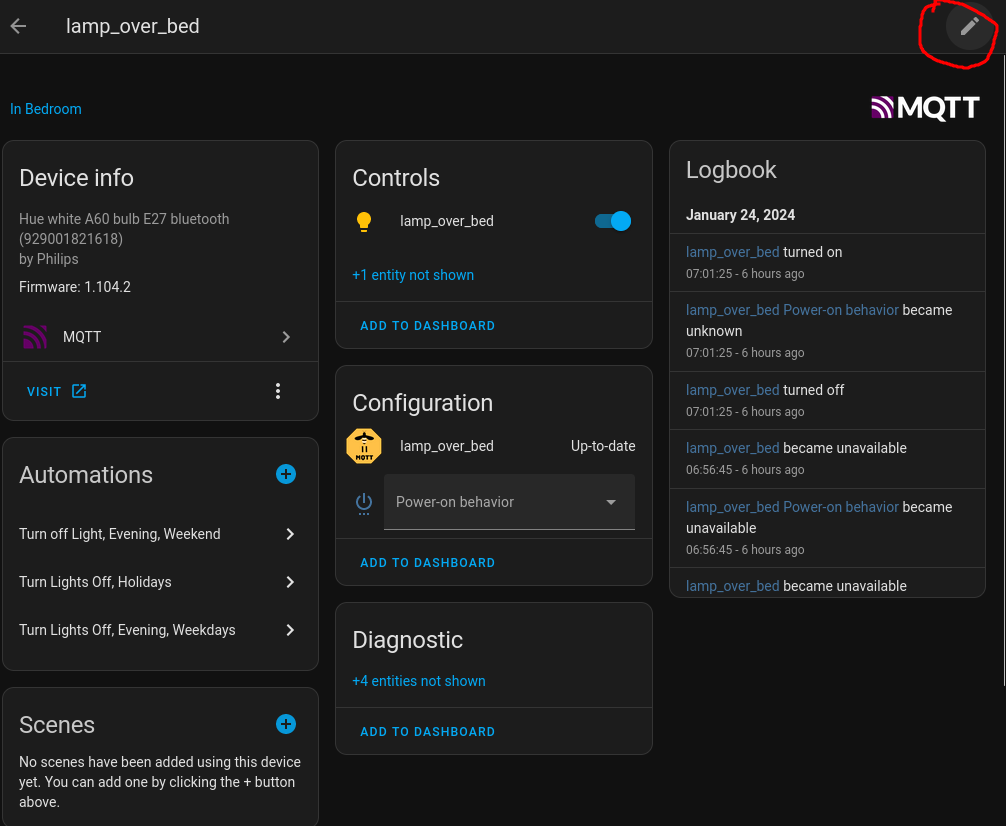
You might have noticed the area_id: bedroom in the automation. This allows targeting all devices in the bedroom. To use this feature, create an area by navigating to Settings -> Area & Zones -> Create Area. You can assign devices to the area under Settings -> Devices & Services -> MQTT -> Devices, after which you press on the device you want to assign to the created area, then you press the edit button in the top right corner and select your newly created area.
For turning off lights at night, another automation is used:Click here to show it
 1alias: Turn Lights Off, Evening, Weekdays
 2description: Turns off the light in the evening on weekdays for sleeping time.
 3trigger:
 4  - platform: time
 5    at: "21:15:00"
 6condition:
 7  - condition: and
 8    conditions:
 9      - condition: time
10        weekday:
11          - tue
12          - wed
13          - sun
14          - mon
15          - thu
16action:
17  - service: light.turn_off
18    data:
19      transition: 900
20    target:
21      device_id:
22        - 4b8a1917bea51bc1c693c47ca6e744fe
23        - 0f50cb3c050c4759a8b2956326f6009a
24        - 316804d86ed3d55b22f0749a0c35df43
25  - service: light.turn_on
26    target:
27      entity_id: []
28      device_id:
29        - 846e13ea6a7f1a66eeeb6ce0a2ca394c
30      area_id: []
31    data:
32      brightness_pct: 50
33      transition: 900
34  - delay:
35      hours: 0
36      minutes: 30
37      seconds: 0
38      milliseconds: 0
39  - service: light.turn_off
40    target:
41      device_id: 846e13ea6a7f1a66eeeb6ce0a2ca394c
42    data:
43      transition: 900
44mode: single
This automation triggers at 21:15, gradually turning off all lights besides one, over 900 seconds and turning the last light to 50% brightness. After a 30-minute delay, the last light turns off.
If you want to use this automation make sure to change the device_id to the id of your lights.
Feel free to adapt these automations based on your devices and preferences. The flexibility of Home Assistant’s automation engine allows you to tailor it to your specific needs.
Resources:
