My Homelab Part 6: Syncthing
January 20, 2024 | 545 words | 3min read
In this installment, I explore another valuable use case for my server - file synchronization between my various devices. This includes regular backups of the pictures taken on my phone, archiving important documents, and seamless access to notes across all devices for tasks like blogging, to-dos, projects, and university-related work. To accomplish this, I rely on the powerful capabilities of synthing a continuous file synchronization program.
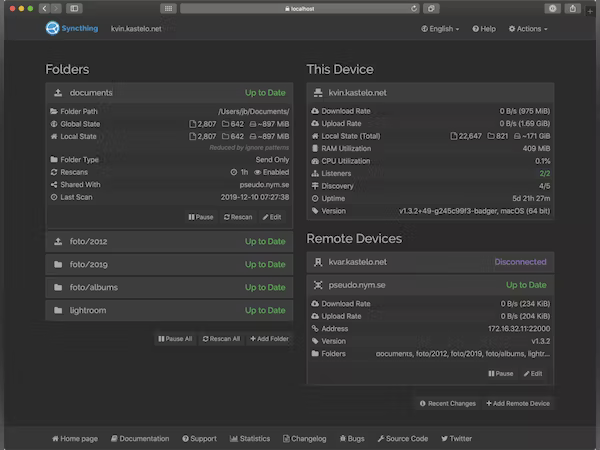
Syncthing operates by synchronizing files between two or more devices, akin to the functionality of OneDrive synchronization on Windows. However, instead of storing files on a cloud server, Syncthing saves them locally on my home server. The software comes equipped with a user-friendly WebUI that facilitates easy management of file synchronization and connected devices.
Installation
For the installation process, I utilize Docker Compose with the following configuration in the synthing-compose.yml file:
 1version: "3"
 2services:
 3  syncthing:
 4    image: syncthing/syncthing
 5    container_name: syncthing
 6    hostname: my-syncthing
 7    environment:
 8      - PUID=1000
 9      - PGID=1000
10    volumes:
11      - /mnt/externalDisk/st-sync:/var/syncthing
12      - /mnt/externalDisk/media:/media
13    ports:
14      - 8384:8384 # Web UI
15      - 22000:22000/tcp # TCP file transfers
16      - 22000:22000/udp # QUIC file transfers
17      - 21027:21027/udp # Receive local discovery broadcasts
18    restart: unless-stopped
Remember to customize the Docker Compose file according to your preferences, particularly adjusting the PUID and PGID to match the owner ID of your Syncthing volume. To install and run the container, use the following command:
1docker compose -f synthing-compose.yml up -d
After installation, you can access the Syncthing WebUI using the URL: http://<IP_Of_Your_Server>:Synthing_Port.
Configuration and Sychronization
For security, it’s essential to set a password for the WebUI. Navigate to Actions -> Settings -> GUI and configure the GUI Authentication User and GUI Authentication Password fields.
Synchronize Phone with Server
To synchronize a folder between your server and phone, install the official Syncthing app. Add your phone as a remote device on the server by clicking the add remote Device button.
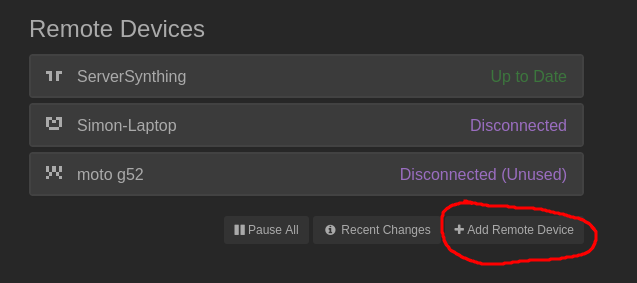
Insert your phone’s device ID in the provided field (find it in the Syncthing app menu). Similarly, add your server as a device on your phone.
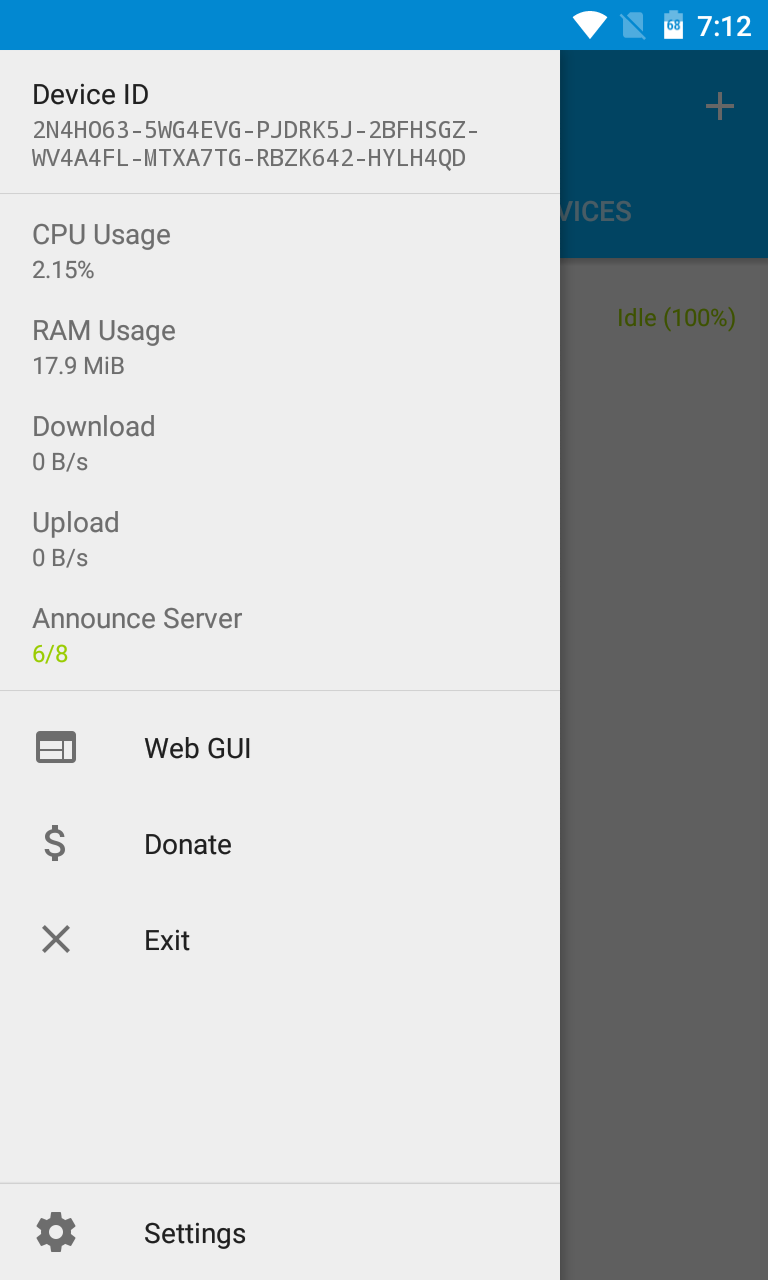
You should also add your server as device to your phone, this works very similar to how you did it above.
Create a synchronization target by pressing the “+” button, select the folder, and share it with your server.
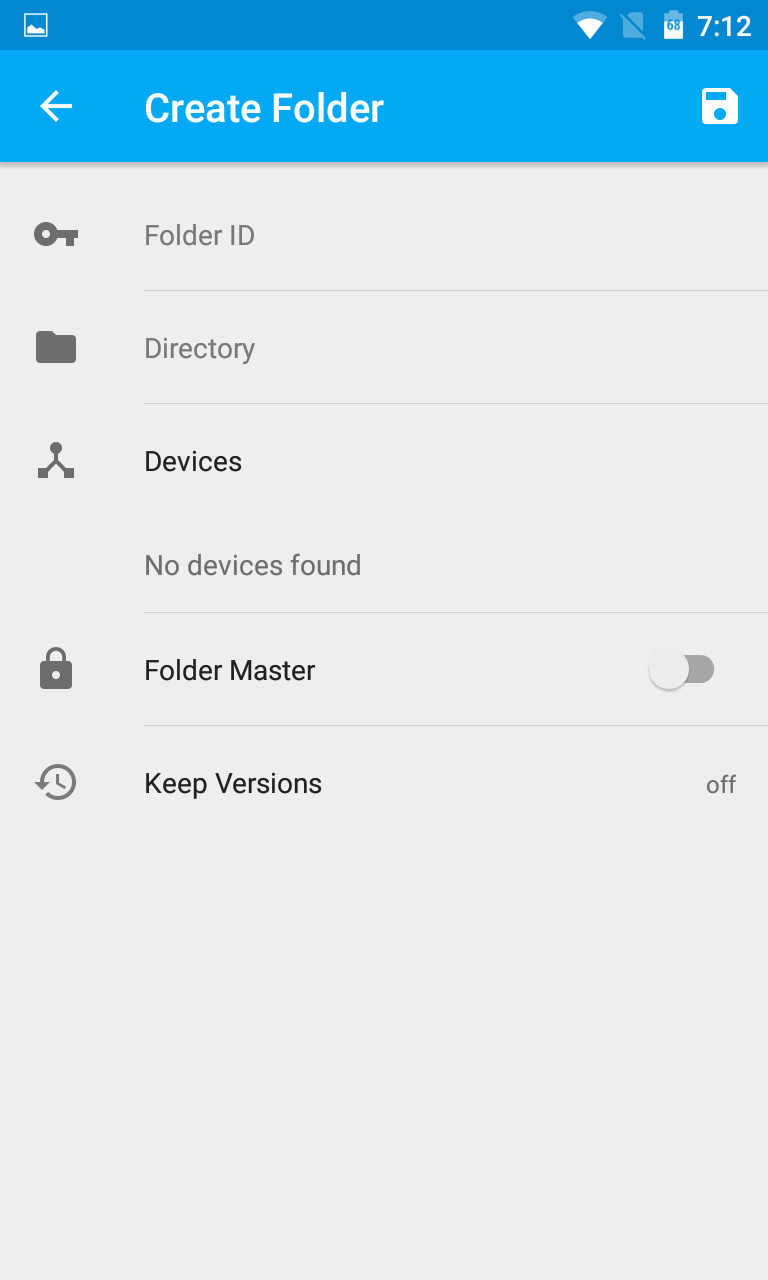
A popup on the server’s Syncthing WebUI will appear, asking if you want to synchronize with the phone folder.
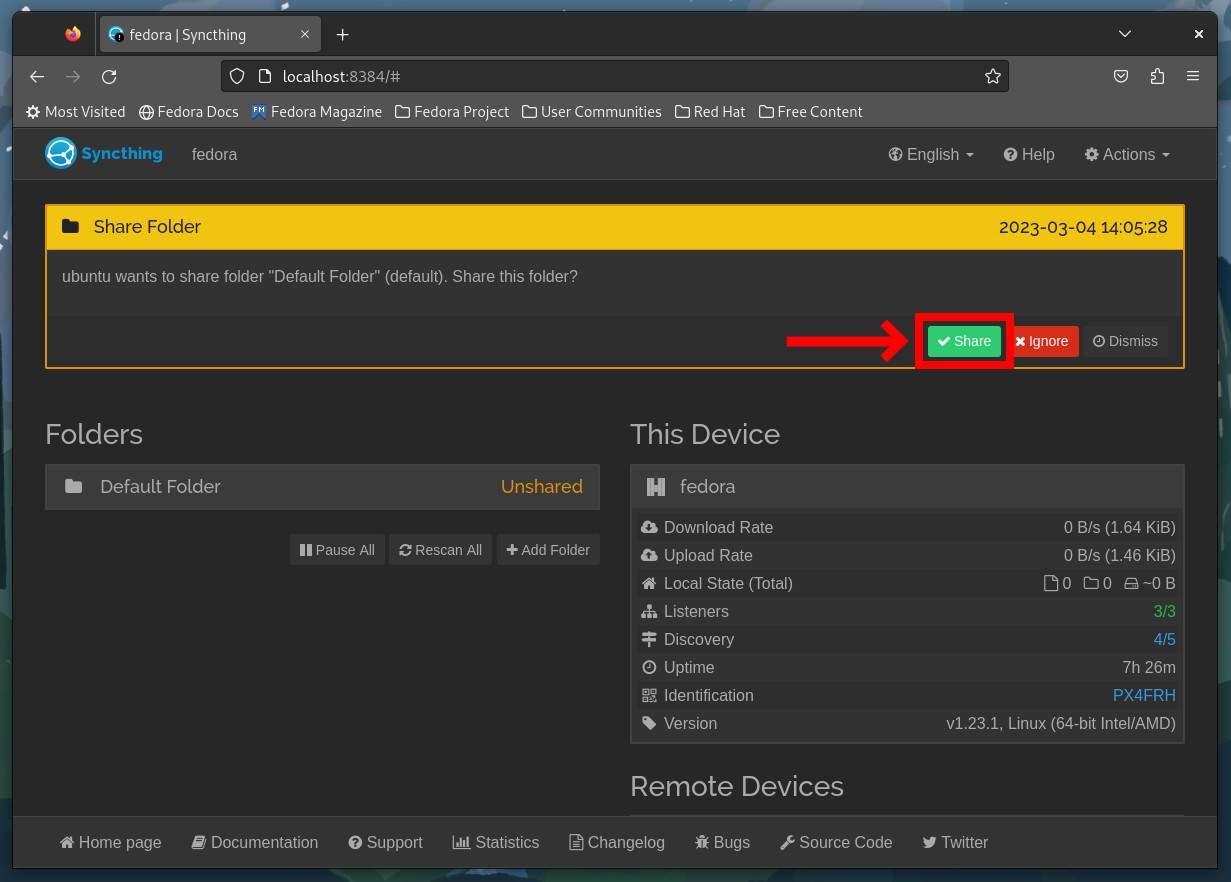
That’s it! Your phone pictures will now automatically upload to your server.
Synchronize Computer with Server
If you want to synchronize your Computer with your Server, you first need to install the synthing software on your computer.
And after that, just like with the phone you need to add your computer as device to the server and vice versa. Then you can again create a synchronization target.
Things to keep in mind
- Synchronization Issues: If you are sharing a folder among devices with different operating systems and disk formats, enable the
ignoring Permissionssetting in theAdvancedsettings section of your synchronization target.
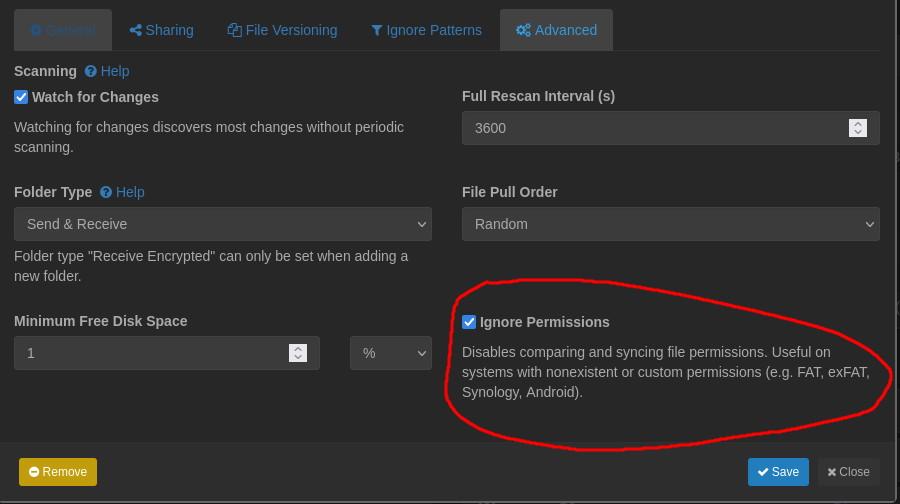
- Battery Optimization on Phone: Disable battery optimization for the Syncthing app on your phone to prevent interference and ensure continuous synchronization.
For additional information, refer to the Syncthing documentation.
References:
