My Homelab Part 9: Caddy, FileServer and DuckDNS
January 23, 2024 | 2,649 words | 13min read
If you have been following this Homelab series, you probably have several services up and running, and maybe even a homepage linking to all your services.
Up to this point, however, accessing these services outside your home network was not possible, and the services lacked user-friendly, readable domain names. Instead, you had to enter the IP address of your server followed by the port of the service you wanted to access. Wouldn’t it be nice if you could access your services like this:
https://service1.my_cool_comain.comhttps://service2.my_cool_comain.comhttps://service3.my_cool_comain.com
All of this and more can be achieved with a service called a reverse proxy combined with a Domain Name.
A domain name is the text you type in your browser when you want to access a website. For instance, the domain name to access the Google website is google.com. Normally, you would need the IP address of the server hosting the website to access it. It’s evident why one would opt for a domain name – it’s easier to remember than an IP address and more readable.
There are numerous providers in the market where you can purchase a domain name that you can then use. Additionally, some providers offer domain names for free, with DuckDNS being one such provider that I chose to use. It’s important to note that when purchasing a domain name, you have more options for customizing how your domain looks. Conversely, when using a free domain provider, you may encounter more limitations.
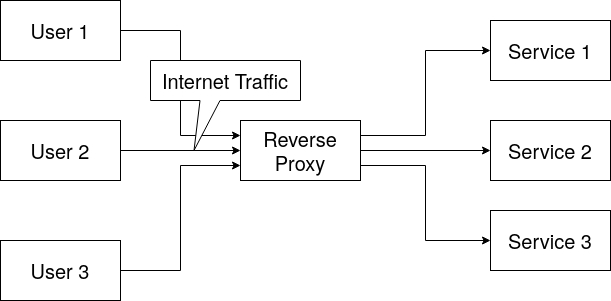
A reverse proxy is a service that sits in front of your internet connection, and internet traffic passes through it. The reverse proxy can then decide which services to forward the internet traffic to. There are several reasons why one might choose to use a reverse proxy:
- Security: Because all internet traffic must pass through the reverse proxy before being forwarded to the services, there is a reduction in the potential attack surface. Rather than focusing on securing all individual services, one only needs to enhance the security of the reverse proxy.
- Elimination of Port Numbers: Even with a domain name for our service, when multiple services run on one server, specifying the port of the service is still necessary for access. If you only access through the domain name, the server won’t know which service to forward the traffic to. This issue can be resolved with a reverse proxy.
- Performance: A reverse proxy can maintain a cache of static content to reduce the load on internal services, improving overall performance.
- Load Balancing: In scenarios where a service is in high demand, and a single server is insufficient to handle all users, multiple servers are needed. A reverse proxy can determine which server to send users to, effectively distributing the load and ensuring optimal performance.

There are various reverse proxy options available, such a nginx, traefik and caddy to name a few. In my setup, I opted for Caddy for three key reasons:
- Default HTTPS Support: Caddy supports HTTPS by default, eliminating the need to adjust complex settings or deal with certifications to enable HTTPS functionality.
- Simplified Configuration: Caddy employs a single configuration file with a straightforward syntax to configure the entire service. This simplifies the setup process and makes it more user-friendly.
- Integrated File and Web Server: Caddy’s versatility allows it to function as both a file and web server. This means you can host files from your computer and access them without requiring additional software installation for this specific purpose.
Using DuckDNS
To set up DuckDNS, I followed their official guide, which provides instructions on installing DuckDNS on your device.
Utilizing DuckDNS involves two main stages. In the first stage, you create your domain and link it to your server using its external IP. In the second stage, you create a script on your server that will automatically notify DuckDNS when the server’s IP changes and update it accordingly.
Here’s a brief explanation of how I did it for my Raspberry Pi server:
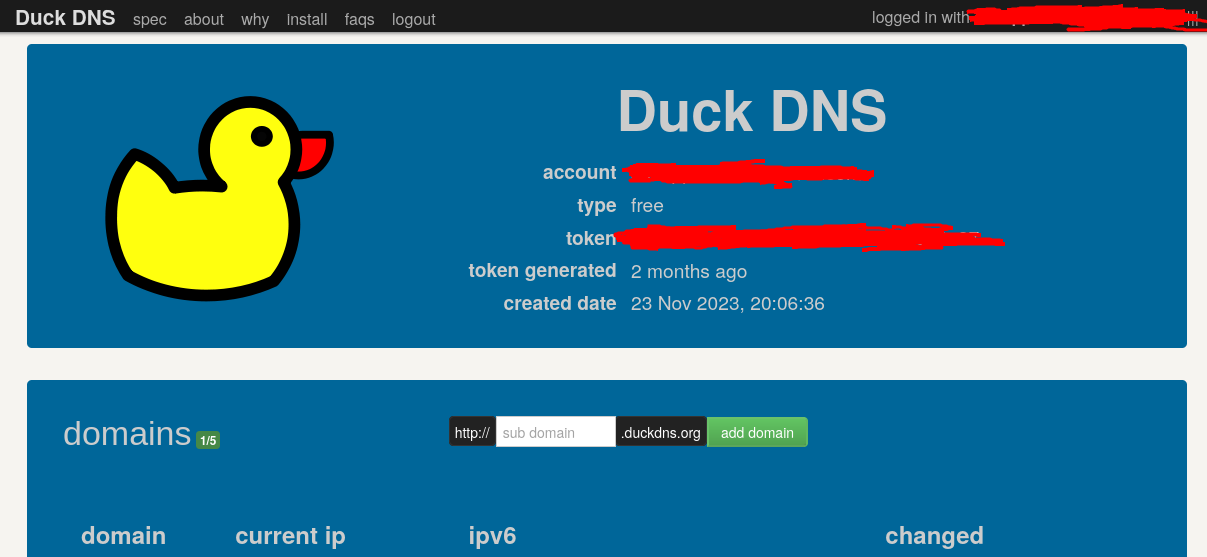
Begin by logging into the DuckDNS website. Upon logging in, you should see a page resembling this:

Enter the desired text for your domain name in the empty field and press the
add domainbutton.Ensure that the
current IPfield contains the external IP (not internal IP) of your server.Next, log into your Raspberry Pi using
ssh(refer to “My Homelab Part 2: DietPi”).Create a folder to store all the files:
1mkdir duckdns
2cd duckdns
3nano duckdns.sh
Enter the following line into the
duckdns.shscript (refer to “My Homelab Part 2: DietPi” for how to use nano) and save the file:1echo url="https://www.duckdns.org/update?domains=exampledomain&token=a7c4d0ad-114e-40ef-ba1d-d217904a50f2&ip=" | curl -k -o ~/duckdns/duck.log -K -Make the script executable:
1chmod 700 duck.shAutomate script execution with cron (see “My Homelab Part 0: Prologue” for how cron works):
1crontab -eCopy and paste the following text, save the file, and close it:
1*/5 * * * * ~/duckdns/duck.sh >/dev/null 2>&1Test if the script is working by running it once and checking the log file for an “OK” message:
1./duck.sh
2cat duck.log
Ensure that cron is started as a service:
1sudo service cron start
With these steps, your domain name should now point to your server. However, you won’t be able to access a service through your domain yet. To achieve that, you’ll need to install Caddy and configure the correct port forwarding.
Installation Caddy
To install Caddy, I followed their officical installation guide and make caddy a service guide:
Begin by downloading the Caddy binary. Head over to their download page, choose the appropriate platform (for Raspberry Pi, it should be “Linux arm64”), and select the DuckDNS and Security module. Press download.
Send the downloaded file to your server using
scp. Ensure you have OpenSSH selected as your SSH server (refer to “My Homelab Part 2: DietPi”). I recommend naming the filecaddyMake the file executable and assign yourself as the owner:
1chmod 700 caddy
2chown User_Name caddy
Move Caddy into your
$PATH$:1sudo mv caddy /usr/bin/Verify the installation by running the Caddy version command:
1caddy versionCreate a folder for Caddy config files:
1mkdir Caddy
2cd Caddy
3touch Caddyfile
4touch caddy.env
5cd ..
Create a systemd unit file::
1nano /etc/systemd/system/caddy.serviceEnter the following into the file, ensure you choose the correct path for
ExecStartandExecReloadif your configuration file is in a different location:1# caddy.service 2# 3# For using Caddy with a config file. 4# 5# Make sure the ExecStart and ExecReload commands are correct 6# for your installation. 7# 8# See https://caddyserver.com/docs/install for instructions. 9# 10# WARNING: This service does not use the --resume flag, so if you 11# use the API to make changes, they will be overwritten by the 12# Caddyfile next time the service is restarted. If you intend to 13# use Caddy's API to configure it, add the --resume flag to the 14# `caddy run` command or use the caddy-api.service file instead. 15 16[Unit] 17Description=Caddy 18Documentation=https://caddyserver.com/docs/ 19After=network.target network-online.target 20Requires=network-online.target 21 22[Service] 23Type=notify 24User=caddy 25Group=caddy 26ExecStart=/usr/bin/caddy run --environ --config /root/caddy/Caddyfile --envfile /root/caddy/caddy.env 27ExecReload=/usr/bin/caddy reload --config /root/caddy/Caddyfile --envfile /root/caddy/caddy.env --force 28TimeoutStopSec=5s 29LimitNOFILE=1048576 30LimitNPROC=512 31PrivateTmp=true 32ProtectSystem=full 33AmbientCapabilities=CAP_NET_ADMIN CAP_NET_BIND_SERVICE 34 35[Install] 36WantedBy=multi-user.targetStart Caddy as a service by typing:
1sudo systemctl daemon-reload
2sudo systemctl enable --now caddy
To verify that it’s running, use:
1systemctl status caddyCaddy won’t work yet as your configuration file is still empty. Check out the next section for configuration details, and then restart Caddy with the following commands:
1systemctl stop caddy
2systemctl start caddy
3systemctl status caddy
Configuration Caddy
All your Caddy configurations will be done in the previously created Caddy folder, which includes two files: the Caddyfile for configurations and the caddy.env file to store environmental variables. If you are unsure about anything or need guidance, refer to the caddy documentation.
Firstly, open the caddy.env file and enter the ports for all your running services, along with a name, and the domain. The file should look like this:
1DOMAIN=name_of_your_domain.duckdns.org
2DUCKDNS_TOKEN=your_duck_dns_token
3VAULTWARDEN_PORT=150
4HOMEPAGE_PORT=3000
5SYNCTHING_PORT=8384
6CALIBRE_PORT=8083
7UPTIME_PORT=3001
8HOME_ASSISTANT_PORT=8123
9MQT_PORT=8888
These variables will be used in the Caddyfile. Using variables allows easy modification of ports without changing every occurrence in the Caddyfile.
For a simple forwarding from your domain to your homepage, insert the following into the Caddyfile :
1{$DOMAIN} {
2    reverse_proxy localhost:{$HOMEPAGE_PORT}
3}
Save the file and restart Caddy. However, accessing your homepage through your domain won’t work yet because you need to port forward and instruct Caddy to use DuckDNS as the domain.
DuckDNS
Until now, Caddy is aware that it should listen to your domain and forward it to your homepage. However, it won’t function without Caddy knowing your DuckDNS token. Therefore, you need to set the token in your caddy.env file. To inform Caddy about using the token, add the following to your Caddyfile:
1(tls) {
2     tls {
3        dns duckdns {$DUCKDNS_TOKEN}
4    }
5}
When you want to utilize the domain on one of your services, you can import it as follows:
1{$DOMAIN} {
2	import tls
3
4	reverse_proxy localhost:{$HOMEPAGE_PORT}
5}
Caddy will now use your DuckDNS token to request HTTPS certificates from the Let’s Encrypt server, enabling you to access your site through HTTPS via your domain name.
Keep in mind: It may take up to 24 hours for the Let’s Encrypt server to issue your certificate. Therefore, it might take some time before you can access your website via HTTPS.
Port Forward
By default, your router is configured to reject all incoming internet traffic for security reasons, preventing unauthorized access to your network. However, this poses a challenge for accessing your hosted services from outside your network. The solution is port forwarding.
Think of a port as a door – port forwarding allows you to open this door and allow internet traffic inside. However, it comes with risks, as malicious actors could also exploit this open door. It is crucial to only open ports that you are confident cannot be misused.
To access services behind your Caddy reverse proxy, you need to port forward ports 80 and 443, responsible for HTTP and HTTPS, respectively. To find out how to port forward with your specific router, search the internet for your router model followed by “How to port forward.”
File Server
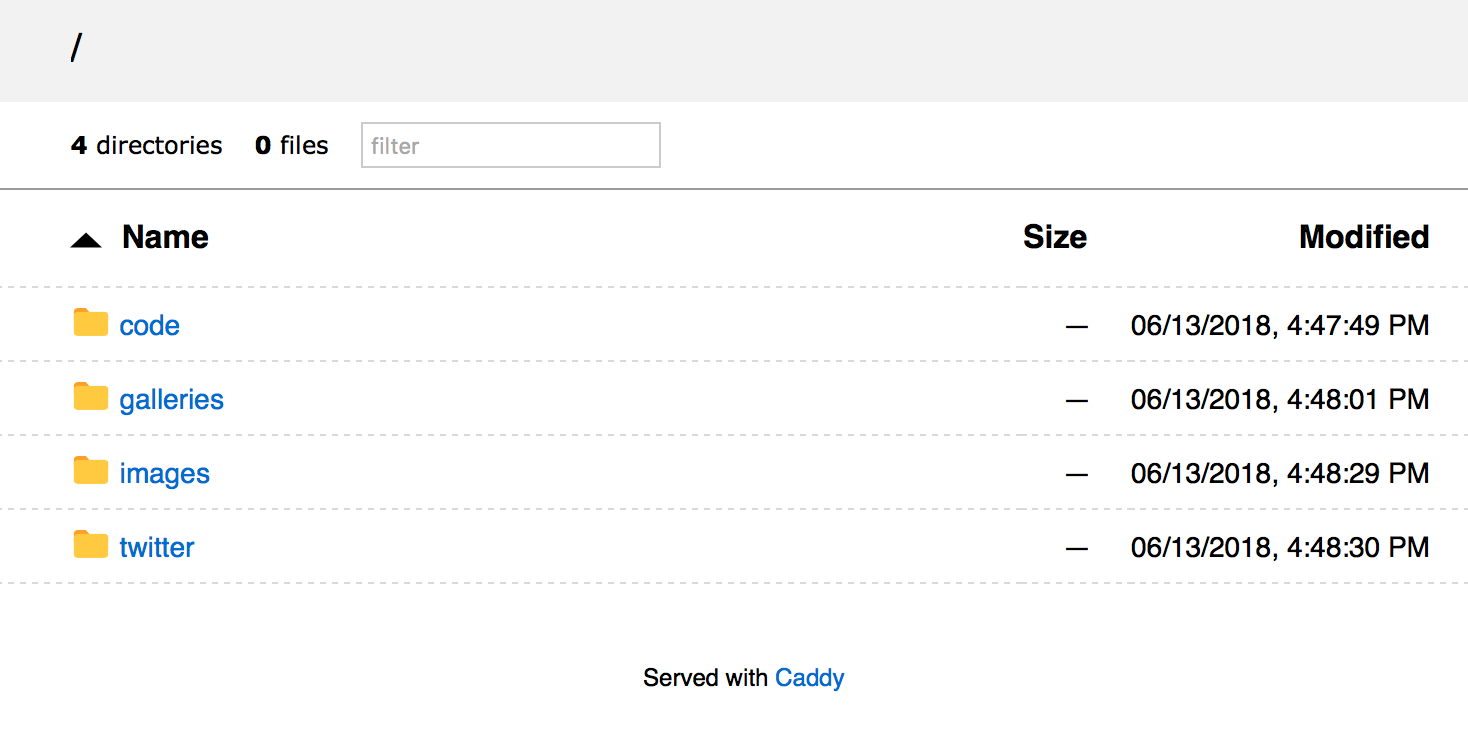
Another useful thing that caddy can do is host a fileserver.
A fileserver host a bunch of files making them accessible through the internet.
Because it allows the hosting of static files, it also allows you to host your own website by hosting .html files through the same principal.

If you want to use a file server you need the following code in your webserver:
1files.{$DOMAIN} {
2
3   root * /path/towards/files
4   file_server browse
5}
Using “files.{$DOMAIN}” ensures that I will later be able to access my files trhough the use of the following URL: htpps:///files.your_domain_name.
The file server of caddy has a bunch of more settings that can be adjusted like compression, root of the files, files to hide and more, to see a full list click here.
HTTP header
HTTP headers enable the client and server to exchange additional information with an HTTP request or response, contributing to website security. The OWASP HTTP Headers Cheat Sheet offers a comprehensive overview of possible headers, and it is advisable to follow their recommendations when setting HTTP header. You can assess the security of your website using securityheaders.com, which evaluates your website’s headers and provides a ranking based on them.
HTTP headers let the client and the server pass additional information with an HTTP request or response.
To set your headers in Caddy, use the following code:
 1(header) {
 2	header {
 3		Strict-Transport-Security "max-age=31536000; includeSubdomains"
 4		X-XSS-Protection "1; mode=block"
 5		X-Content-Type-Options "nosniff"
 6		Referrer-Policy "same-origin"
 7		X-Frame-Options "ALLOW-FROM *.{$DOMAIN}"
 8		-Server
 9		Content-Security-Policy "frame-ancestors {$DOMAIN} *.{$DOMAIN}"
10		Permissions-Policy "geolocation=(self {$DOMAIN} *.{$DOMAIN}), microphone=()"
11        }
12}
And later when you want to use it you can simply import it like this:
1{$DOMAIN} {
2	import tls
3	import header
4
5	reverse_proxy localhost:{$HOMEPAGE_PORT}
6}
Adding an Authentication Portal
For this section to work, you need to download Caddy with the Security module selected.
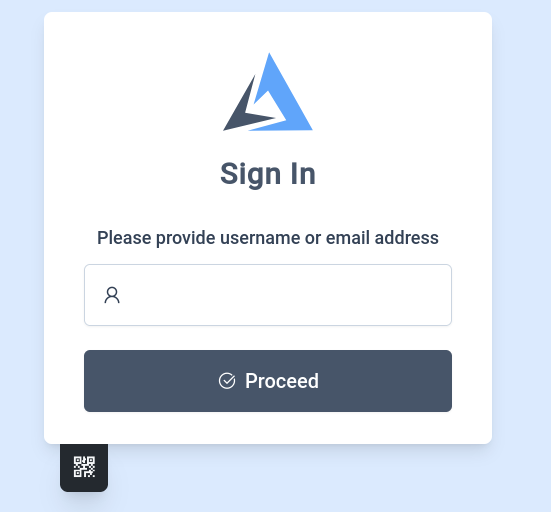
Even though most services have their own authentication methods, adding an extra layer of security with a portal before the user reaches your homepage might be desirable.

To add the authentication site to Caddy, use the following code:
 1{
 2    order authenticate before respond
 3    order authorize before reverse_proxy
 4
 5    security {
 6    	local identity store localdb {
 7            realm local
 8            path /etc/caddy/auth/local/users.json
 9        }
10    	authentication portal myportal {
11	    enable identity store localdb
12	    cookie domain {$DOMAIN}
13	    cookie lifetime 172800 # 48 hours in seconds
14	    transform user {
15		match email schuppsimon5@gmail.com
16		action add role authp/user
17	    }
18	}
19        authorization policy admin_policy {
20           set auth url https://auth.{$DOMAIN}
21           allow roles authp/user
22       }
23    }
24}
(I got the cookie lifetime never correctly work for me, If someone knows why, shoot me an email)
If you now want to add this security portal to a site of you, you can do the following:
1{$DOMAIN} {
2	import tls
3	import header
4
5	authorize with admin_policy
6	reverse_proxy localhost:{$HOMEPAGE_PORT}
7}
Services and Reverse Proxies
Not every service works seamlessly with a reverse proxy. Some may require specific settings or the configuration of the domain name. In such cases, consult the documentation for information on using reverse proxies with the respective service.
It’s worth noting that some services may not work at all. For instance, HomeAssistant may pose challenges, and accessing it might be limited to only the home network using an IP address.
Full Caddyfile
Here’s my full Caddyfile for reference:Click here to show it
  1{
  2    order authenticate before respond
  3    order authorize before reverse_proxy
  4
  5    security {
  6    	local identity store localdb {
  7            realm local
  8            path /etc/caddy/auth/local/users.json
  9        }
 10    	authentication portal myportal {
 11	    enable identity store localdb
 12	    cookie domain {$DOMAIN}
 13            cookie lifetime 86400 # 24h
 14            cookie samesite lax
 15            cookie insecure off
 16
 17            ui {
 18                links {
 19                  "My Identity" "/whoami"
 20                }
 21            }
 22
 23            transform user {
 24		match email schuppsimon5@gmail.com
 25		action add role authp/user
 26	    }
 27	}
 28        authorization policy admin_policy {
 29           set auth url https://auth.{$DOMAIN}
 30           allow roles authp/user
 31       }
 32    }
 33}
 34
 35(header) {
 36	header {
 37		Strict-Transport-Security "max-age=31536000; includeSubdomains"
 38		X-XSS-Protection "1; mode=block"
 39		X-Content-Type-Options "nosniff"
 40		Referrer-Policy "same-origin"
 41		X-Frame-Options "ALLOW-FROM *.{$DOMAIN}"
 42		-Server
 43		Content-Security-Policy "frame-ancestors {$DOMAIN} *.{$DOMAIN}"
 44		Permissions-Policy "geolocation=(self {$DOMAIN} *.{$DOMAIN}), microphone=()"
 45        }
 46}
 47
 48(tls) {
 49     tls {
 50        dns duckdns {$DUCKDNS_TOKEN}
 51    }
 52}
 53
 54auth.{$DOMAIN} {
 55    import header
 56
 57    authenticate with myportal
 58}
 59
 60{$DOMAIN} {
 61    import tls
 62    import header
 63
 64    authorize with admin_policy
 65    reverse_proxy localhost:{$HOMEPAGE_PORT}
 66}
 67
 68vaultwarden.{$DOMAIN} {
 69    import tls
 70    # import header
 71    # i think with the header doesnt work
 72
 73    reverse_proxy localhost:{$VAULTWARDEN_PORT}
 74}
 75
 76rss.{$DOMAIN} {
 77    import tls
 78    # import header
 79    # i think with the header doesnt work
 80
 81    authorize with admin_policy
 82    reverse_proxy localhost:{$RSS_PORT}
 83}
 84
 85calibre.{$DOMAIN} {
 86    import tls
 87    import header
 88
 89    authorize with admin_policy
 90    reverse_proxy localhost:{$CALIBRE_PORT}
 91}
 92
 93uptime.{$DOMAIN} {
 94    import tls
 95    import header
 96
 97    authorize with admin_policy
 98    reverse_proxy localhost:{$UPTIME_PORT}
 99}
100
101syncthing.{$DOMAIN} {
102    import tls
103    import header
104
105    authorize with admin_policy
106    reverse_proxy localhost:{$SYNCTHING_PORT}
107}
108
109netdata.{$DOMAIN} {
110    import tls
111    import header
112
113    authorize with admin_policy
114    reverse_proxy localhost:{$NETDATA}
115}
116
117media.{$DOMAIN} {
118   import tls
119   import header
120
121   authorize with admin_policy
122   root * /mnt/externalDisk/media
123   file_server browse
124}
125
126wg.{$DOMAIN} {
127   import tls
128   import header
129
130   authorize with admin_policy
131   reverse_proxy localhost:{$WG_PORT}
132}
References:
